Welcome to our guide on the Mac startup disk's significance and how a full disk affects your Mac's performance. The startup disk is crucial for initializing the operating system and launching applications. It serves as the primary storage location for essential system files, playing a vital role in your Mac's overall efficiency. As we explore the intricacies of the startup disk, you'll discover its impact on various aspects of your Mac's performance. One common issue is a Mac startup disk full, which often goes unnoticed but severely affects your Mac's speed and stability.
In the following sections, we'll discuss the repercussions of a startup disk full, warning signs to look out for, and effective strategies to optimize it for better performance. By understanding and managing your startup disk efficiently, you can ensure your Mac operates at its full potential, providing you with a seamless computing experience.
Part 1: What is the Mac Startup Disk and Why Does it Get Full?
The Mac startup disk is the storage drive or partition housing the operating system and vital system files necessary for booting up the Mac. Its primary function is to initiate the system and launch applications. Upon powering on your Mac, the system actively seeks the startup disk to initiate the boot process by loading the essential files. Even after the initial boot, the startup disk continues to impact the overall speed and responsiveness of your Mac in everyday usage.
Reasons for a Mac Startup Disk full:
- Large Application Files and Downloads: Installing and using applications, especially those with heavy multimedia content, can consume a significant amount of disk space. Additionally, downloading large files from the internet without proper management can quickly fill up the startup disk.
- Temporary Cache and System Files: Your Mac generates various temporary files and caches to speed up processes and enhance user experience. However, over time, these files can accumulate and occupy a substantial portion of the startup disk.
- Duplicate Files and Old Backups: Unintentional duplication of files, both within applications and user-generated content, can unnecessarily occupy space. Moreover, outdated or redundant backups that are no longer required can contribute to the startup disk filling up.
- Large Media Libraries: Storing extensive collections of photos, videos, and music can lead to a full startup disk, particularly if proper organization and regular pruning are not performed.
- Virtual Machines and Disk Images: Running virtual machines or using disk images can require substantial disk space, especially if they are not adequately managed or regularly cleaned up.
- System Logs and Error Reports: macOS generates system logs and error reports to track and troubleshoot issues. Over time, these logs can grow in size and take up valuable space on the startup disk.
- Mail and Messaging Attachments: Email and messaging applications can accumulate numerous attachments and media files, especially if they are not regularly managed, resulting in increased disk usage.
- Software Updates and Installers: Software updates and installer packages, particularly for large applications or operating system updates, can occupy considerable space until they are removed.
Regularly monitoring and managing the contents of your Mac startup disk is essential to prevent it from reaching its capacity and negatively impacting the overall performance of your Mac system.
To check storage space on your Mac:
- Click the Apple logo > "About This Mac" > "Storage" tab for an overview.
- Click "Manage" for detailed storage breakdown and optimization recommendations.
Additionally, open Finder, select "Go" > "Computer," right-click the Mac's internal storage for detailed information on available and used space.
Part 2: Checking the Disk Storage Status if Startup Disk Full
A. Using macOS Built-in Storage Management
When your system alerts you about the startup disk nearing its full capacity, it's essential to take heed. To determine which files are occupying the most space on your startup disk, proceed with the following steps:
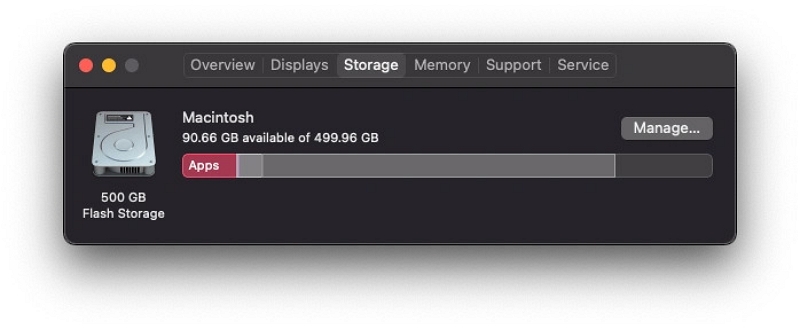
Step 1: Navigate to the upper left corner of your screen and click on the Apple icon, then select "About This Mac."
Step 2: Access the Storage tab to observe the storage bar, which is segmented into various sections, each representing a distinct category. The length of each colored section corresponds to the amount of space occupied by that category. If there is any available free space, it will be displayed at the end of the storage bar.
Step 3: To open the Storage Management Window and view the size of each category, click on the Manage button located above the storage bar.
B. Identifying Large Files and Storage Hogs
Below are the step-by-step guidelines to discover and analyze large files and folders that contribute to a full startup disk on a Mac:
Step 1: Open the Apple menu by clicking on the Apple icon located in the upper left corner of your screen. From the drop-down menu, you have to choose "About This Mac."
Step 2: In the new window that appears, click on the "Storage" tab. The Storage tab will display a graphical representation of your disk usage, with colored sections representing different categories like System, Documents, Apps, and Others.
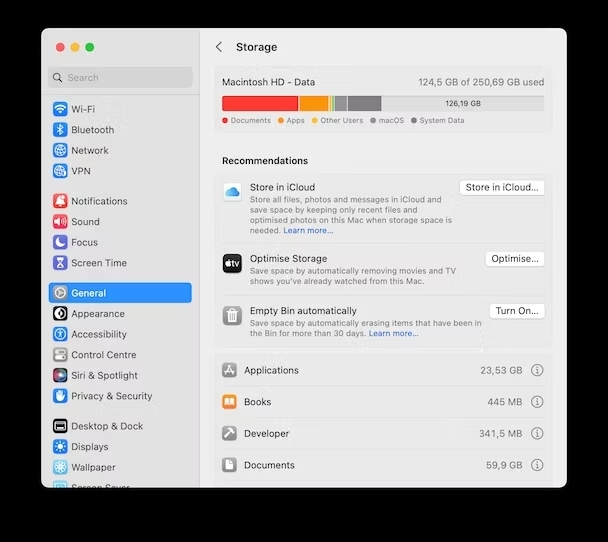
Step 3: Identify any significant, dominant sections in the graph, as they indicate the categories occupying the most space. This will give you a general understanding of which types of files are using up the most disk space. For more detailed information about the files and folders, click on the "Manage..." button positioned above the storage bar.
Step 4: The Storage Management window will open, organizing your files into different sections like Applications, Documents, Mail, Photos, and more. Thoroughly explore each section to locate the largest files and folders within them. For instance, you might find large video files, old backups, or unnecessary downloads.
Step 5: To identify specific large files or folders, select a category (e.g., Documents, Applications) from the left sidebar. The right pane will display the files in that category sorted by size, with the largest ones listed at the top.
Step 6: Review the list and decide whether you can delete unnecessary large files, move them to an external drive, or back them up to free up disk space. Exercise caution when deleting files or folders to avoid accidentally removing important data.
By following these instructions, you can effectively identify and manage large files and folders, thereby creating more space on your startup disk and enhancing your Mac's overall performance.
Part 3: How to Free Up Space on the Macbook Startup Disk Full Issue?
Having obtained a comprehensive understanding of the available space on your startup disk and the types of files occupying your storage, it's time to declutter and create more room. Below, you will find a compilation of the most effective methods to free up space on the MacBook startup disk full issue –
1. Dispose of the contents in the Trash and Downloads folder
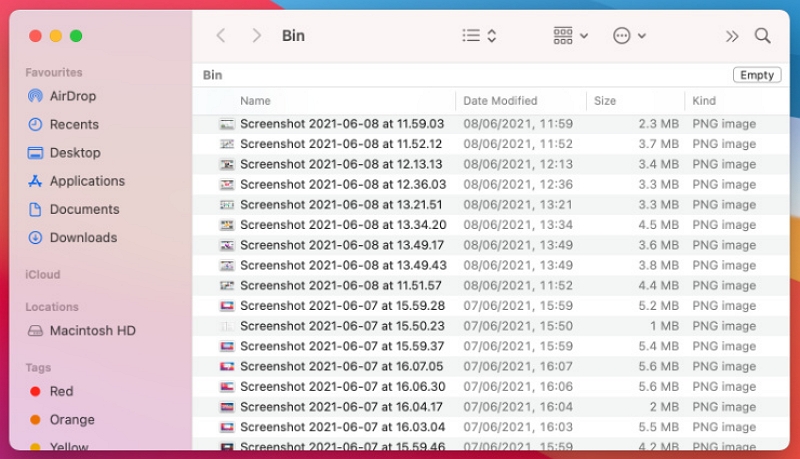
Over time, both your Mac's Trash and Downloads folders accumulate redundant files. The Downloads folder stores everything you've ever downloaded, while the Trash retains everything you've deleted until emptied. These two folders can easily consume gigabytes of space on your startup disk. The straightforward solution is to delete unnecessary downloads and regularly empty the Trash. Here are the steps to solve the Mac startup disk full issue –
Step 1: Launch Finder and opt for the Downloads folder from the sidebar.
Step 2: Assess your downloaded files and drag any unnecessary ones to the Trash.
Step 3: Next, access the Trash from the Dock and click on "Empty."
2. Eliminate Time Machine snapshots
If the "About This Mac" window indicates that a substantial amount of space on your Mac is occupied by System, Other, or Backup files, a straightforward solution might be to perform a backup.
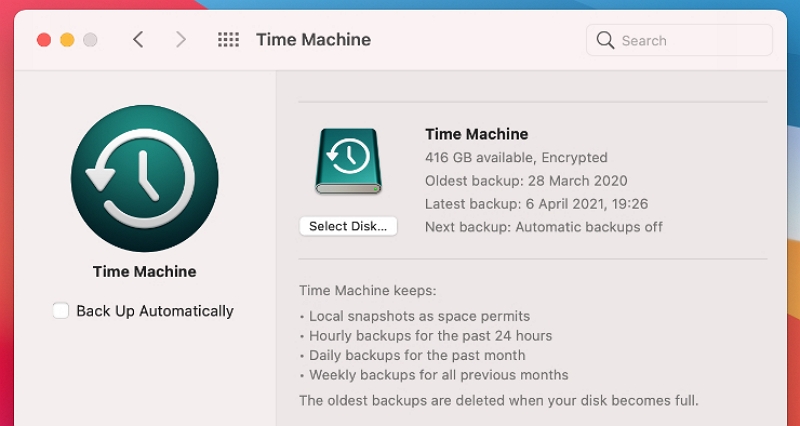
This situation commonly occurs when you usually rely on Time Machine to back up your Mac but haven't done so recently. Consequently, your Mac creates multiple Time Machine snapshots on the startup disk, awaiting transfer to an external drive during the next backup.
To resolve this, connect your external Time Machine drive and navigate to System Preferences > Time Machine > Back Up Now. This process will help free up space on your startup disk by moving the snapshots to the external drive during the backup.
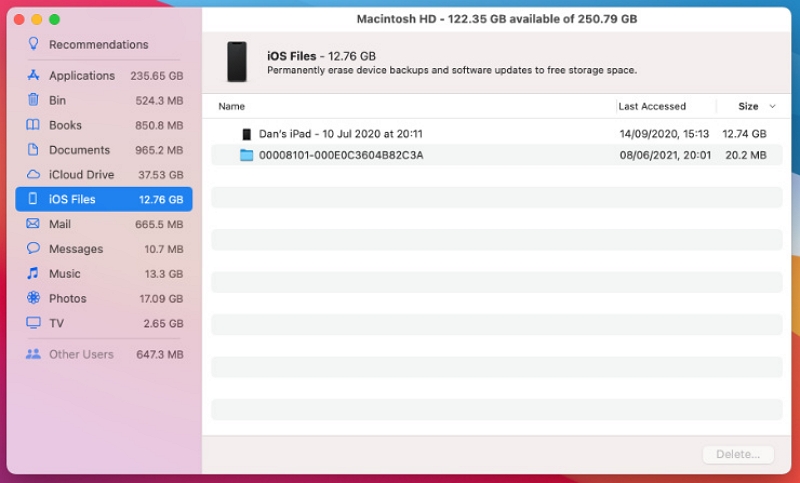
3. Remove outdated iOS and iPadOS backups
Additionally, you might notice a significant amount of storage occupied by local iOS or iPadOS backups. If these backups are no longer necessary, especially if you now rely on iCloud for backups, you can easily delete them using the "About This Mac" window. Here's the process to remove outdated iOS and iPadOS backups –
Step 1: Click on the Apple icon in the top-left corner of the menu bar, then choose "About This Mac."
Step 2: Navigate to the Storage tab and click on "Manage."
Step 3: Choose "iOS Files" from the sidebar to access all your iOS and iPadOS backups.
Step 4: Highlight the backups you wish to discard, then click on "Delete" to remove them.
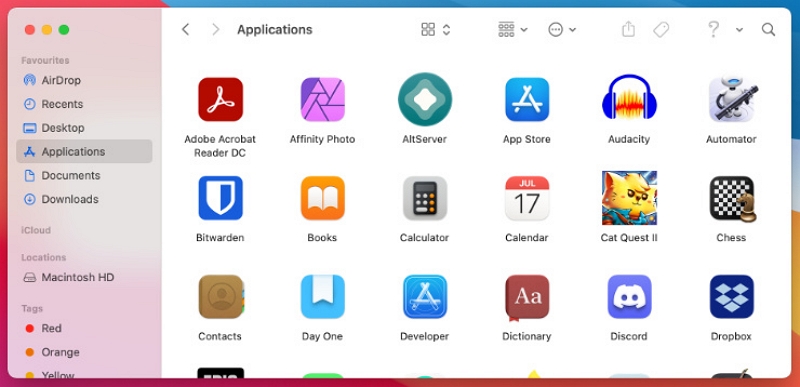
4. Remove applications you no longer use
To view all the installed apps on your Mac, open Finder and select "Applications" from the sidebar. Review the list to identify any apps you no longer use, which you can uninstall to free up space.
The conventional method to uninstall an app is by dragging it to the Trash; however, this may leave behind hidden files in the System and Library folders, still occupying space.
Alternatively, you can use a Mac app cleaner to uninstall an app and eliminate all associated files in one go. This approach ensures a thorough removal, optimizing space on your Mac.
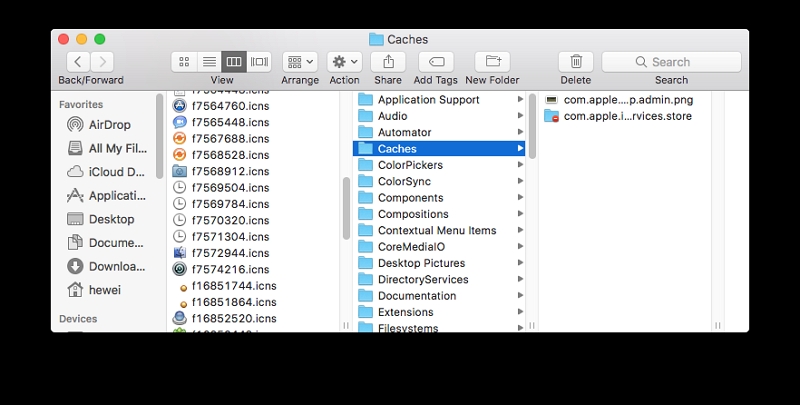
5. Delete app cache
Apps utilize caches to store various pieces of information, but these files can gradually expand, occupying significant disk space. If your disk is running low on storage, clearing the app cache can be beneficial.
Most apps store their caches in either of the two following folders, and these cache files can be safely removed, as the apps will recreate them when necessary:
1. Your local user's cache folder at ~/Library/Caches
2. The system-wide cache folder at /Macintosh HD/Library/Caches
Here are the steps to delete the app cache and solve MacBook/MacBook Air/MacBook Pro startup disk full issue –
Step 1: Launch Finder on your MacBook/MacBook Air/MacBook Pro.
Step 2: Click on "Go" in the menu bar at the top of the screen, and then select "Go to Folder."
Step 3: Enter ~/Library/Caches and press Enter to access this folder.
Step 4: Enter each of the folders and remove all contents.
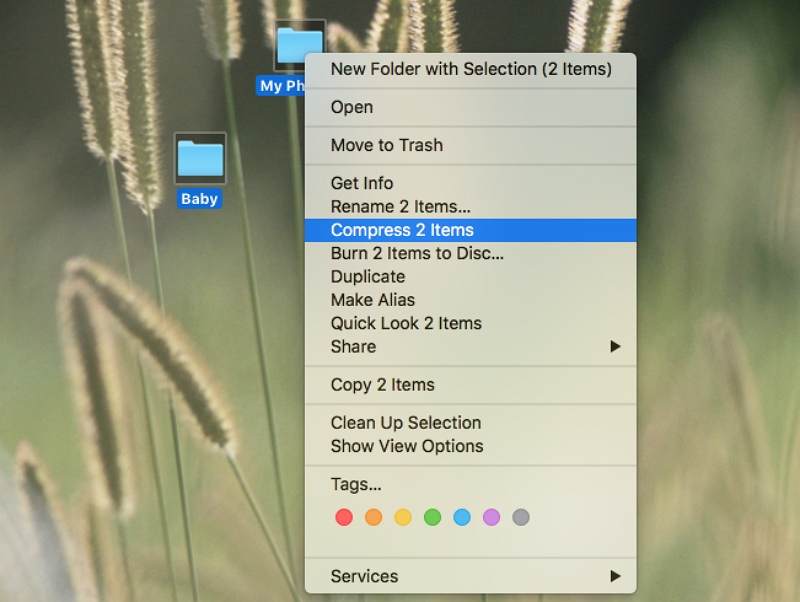
6. Compress files and directories
Compressing files and folders into a smaller archive is an efficient method to create more space on your Mac. Typically, a zip file will be around 10% smaller than the combined size of the original files before compression. This approach is particularly effective for medium-sized files. If you have numerous large files on your Mac, it is advisable to compress them into an archive to optimize space utilization. Follow the below steps to compress files and directories –
Step 1: To select multiple files and folders, hold down the Shift key (for continuous items) or the Command key (for individual items) while clicking on them.
Step 2: By right-clicking on the files and folders, and selecting "Compress Items," a compressed file with the .zip extension will be generated. Following this, you can safely delete the original files and folders.
To expand an item, simply double-click the .zip file. You can then organize your files and folders through classification, making it easier for you to locate the items you need.
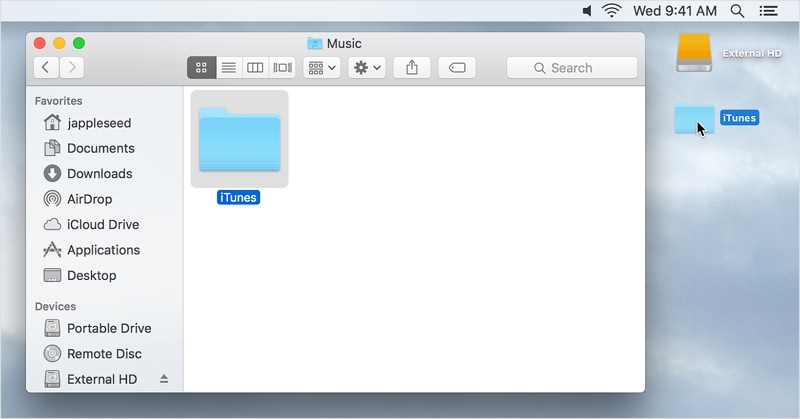
7. Transfer files to an external storage device
If your Mac's storage space is running low, it's advisable to transfer infrequently used files and folders to an external storage device, such as an external hard drive. Here are the steps to transfer files to an external storage device –
Step 1: Establish a connection between your Mac and the external hard disk by utilizing the USB cable.
Step 2: Choose all the files you intend to relocate, then drag and drop them onto the hard disk.
Step 3: Once you have transferred all your files to the hard disk, you can eject it by clicking the eject button located next to the hard disk's name.
Alongside external storage options, you can also move files to cloud storage solutions like iCloud.
8. Delete language packs
Many of your apps include language packs, also known as localization files, allowing you to change the language within the app. While having this option is beneficial, the reality is that most people only require one supported language, perhaps two at most. The remaining language packs only serve as unnecessary space consumers. To manually remove language packs, follow these instructions:
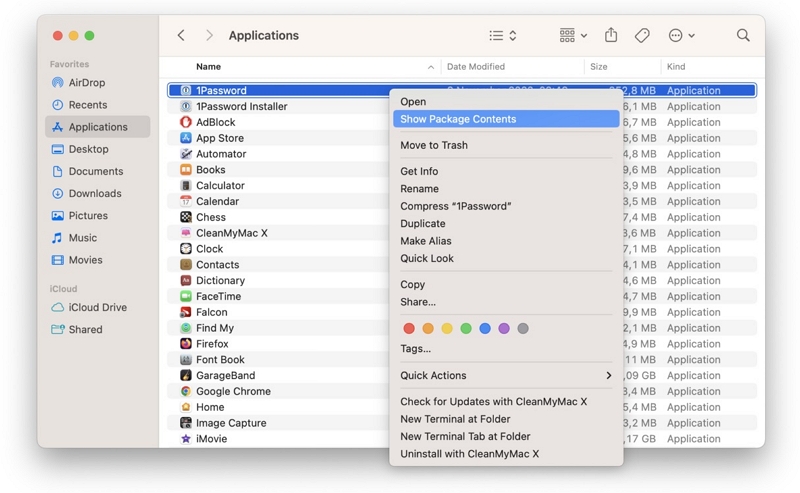
Step 1: Go to the Applications directory.
Step 2: Perform a right-click (or ctrl-click) on an app, then choose "Show Package Contents."
Step 3: Select the "Contents" option.
Step 4: Tap on "Resources."
Step 5: Remove any unnecessary languages (ending in .Iproj).
Step 6: Perform the same process for other apps.
Part 4: Optimizing System Settings for Disk Management
A. Adjusting System Preferences for Optimal Storage
- Utilize Optimize Storage: macOS provides an "Optimize Storage" feature that automatically removes watched TV shows and movies. To enable this, navigate to the Apple menu > About This Mac > Storage > Manage, and select the "Optimize" option.
- Make Use of iCloud Storage: Store files such as photos and documents in iCloud. Head to System Preferences > Apple ID > iCloud to choose what data you want to keep in iCloud, freeing up valuable local disk space.
- Automate Trash Emptying: Enable the "Empty Trash Automatically" option in Finder Preferences. This automatically deletes files from the Trash after 30 days, preventing unnecessary disk space usage.
- Disable Hibernation: For MacBook users, saving disk space is possible by disabling hibernation. Open Terminal and enter the command: sudo pmset -a hibernatemode 0, which removes the hibernation file.
B. Enabling and Scheduling Time Machine Backups
- Activate Time Machine: Connect an external hard drive and enable Time Machine in System Preferences > Time Machine. This feature automatically backs up your entire system, safeguarding important files for easy recovery in case of data loss.
- Set Up Scheduled Backups: Configure a regular backup schedule in Time Machine Preferences. This ensures automatic backups, preventing the startup disk from being overwhelmed by outdated backup data.
C. Managing System Updates and Installers
- Delete Old Installers: After updating macOS, old installer packages may still occupy disk space. Locate them in the Applications folder or use tools like "CleanMyMac" to safely find and remove them.
- Clear Software Update Cache: Sometimes, macOS stores cached update files. To clear the cache, open Finder, press Shift + Command + G, enter "/Library/Updates," and delete the folder's contents.
D. Controlling Browser Cache and Download Folders
- Clear Browser Cache: Each browser has a different method to clear cache, usually found in the browser's settings. Periodically clearing the cache frees up disk space and can improve browser performance.
- Manage Download Folders: Regularly review your downloads folder and delete unnecessary files. Consider designating a specific folder for downloads to keep your main Downloads directory organized.
Part 5: Best Way to Fix Mac Startup Disk Full Error
Macube stands out as one of the finest solutions for resolving the Mac startup disk full error. This remarkable Mac cleaner boasts an array of features, including junk cleaning, duplicate removal, and privacy protection. It excels in detecting and eliminating redundant files across critical macOS system folders like iTunes, photos, mail, browsers, and outdated large files. The astonishing results lead to a significant recovery of valuable storage space on your Mac.
Furthermore, Macube effortlessly handles downloads and junk files, efficiently manages duplicates, and expertly identifies and deletes large or old files. With a simple click, you can manage extensions, clear web history, uninstall applications, and remove outdated files. Macube offers a comprehensive and efficient solution to optimize your Mac's performance while safeguarding your privacy through browser cache and history clearing. Gone are the days of juggling multiple apps for the same tasks; with Macube, all your Mac optimization needs are met in one powerful package.
Key Features:
- You can uninstall applications on Mac without leaving any residual app files.
- Enhances your privacy and bolsters the security of your personal information by clearing your browser cache and history.
- Effortlessly reclaim all the occupied space of an app, surpassing the usual amount.
- Experience the full functionality with a complimentary 7-day trial.
- Enables you to effortlessly find and remove duplicates in just 3 simple steps.
Here are the steps to fix Mac startup disk full error using Macube –
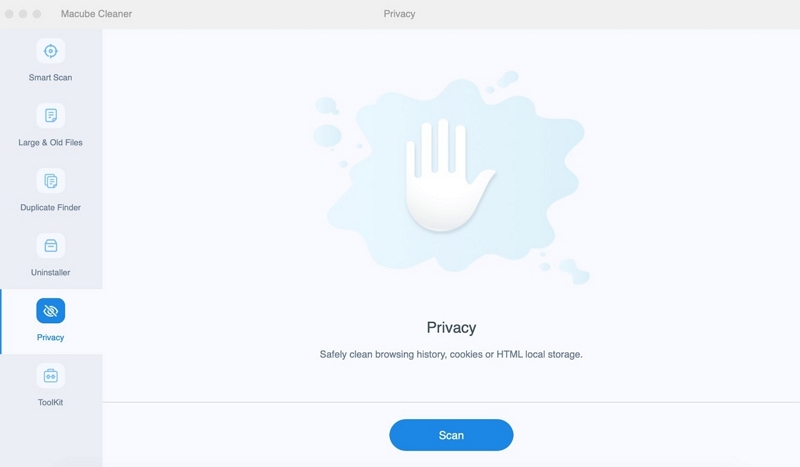
Step 1: First, you need to install Macube and launch it on your Mac. After launching, locate the junk files in the entire Mac by selecting “Smart Scan”.
Step 2: Once the scan is done, select all the unwanted files by previewing the scanning results.
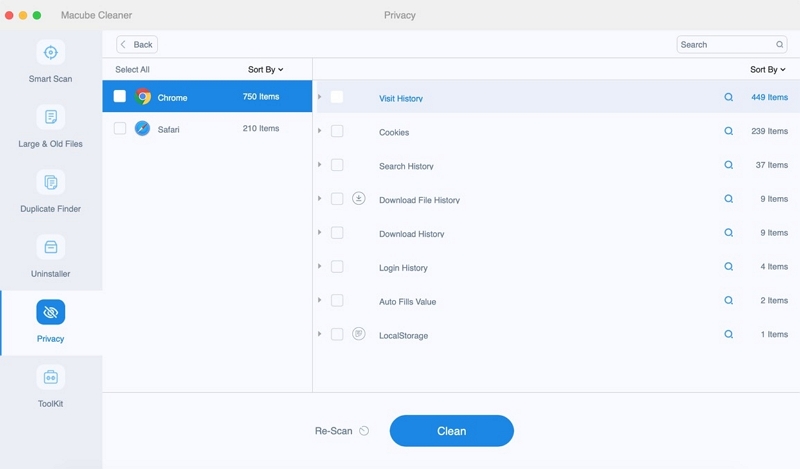
Step 3: Get your disk space again by clearing the junk files with one simple click.

Part 6: Precautions Before Fixing Macbook Air Startup Disk Full
Before commencing any disk cleanup procedures, it is strongly advised to create backups of all important files to mitigate the risk of data loss. Safeguarding your valuable data through a backup ensures that you can restore it in the event of accidental deletion or any unforeseen complications during the cleanup process.
Caution: Avoid manually deleting critical system files, as it can result in severe system instability and potential damage to your operating system. These files play a vital role in the proper functioning of your computer, and removing them may lead to unexpected errors, crashes, or even render your system inoperable. Only advanced users with comprehensive knowledge of the system should attempt modifications to critical files, and even then, exercise extreme caution. If you are unsure about a file's significance, seek expert advice or use trusted software tools for safe system maintenance.
Conclusion
In conclusion, understanding the importance of the Mac startup disk and its impact on performance is crucial. We explored various methods to free up space on the Mac startup disk and emphasized the risks of manually deleting critical system files without backups. Regular disk maintenance is vital to prevent slowdowns and maintain efficiency. Macube offers the best solution to fix the Mac startup disk full error, optimizing performance by removing redundant files. Take control of your Mac with Macube's powerful features and enjoy a seamless computing experience. Start your complimentary 7-day trial today and unlock a world of possibilities!
Macube Cleaner
Speed up and troubleshoot your Mac super easily with a Macube full-featured free trial!
Start Free Trial