Mac users are always looking for ways to make their computers work better. Apple keeps releasing new versions of MacOS, like Ventura and Monterey, which come with exciting new features and faster performance. But there's a problem that's been bothering Mac users for a long time - they often run out of space on their computers. Luckily, in this article, we'll introduce the 8 proven ways to optimize Mac storage. Whether you use your Mac for work or just for fun, these tips will help you use your computer's storage more effectively.
Part 1: Benefits of Optimizing Storage on Mac
Optimizing storage on Mac brings lots of advantages. Here are some of the good things that happen when you optimize storage on your Mac:
- Faster Mac: When your Mac's storage is almost full, it can become slow. Fixing your storage can speed up your Mac, making it work better.
- More Space: When you fix your storage, you get more room on your Mac for new things like apps, files, or videos.
- Easier Backups: If you use backups like Time Machine, fixing your storage makes it easier and faster. Your backups work better.
- Easy Updates: Big updates need lots of space. Fixing your storage helps you get ready for updates and keeps your Mac updated.
Part 2: How to Optimize Mac Storage
Making your Mac's storage better means using different methods to get more space, tidy up files, and keep your storage healthy. Here are some methods to optimize Mac storage.
Method 1: Enable Optimize Storage function
What does optimizing Mac storage do? It's a feature that helps you make more room on your Mac by putting some of your files in iCloud. When you turn it on, your Mac will keep important stuff on your computer and move less important things to iCloud. This way, you'll have enough space on your Mac for the stuff you use a lot, and the other stuff can be fetched from iCloud when you need it. Here are the steps to enable an optimized storage function.
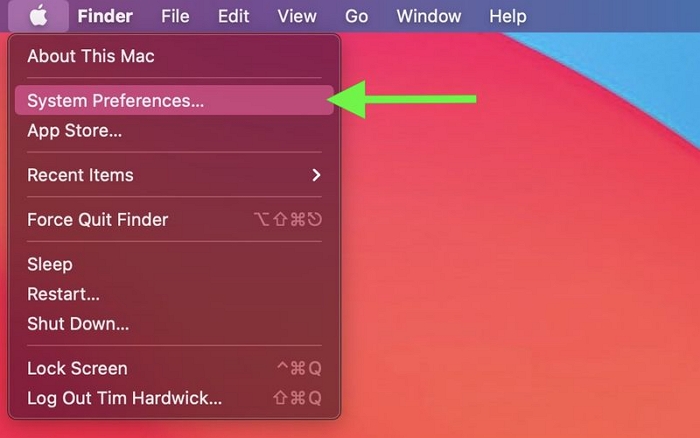
Step 1: In the top-left corner of your screen, click on the Apple logo and click on "System Preferences" from the menu that appears.
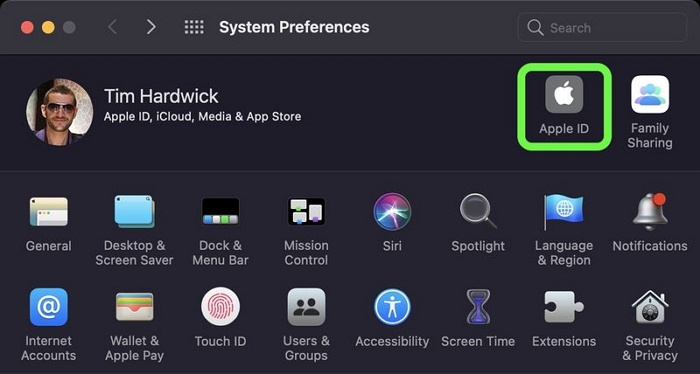
Step 2: Inside the System Preferences window, you'll find an icon with "Apple ID". Click on it to access your Apple ID settings.
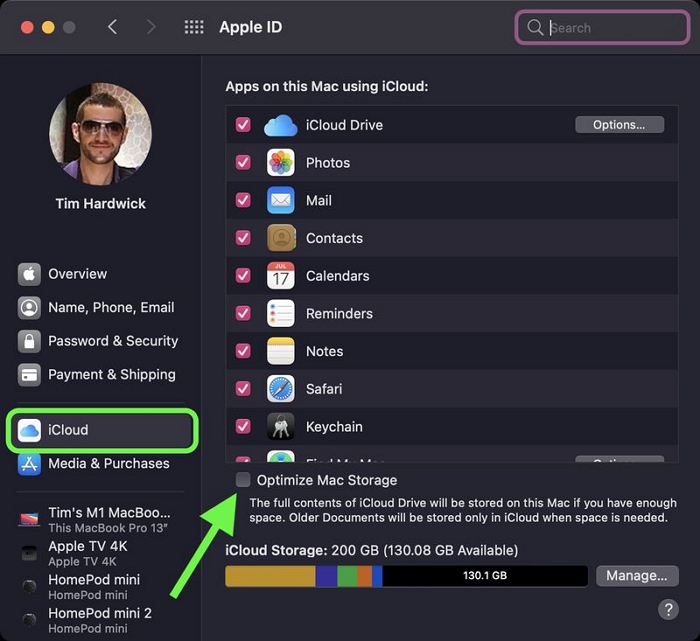
Step 3: Select "iCloud" from the options in your Apple ID settings. In the iCloud preferences, find and click the "Manage" button, which is often next to "iCloud Storage".
Step 4: Look for "Optimize Mac Storage" in the list of options related to iCloud and click on it.
Step 5: A window will pop up, explaining what optimizing storage does. Click "Optimize" to turn on this feature. Your Mac will now start moving less-used files to iCloud to free up space. This might take some time, depending on your data and internet speed.
Step 6: To make sure it's working, go to the Apple menu, choose "About This Mac", and click on the "Storage" tab. You should see "Optimized Storage" mentioned there.
Method 2: Delete Unused Apps
Getting rid of apps you don't use on your Mac is a good idea to make your computer work better and have more space. You can use Finder to delete unused apps from your Mac and here are the steps:
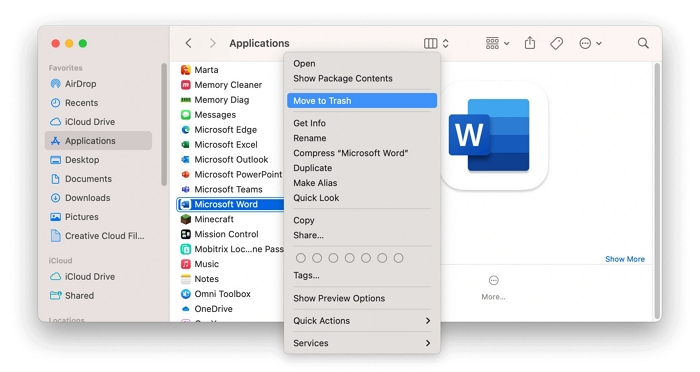
Step 1: Click on "Applications". You can find it on your computer in two ways: either by clicking on the icon in the Dock or by opening Finder and going to "Go" and then "Applications".
Step 2: Once you're in the "Applications" folder, look for the app you want to delete.
Step 3: To get rid of the app, either drag it to the Trash icon in your Dock or right-click on it and choose "Move to Trash".
Step 4: To completely remove the app and all the stuff connected to it, you might have to empty the Trash. Just right-click on the Trash icon and select "Empty Trash".
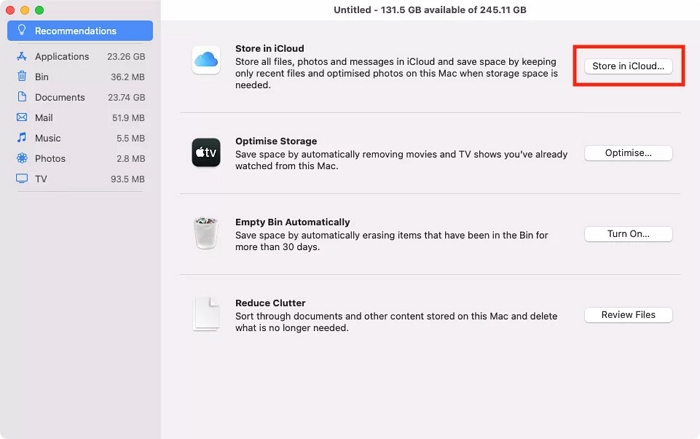
Method 3: Store Files in iCloud
Using cloud storage is a great way to make your Mac work better. It means your Mac can put some of your files in a special online place called iCloud. This includes things from your Desktop, Documents, photos, and messages. But if you use this, you might need to get more iCloud space. Here's how you can set up iCloud to save space on your Mac.
Step 1: Click the Apple icon in the top-left corner of your screen and choose "About This Mac".
Step 2: Pick the "Storage" tab and click "Manage".
Step 3: In the "Recommendations" section, press the "Store in iCloud" button.
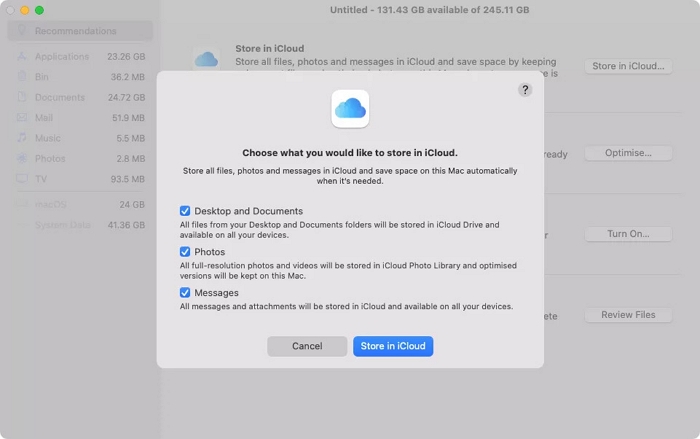
Step 4: Check the things you want to put in iCloud, then click "Store in iCloud".
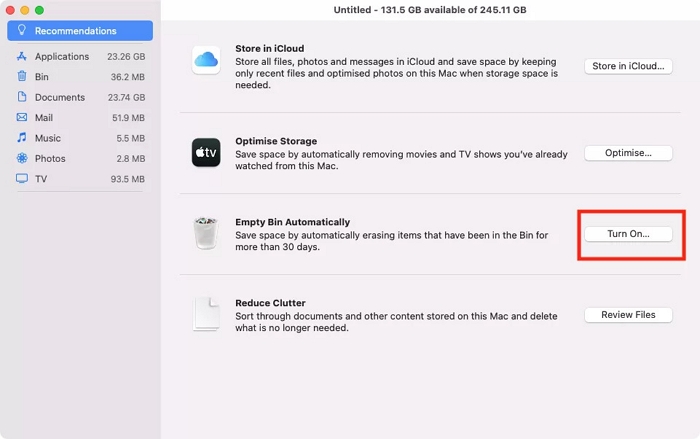
Method 4: Empty Trash Manually/Automatically
It's common to delete things but forget they're still in your Trash. Over time, this can fill your Mac with unwanted files. You could manually empty the Trash or make your Mac clean the Trash automatically by removing files that have been there for more than 30 days. Here is how you can empty trash automatically:
Step 1: Click on the Apple menu in the top-left corner and choose "About This Mac".
Step 2: Go to the "Storage" tab, and click on "Manage".
Step 3: Next to "Empty Bin Automatically", click "Turn On".
Step 4: Now, you have to confirm by clicking "Turn On" again.
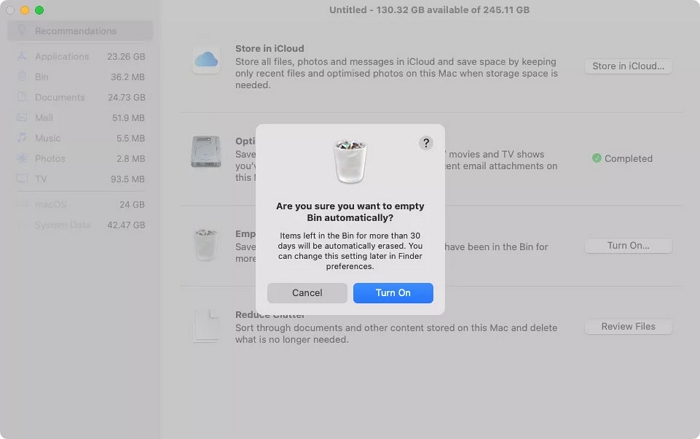
Now, your Mac will take care of emptying the Trash for you automatically.
Method 5: Clean up Mac with Macube Cleaner
To make sure your Mac computer stays in good shape and doesn't have problems, you should keep it organized. This means deleting files you don't need that take up space on your Mac. If you find this process cumbersome, there's a tool called Macube Cleaner that can help you do this within a click-through process. It's the best way to keep your Mac clean and free from errors.
Macube Cleaner, a multifunctional utility, thoroughly cleans up your Mac for gigabytes of available space by deleting useless data like system junks, duplicate/old files, unneeded apps, browsing cache and more. It enhances your using experience with a lightweight and tidy macOS. Plus, Macube Cleaner has an outstanding feature named File Shredder that not only allows you to forever erase sensitive files but also stubborn documents.
Features:
- Safely delete system junks like system cache, system logs, and user logs.
- Easily remove unnecessary data including duplicate files and similar images.
- Quickly search out all large files so that you could get rid of unneeded ones for more storage.
- Effectively protect your privacy with the File Shredder feature which ensures the erased files are 100% unrecoverable.
Here are the steps to clean up Mac with Macube Cleaner.
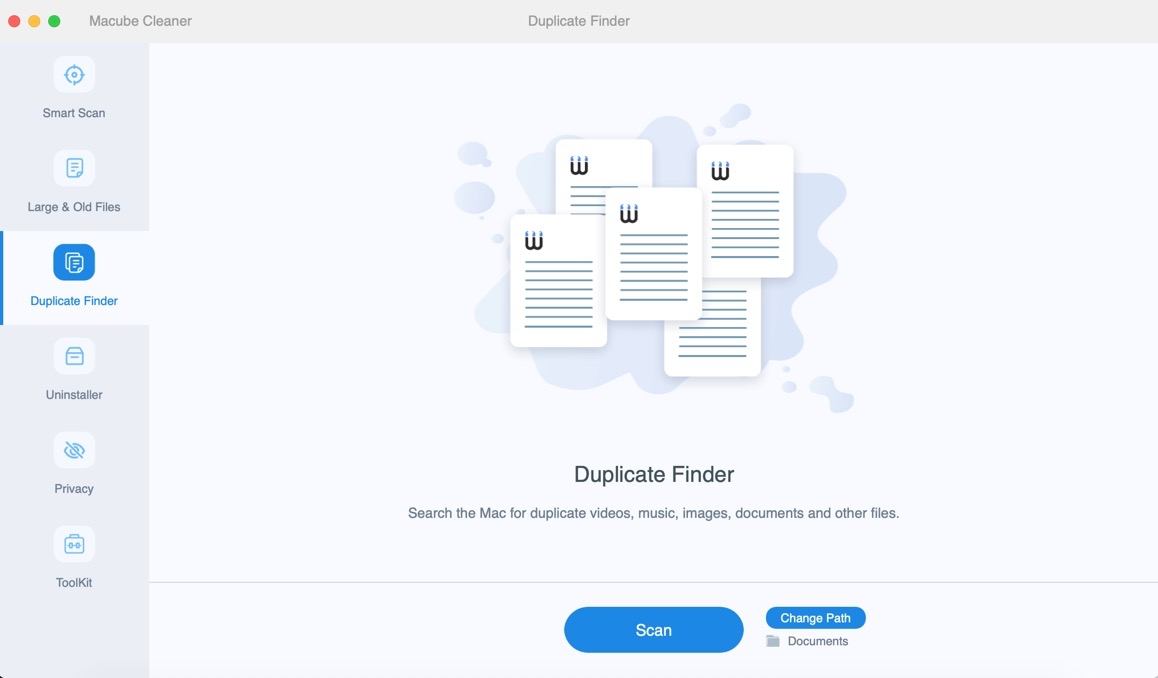
1. Remove Duplicate Files
Step 1: Open Macube Cleaner on your Mac computer, pick “Duplicate Finder” from the left sidebar, and start looking for duplicate files.
Step 2: Take a look at the scan results and choose the extra duplicate files you want to get rid of.
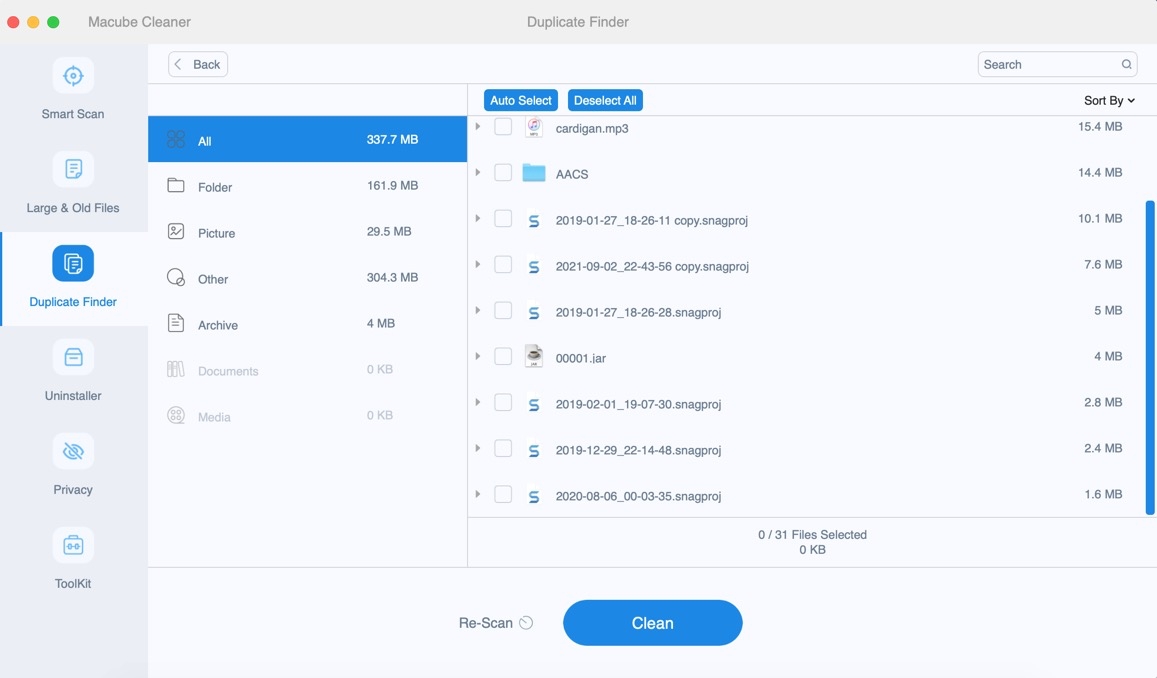
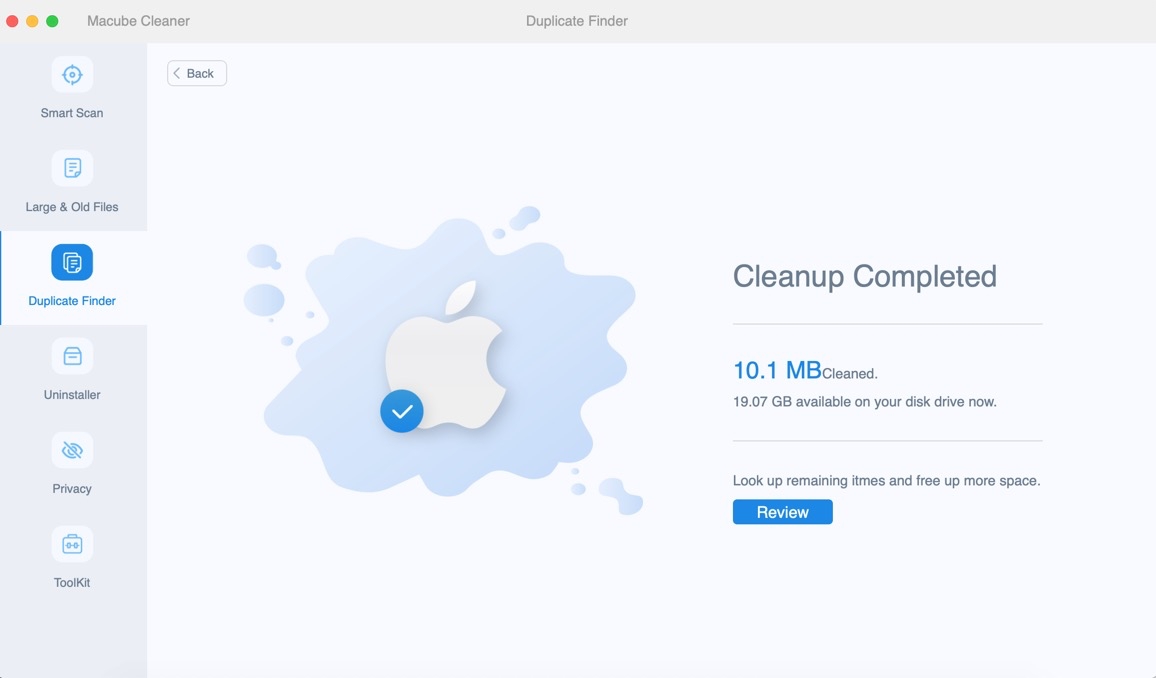
Step 3: Click the “Clean” button and get rid of the copies easily to free up extra storage space.
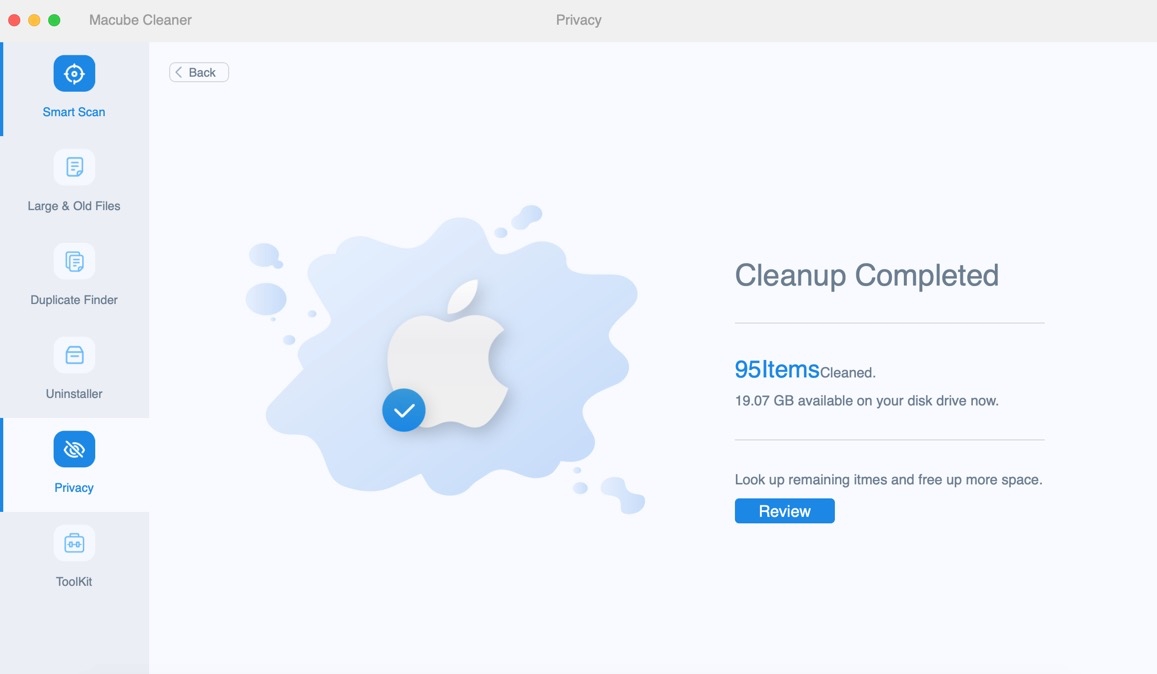
2. Clear Browsing Data
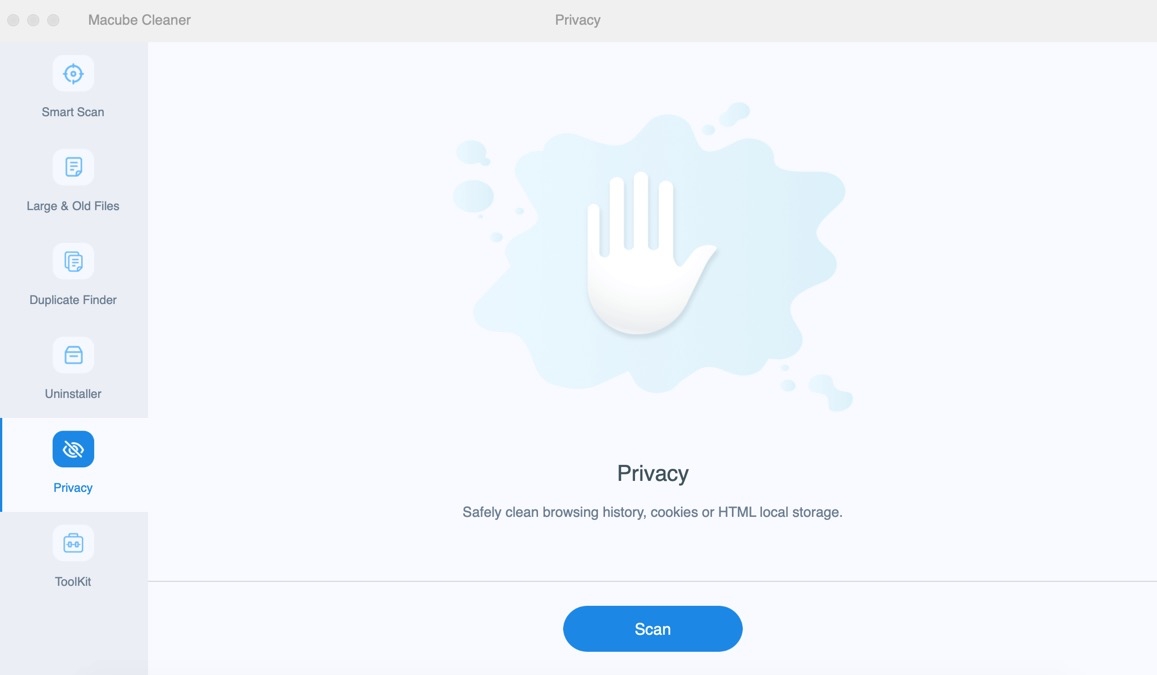
Step 1: First, launch Macube on your computer and use the "Privacy" function. Next, click on "Scan" to find cookies and browsing history on your Mac web browsers.
Step 2: Take a look at the scan results and choose the files you don't want.
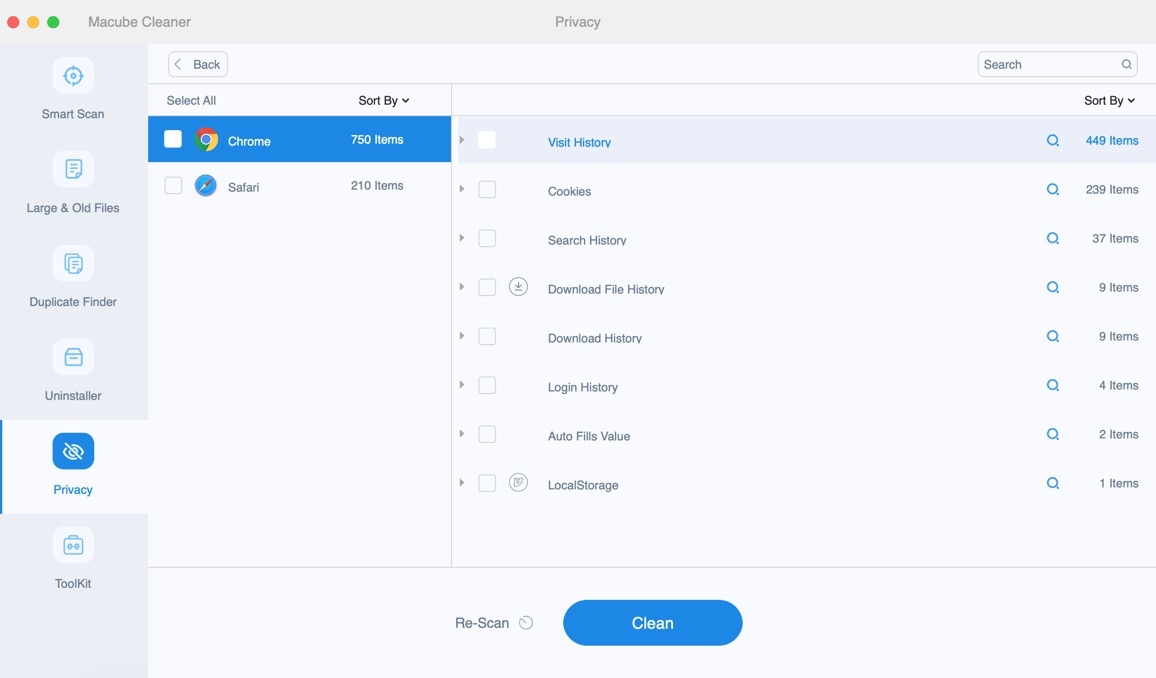
Step 3: Easily delete cookies and browsing history by tapping on the “Clean” button to keep your online activities private.
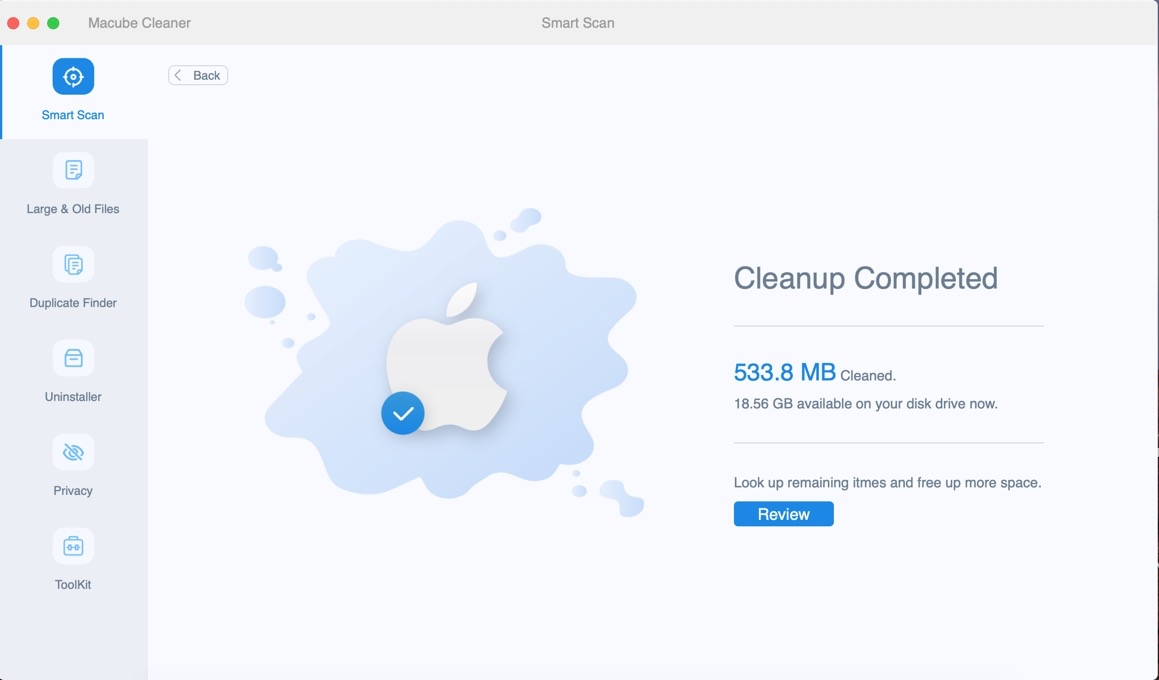
3. Delete System Junks
Step 1: Run Macube Cleaner on your Mac. Click on "Smart Scan" on the left side. This will help you locate system junk files and email attachments on your device.

Step 2: Pick the files you want to delete once you've checked the scan results.
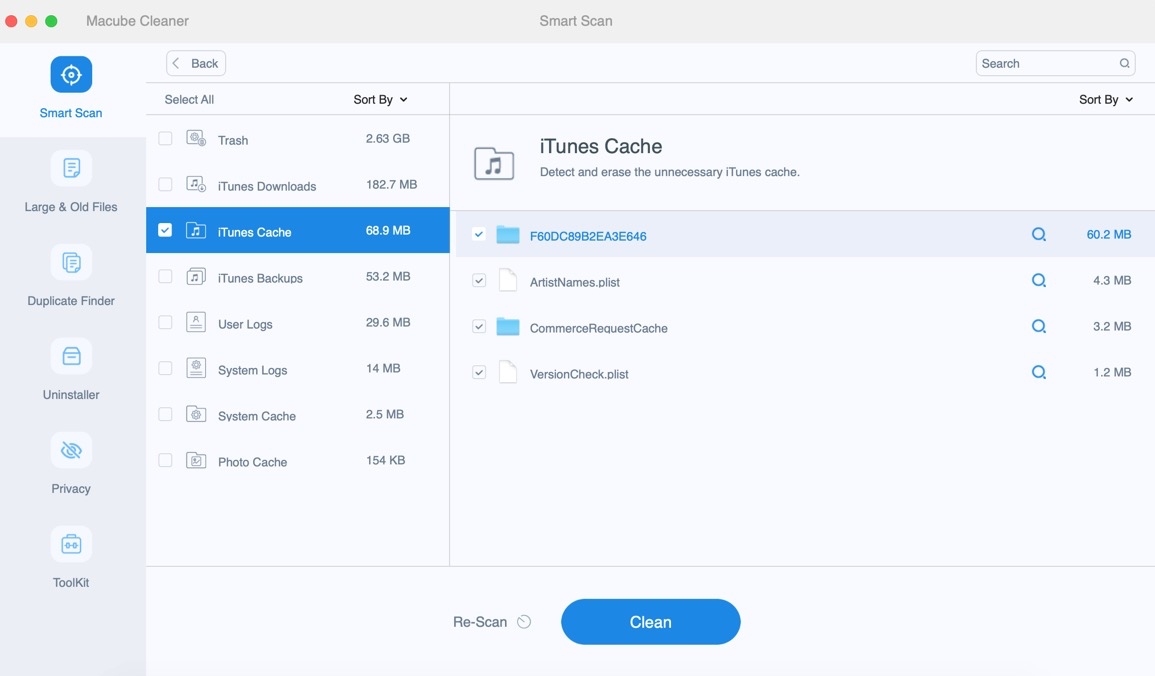
Step 3: Click the "Clean" button to make more room on your computer.
Conclusion
In this article, we have introduced the 8 proven ways to optimize Mac storage. One great way is using the tool called Macube Cleaner. It's like a magic helper that can make your Mac faster and safer. Macube Cleaner does things like finding and removing duplicate files on Mac, keeping your private stuff private, and cleaning up unnecessary junk files.
Hot Articles
Macube Cleaner
Speed up and troubleshoot your Mac super easily with a Macube full-featured free trial!
Start Free Trial