When your startup disk is almost full on MacBook or iMac, you may be prompted with a message asking you to optimize your storage. Even if you have not yet received such a warning, you can also be anxious for seeing your Mac cluttered with a bunch of files and running slowly – usually, making more space available is a crux.
But, how to free up storage on Mac can be a problem. How to quickly check the files taking up a large amount of space? What files can be cleared to free up the storage space and how to remove them? If these are the questions you are asking, this article is bound to answer them in detail and solve your problem.
Part 1: Before Freeing up Disk Space: How to Check Storage on Mac
Wait a minute before you are going to free up your Mac space. It’s important to check what’s taking up space on your Mac. Actually, it is very easy to find them out. Just go to the Apple menu on your computer and go to About This Mac > Storage. Then you will see an overview of the free space as well as the occupied space. The storage is divided into different categories: Apps, Documents, System, Other or the undescriptive category - Purgeable, and so on.
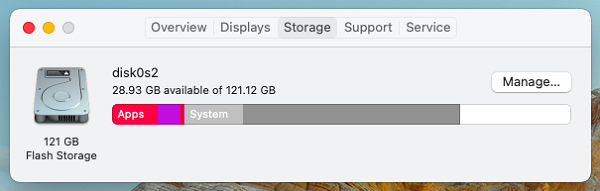
Looking at the category names, some are intuitive, but some of them like other storage and purgeable storage is likely to make you confused. And they usually take up a large amount of storage. What on earth do they include? Here’s a brief introduction:
What is Other Storage on Mac?
"Other" category is always seen in macOS X El Capitan or earlier. All the files that are not categorized as any other category would be saved in the Other category. For example, the disk images or archives, plug-ins, documents, and caches would be as recognized as Other.
Similarly, you may see What is "Other" Storage on Mac and How to Delete it.
What is Purgeable Storage on Mac?
"Purgeable" is one of the storage categories on Mac computers with macOS Sierra. When you enable the Optimize Mac Storage feature, you may probably find out a category called Purgeable, which stores the files that will move to iCloud when storage space is needed, and the caches and temporary files are also included. They are noted to be the files that can be purged when there is a need for free storage space on Mac. To know more about them, click How to Get Rid of Purgeable Storage on Mac to see.
Now that you have figured out what has taken up much space on your Mac, keep it in mind, and let’s begin to manage your Mac Storage.
Part 2: How to Free up Disk Space on Mac
Actually, there are a number of ways to free up space and manage your Mac storage. Focusing on different situations and different types of files, here we will introduce 8 ways to free up Mac storage, from the easiest ways to the ones that require some time and effort.
1. Free up Space with a Reliable Tool
Dealing with a big chunk of unneeded and junk files is often bothersome and time consuming. Also, freeing up Mac storage manually may leave out some files that certainly can be deleted. So, it’s great to manage Mac storage with the help of a reliable and powerful third-party tool, and can be the easiest way to free up storage on Mac.
Macube Cleaner is an all-in-one Mac storage management app that aims to keep your Mac in new status. It provides a variety of scanning modes for you to manage all kinds of data effectively, including the Smart Scan mode to remove caches, the Large & Old Files mode to clear unused files in large size, the Uninstaller to completely delete apps with their leftovers, the Duplicate Finder to remove your duplicate files, and etc.
Now this tool is free to use for up to 7 days, while using it to solve your Mac storage problem may just cost minutes. The usage of this Mac cleaning software is also very easy. Below is a brief instruction:
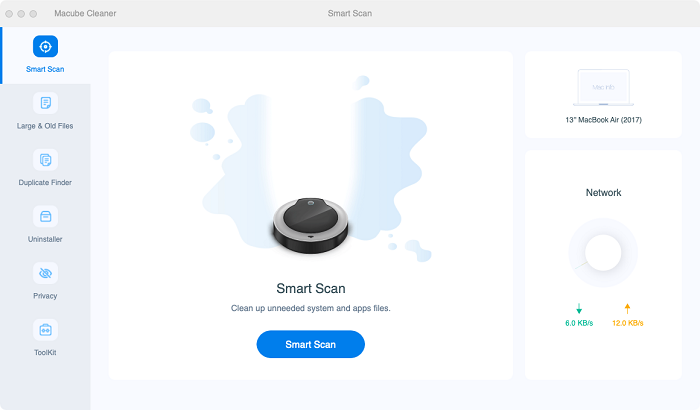
Step 1. Free Download and Launch Macube Cleaner.
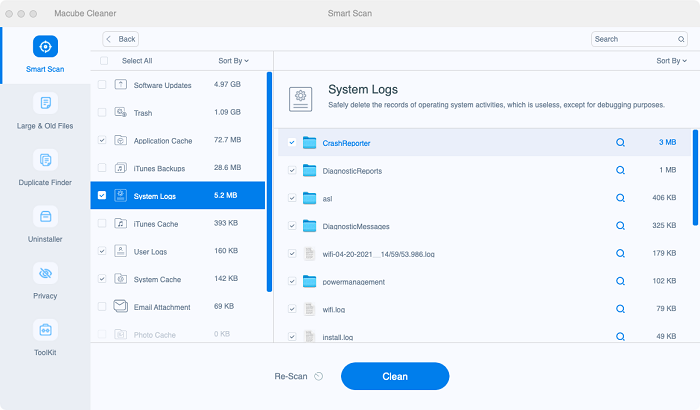
Step 2. Choose a scan mode and the specific files you want to scan (if provided), and then click “Scan”. Here we will take Smart Scan as an example.
Step 3. After scanning, the files will be showed in size. Select the files you want to delete and click the “Clean” button to free up your Mac storage.
In a few clicks, you can successfully manage your storage and free up space on Mac. To see more details about how to free up Mac storage with it, you can head to this page: Guide to Optimize Your iMac/MacBook.
If you are going to manage storage on Mac manually, read on to see the useful tips and instructions in the following parts.
2. Empty the Trash
To be honest, this is more a reminder than a method. Everyone knows that we can directly drag files to Trash when we want to delete something on Mac. But you may not have the habit to click “Empty Trash” afterward. Remember that the deleted files will not be completely removed until you empty the Trash.
To do this, just right-click Trash, and then select Empty Trash. Some of you may surprisingly have got some free Mac storage.

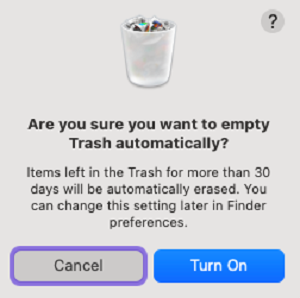
If you don’t want to manually do this every time, you can set up the feature Empty Trash Automatically on Mac. As the name indicates, this function can automatically remove the items in the Trash after 30 days. Here is the instruction to turn it on:
How to Set up Empty Trash Automatically
For masOS Sierra and later, go to Apple Menu > About This Mac > Storage > Manage > Recommendations. Choose “Turn on” at Empty Trash Automatically.
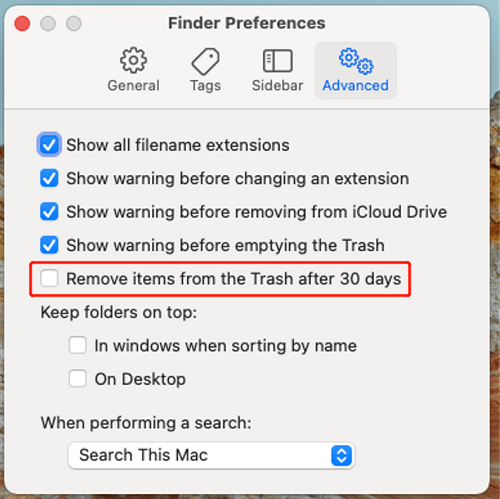
For all macOS version, select Finder at the top bar, and then choose Preferences > Advanced and tick “Remove items from the Trash after 30 days”.
3. Use Recommendations to Manage Storage
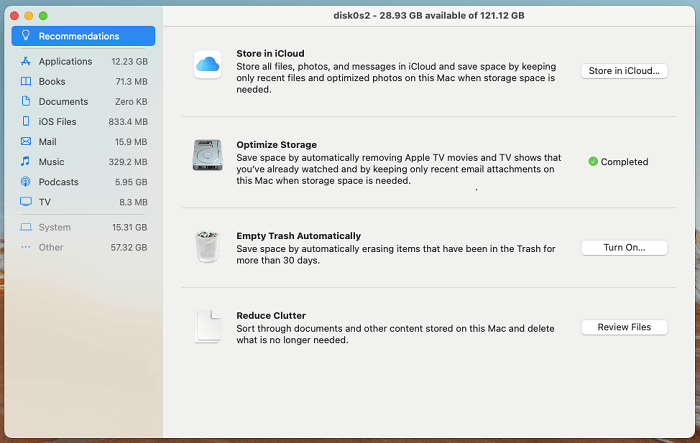
If you Mac is masOS Sierra and later, your Mac itself have provided useful tools for you to manage storage on Mac. We just mentioned a little part of it in the Method 2, which is to select dumping the Trash automatically. Open Apple Menu > About This Mac > Storage > Manage > Recommendations, and you will see three more recommendations.
 Note:
Note:
- If you are using the macOS X El Capitan or earlier, it’s sorry that there is no manage button on Mac storage.
Here we will simply explain the other three functions for you:
Store in iCloud: This feature help you store the files from Desktop and Documents locations to iCloud Drive. For all of the full-resolution photos and videos, you can store them in iCloud Photo Library. When you need an original file, you can click on the download icon or just open it to save them on your Mac.
Optimize Storage: You can easily optimize storage with it by automatically delete the iTunes movies, TV shows and attachments that you have watched. It’s the easiest way for you to delete movies from Mac, and with this option, you can clean up some of the "Other" storage.
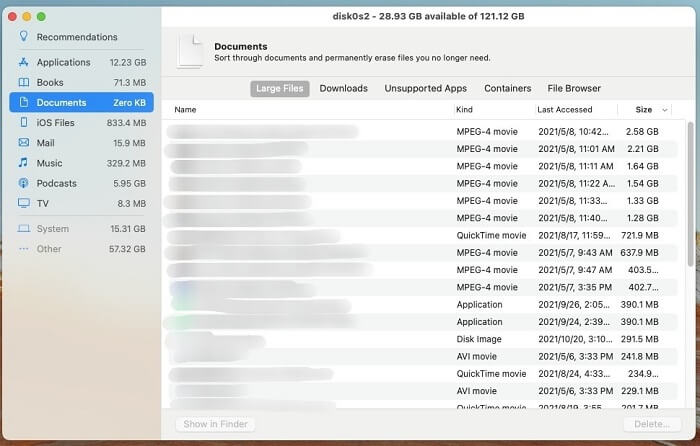
Reduce Clutter: This function can help you quickly identify the large files by arranging files on your Mac in sequence of size. Check files with this option, and delete the ones you don’t need.
4. Uninstall the Unneeded Apps
Many people usually download hundreds of apps on the Mac but hardly use most of them. If you are one of those people, it’s time to go through the applications you have and uninstall the unneeded ones. It can sometimes save up a lot of space because some of the apps can occupy a big chunk of storage even if you don’t use it.
To delete an application, there are also different ways:
Use Finder: Go to Finder > Applications, identify the apps you no longer need and drag them to Trash. Empty the Trash to uninstall them.
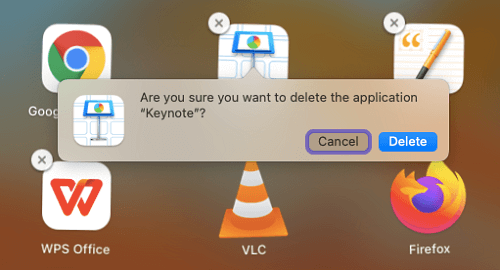
Use Launchpad: Open Launchpad, long press the icon of the app you want to remove, and then click “X” to uninstall it. (This way is only available for apps downloaded from App Store)
For more details in removing apps, you can click How to Uninstall Apps on Mac to see. But remember that these methods cannot completely delete the apps and will leave out some app files that you have to clean up by yourself. Alternatively, you can use Macube Cleaner to quickly and safely uninstall apps along with all the related files, so that you don’t need to sort them out by yourself.
5. Delete iOS Files and Apple Device Backups
When your iOS devices are connected to your Mac, they may backup without your notice, or sometimes you just forget and have backed them up for multiple times. It’s possible that iOS files and apple device backups take up a lot of space on your Mac. To check and delete them, just follow the ways:
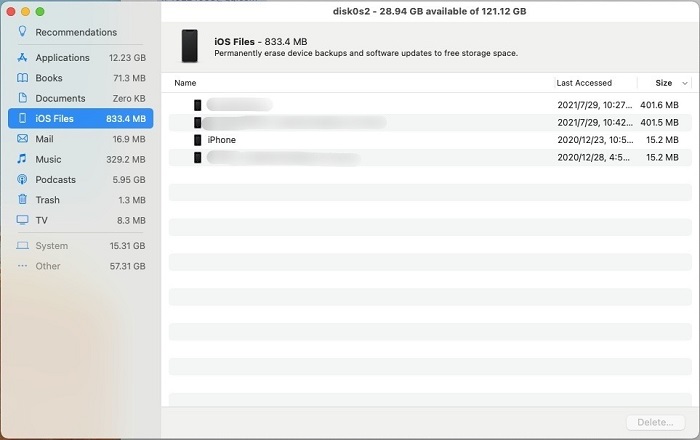
Again, if you are using masOS Sierra and later, click the “Manage” button at where you check the Mac storage, and then choose “iOS Files” in the sidebar. The files will show in last accessed date and size, and you can identify and delete the old ones that you no longer need.
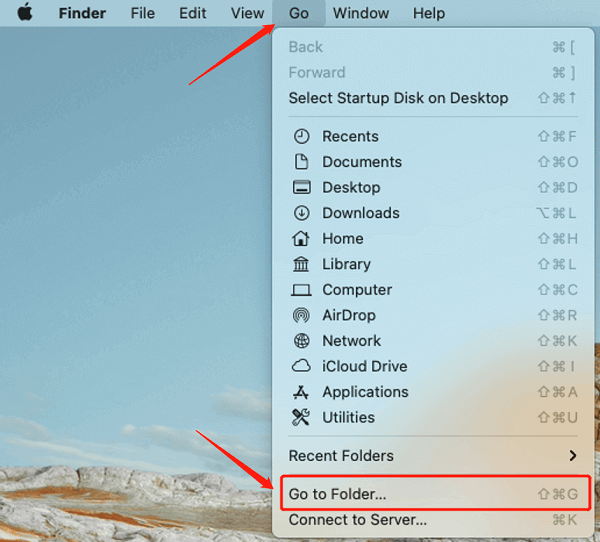
Besides, mostly the iOS backup files are stored in the backup folder in Mac Library. To access the folder, open your Finder, and select Go > Go to Folder at the top menu.
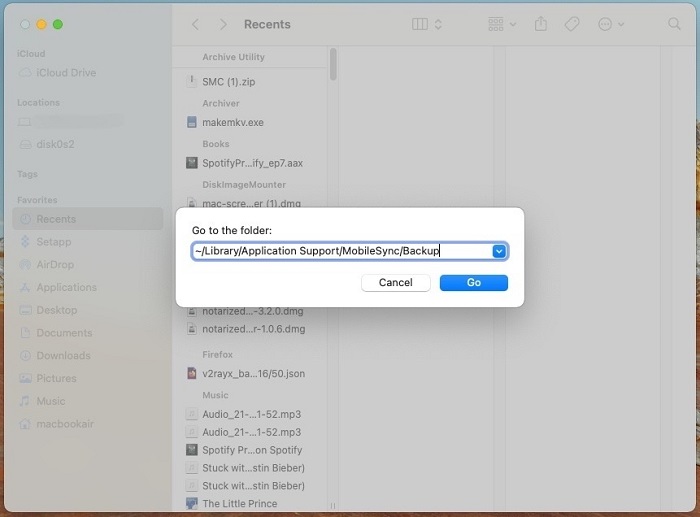
Enter ~/Library/Application Support/MobileSync/Backup to open it, and you will be able to check the backups and delete the ones you don’t want to keep.
6. Clear Caches on Mac
We all know that when we run the computer, it generates caches. If we don’t clean caches regularly, they will take up a large proportion of the Mac storage. So, an important point to free up space on Mac is to remove the caches.
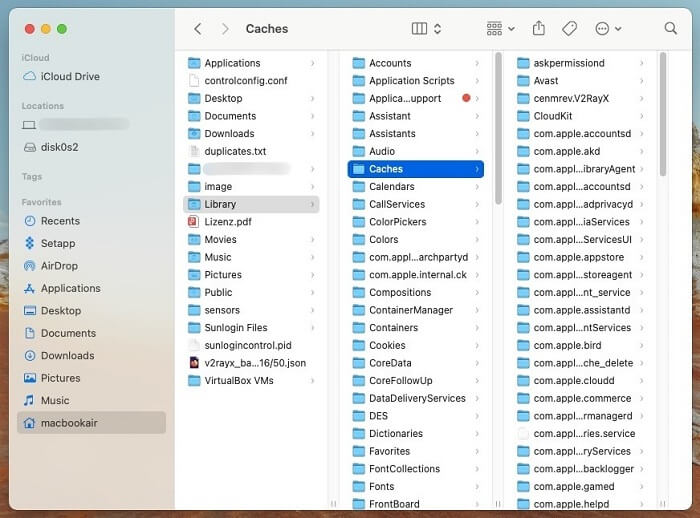
Actually, the access to the Caches folder is similar to that of the Backup Folder. This time, open Finder > Go > Go to Folder, enter “~/Library/Caches”, and you will be able to find it out. The caches are usually divided in different folders in the name of different apps and services. You can sort them by size and then delete.
7. Erase Junk Mails and Manage Mail Downloads
If you frequently use Mail, it’s also probably that the junk mails, downloads and attachments have mounted up on your Mac. Here are to ways to free up storage on Mac by removing them:
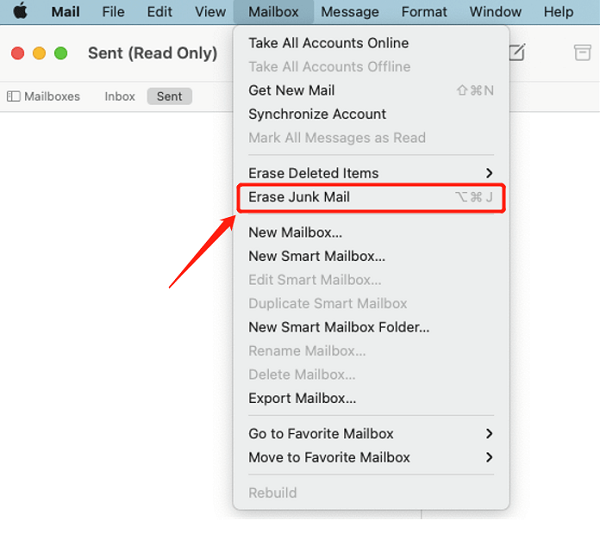
How to Delete Junk Mails
To erase the junk mail, open the Mail app and choose Mailbox > Erase Junk Mail at the top bar.
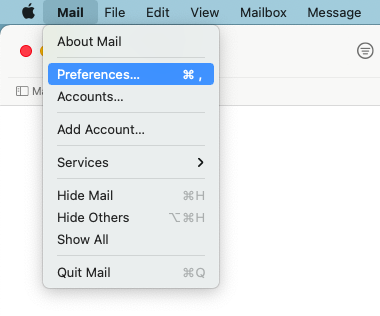
How to Manage and Remove Mail Attachments/Downloads
To manage the downloads and deleted mails, go to Mail > Preferences.
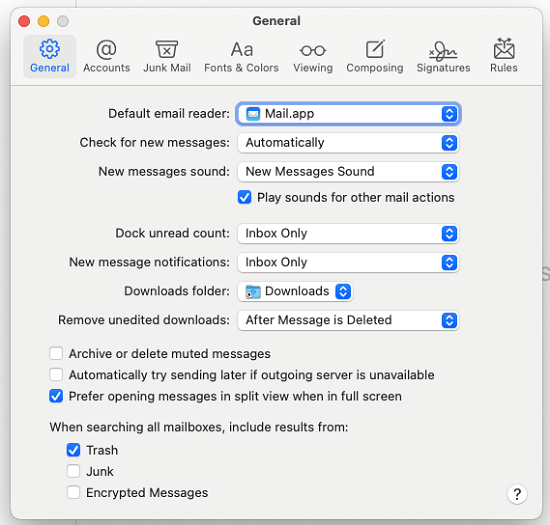
In General > Remove unedited downloads, choose “After Message is Deleted” if you haven’t set it up.
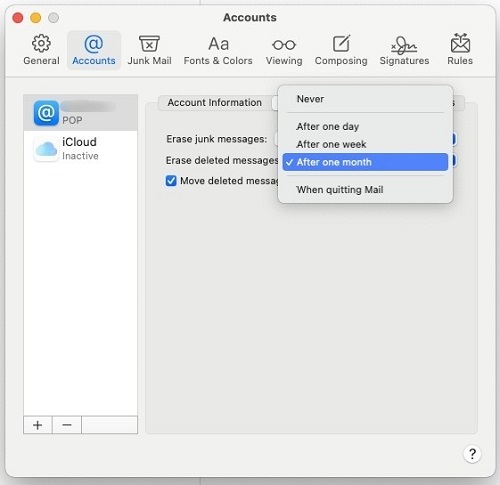
In Account, choose a period to erase junk messages and deleted messages.
8. Clear Browsing Data
This method is for the ones who uses browsers a lot but seldom clear the browsing caches. The caches of each browser are usually stored independently, so you need to manually remove them and free up your Mac storage.
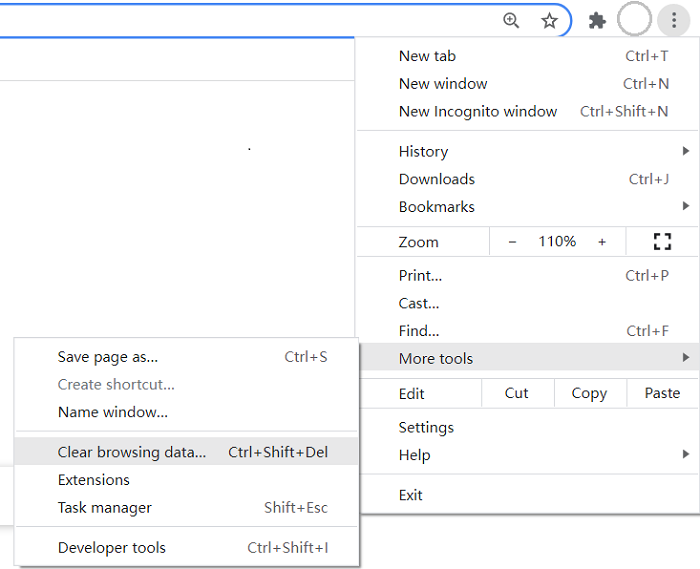
For example, if you want to clear browsing data on Chrome, open Chrome and choose the three dots icon at the top right corner, and then go to More tool > Clear browsing data.
For Safari and Firefox, the method is similar, but the specific options may differ.
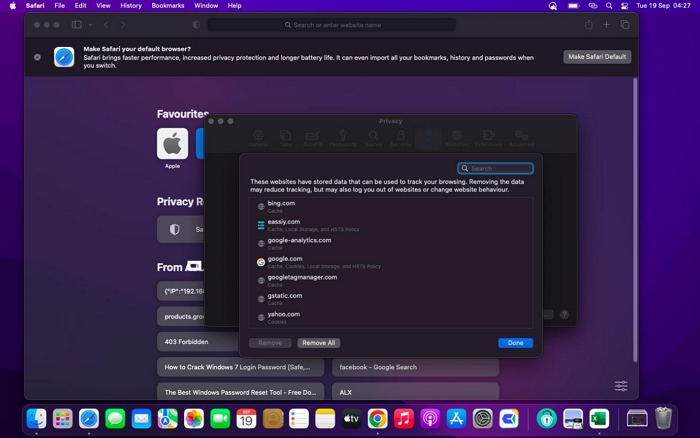
For Safari: Open Safari > Settings > Preference > Privacy > Manage Website Data button. When you're done, click "Delete Now" and then "Delete" to finish.
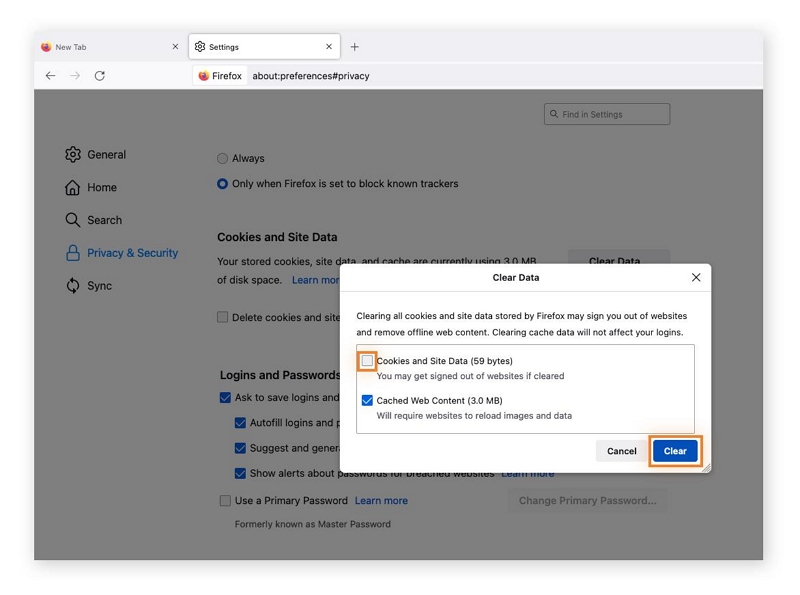
For Firefox: Open Firefox > Settings from the hamburger menu > Privacy & Security > Cookies & Site Data > Clear Data. Select what you want to clear. Finally, click Clear.
Part 3: After freeing up disk space: How to maintain a good state of disk
Here are some tips that you can follow to keep your disk with stable free space:
1. Organize and clean regularly: At least once a month, delete any unnecessary files or programs that are no longer needed. Use a disk cleanup utility or Macube Cleaner to remove temporary files, caches, and other clutter.
2. Manage software and updates: Check for updates regularly to ensure optimal performance and security. Keep your operating system and all installed software up to date with the latest patches and updates.
3. Avoid disk overload: Be aware of the amount of data stored on the disk. Avoid filling it to its maximum capacity as this may cause performance degradation on your Mac. Aim to keep at least 15-20% of free disk space for smooth operation.
4. Back up data regularly: Create backups of important files regularly. This step ensures that even if disk problems or failures occur, your data remains safe and recoverable. But if you have lost your data, we recommend using Eassiy Data Recovery to help you recover your data efficiently.
5. Control startup programs: Reduce the number of programs started at startup. Starting programs unnecessarily can significantly slow down the system's startup process and waste disk resources.
Keep in mind that these practices may vary depending on your operating system. Check out the Ultimate Guide to Check, Analyze and Clean Up Disk Space on Mac (Step by Step) for best practices in maintaining disk health.
Part 4: FAQs:
Q1: Why does my Mac have 50 GB of Other on storage?
Other Storage includes various types of files like plugins, caches, documents, and system folders that don't fit into specific categories like applications, photos, or videos. These files don't harm your Mac but can take up space.
Q2:How do I delete files from my computer but not iCloud?
Open the iCloud app on your computer and go to the "Options" menu next to iCloud Drive. Uncheck the box next to iCloud Drive to disable it. This will prevent new files from syncing to iCloud but will not remove any files that are already stored in iCloud.
Conclusion
That’s what you should know and the things you can do when you want to clear your disk space on Mac. There are definitely a number of ways to manage Mac storage, like emptying the Trash, using Apple built-in tools, uninstalling apps, deleting iOS backups, removing caches, clearing junk mails and browsing data.
Using all the methods may require a lot of time, so you can choose the ones that are suitable for you, or just turn to Macube Cleaner for help to free up storage on your Mac effortlessly.
Macube Cleaner
Speed up and troubleshoot your Mac super easily with a Macube full-featured free trial!
Start Free Trial