"Background Items Added" is a very common Mac notification. There are many solutions to make the notification disappear, such as using terminal commands, using smart third-party cleaning software, or updating the system for repair, and so on.
If you want to solve this problem without burden and without causing damage to the system itself, you can choose the fourth solution to help you solve it quickly.
Part 1: When will you see "Background Item Added"?
Many Mac users have reported an issue with macOS Ventura that triggers login item notifications for various background application processes every time they start their computer, even if the application is disabled.
If notification previews are disabled (via System Settings > Notifications > Show Previews), annoying notifications will appear as "Login Items".
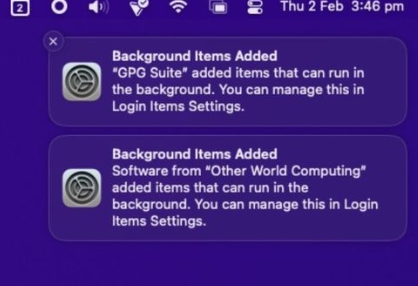
If preview is enabled, the notification will be labeled "Background item added" and contain the message "[application/process name] added an item that can run in the background. You can manage this in Login Items settings".
I'm sure you've already encountered this warning, and they usually appear in one of four situations:
1. When you start up your Mac
2. When you restart your Mac
3. When switch between user accounts
4. Access the Login Items section in System Settings
Part 2: How to Stop “Background Items Added” Notifications on macOS Ventura?
Some pros say that deleting the launch agent or property list file (.plist) associated with the apps mentioned in these notifications can resolve the issue. This is a hard-line solution and not recommended in this article. Because background processes usually provide functionality to check for updates.
Here are nine ways you can choose what looks good to you.
Way 1. The regular way
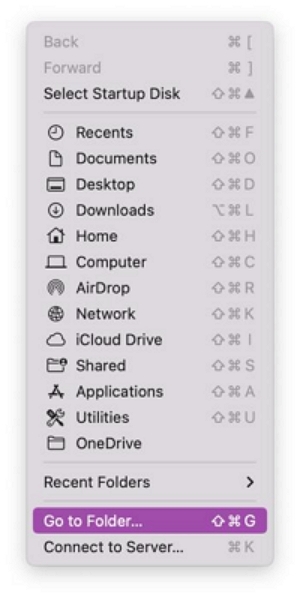
Step 1. Go Finder >“Go” menu > “Go to Folder…”.
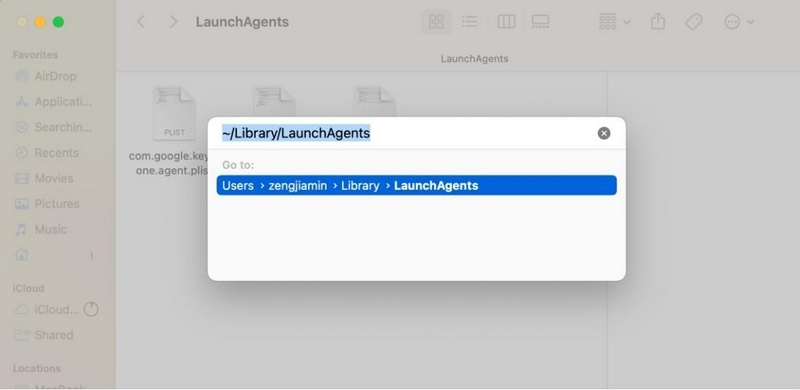
Step 2. Type in /Library/LaunchAgents and press Enter.
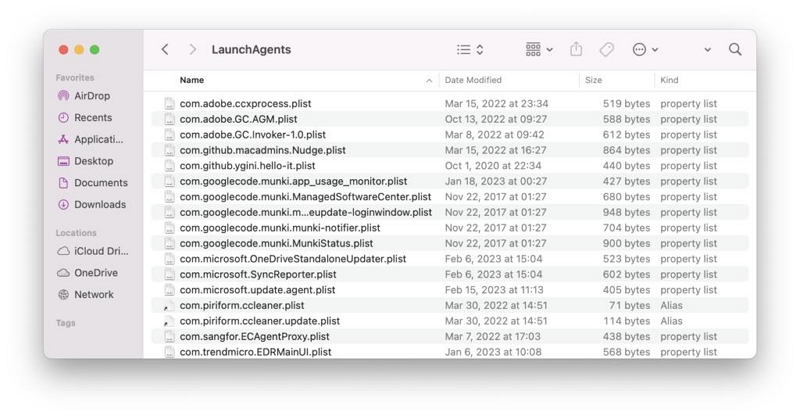
Step 3. Look for the app(s) or developer name(s) causing the notifications (the same one/ones in the Background Items Added notifications on your desktop) and delete files.
Step 4. Repeat steps 3 ~ 6 with /Library/LaunchAgents, ~/Library/LaunchDaemons, and /Library/LaunchDaemons.
Step 5. Empty the Trash and restart your Mac.
Way 2. Update the app that's adding the background item
It's a good idea to update the problematic app, as the version of the app on your Mac may not be compatible with macOS Ventura yet. If the wrong application is indicated in the notification, it is easy to fix it. However, if you can't get specific information from the notification, try the following tips to find the wrong app.
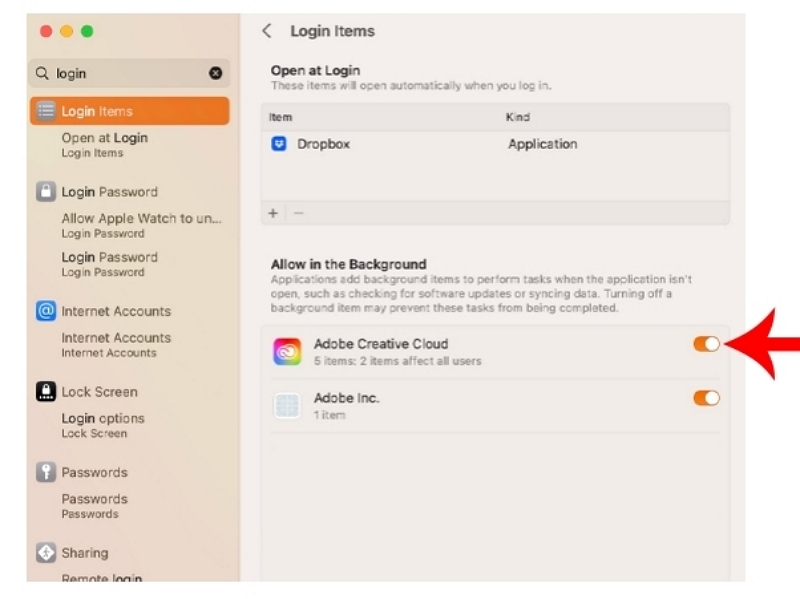
Firstly,Go to Apple Menu > System Settings > General > Login Items.

Then check the items under "Allow in the background" to see if there are any added services. Then click the “!” information icon for more information.
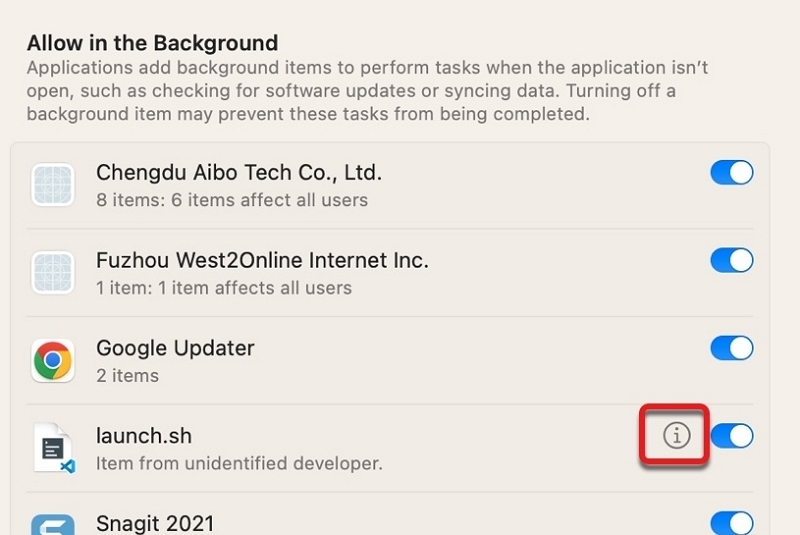
Lastly, If an alert occurs when you open or close a particular app, it's usually the culprit.
If you've found the problem app, you can check it for new updates that you can install. If not, you can report the problem to the developers.
Way 3. Reset Login Item Data using Terminal.
The way to reset login item data on a Mac is to use Terminal. This is more convenient because you only need to execute one command.
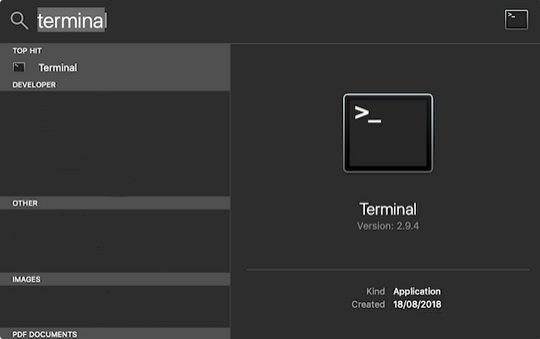
Step 1: Press Command + Space on your keyboard to open Spotlight.
Step 2: Type Terminal and hit Return to launch the app.
Step 3: Inside the Terminal, copy and paste the command below:
sfltool resetbtm

Step 4: Restart your Mac to apply the changes.
Watch to see if you still experience persistent "Background Items Added" notifications during startup.
Way 4: [The Less Techy Way] Completely uninstall the app
You can also disable the "Background Item Added" notification on Ventura by completely uninstalling the app.
Note: Simply dragging and dropping an app into the Trash does not delete all files and caches generated by that app. It is best to use an uninstaller that quickly uninstalls the application and deletes all its files and folders.
If you're looking for a convenient and less-techy way for uninstalling the app to fix this problem, you should give Macube Cleaner a try.
Macube Cleaner has powerful cleaning capabilities and is a software dedicated to serving Mac users. If you want to uninstall malware and stubborn software, Macube can help you do it without leaving any traces. It only takes three steps to uninstall the software.
Step 1. Click the Macube Cleaner icon to open and launch Macube, choose Uninstaller in the left sidebar.
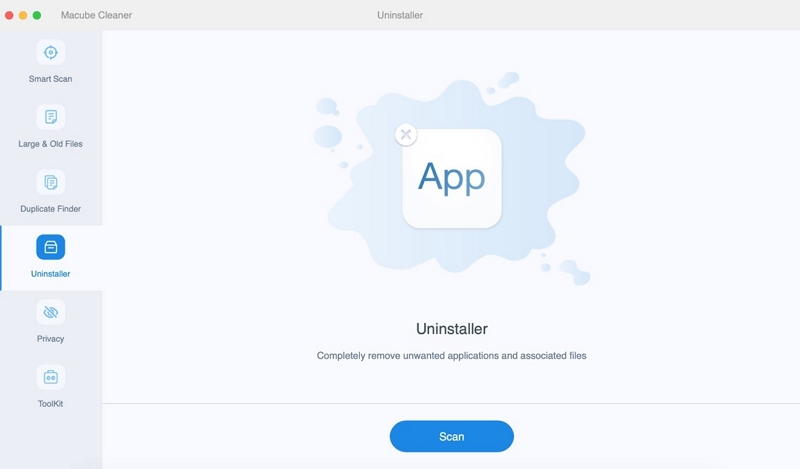
Step 2. Click Scan, and preview the scan results, select the question software, the one that triggers the "Background Item Added" notification.
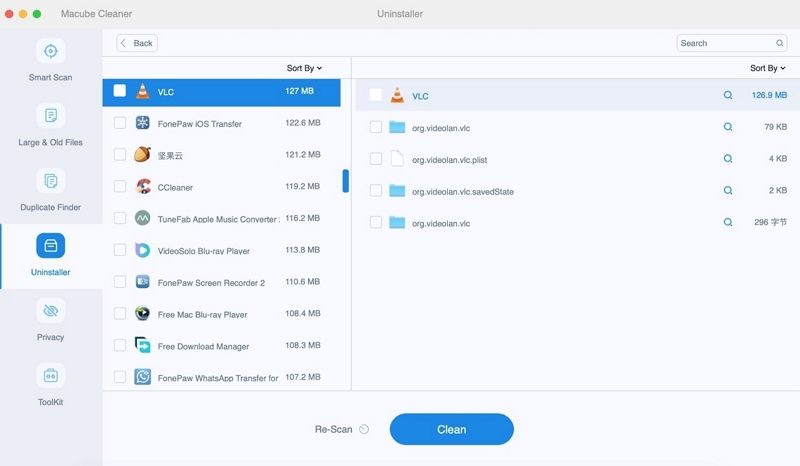
Step 3. Click button “Clean” to Delete applications and application cache from your Mac.

Finally, the software will say goodbye to you completely.
Way 5. Remove leftover components of the deleted app
If you've gone through several of the scenarios above and you're still getting the "Background Items Added" notification about uninstalling software, then you probably didn't remove all components of the removed app. There are often plug-ins and add-ons scattered all over your Mac, with Macube Cleaner you can simply collect them in one place and manage them with ease. proxies,Built-in plug-ins, third-party extensions, startup items, Quicklook, etc. can be easily turned on or off with one click.
Browse to the steps below and remove components related to the uninstalled application.
Step 1. Find the Extension in the Toolkit and select it.
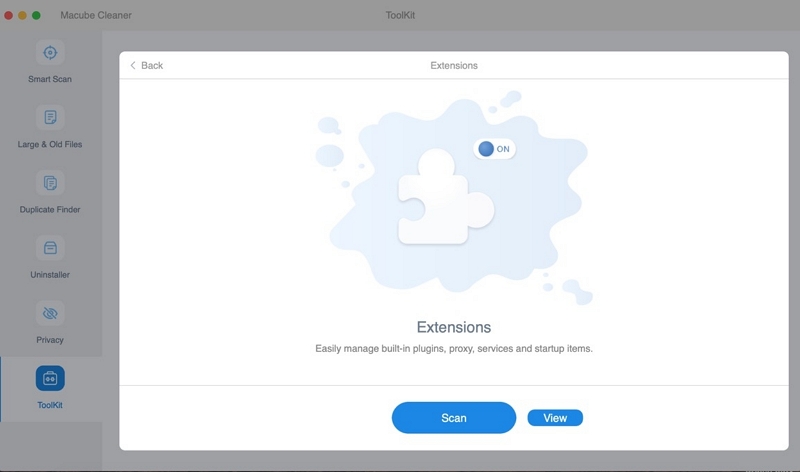
Step 2. Choose to scan entire Mac for extensions.
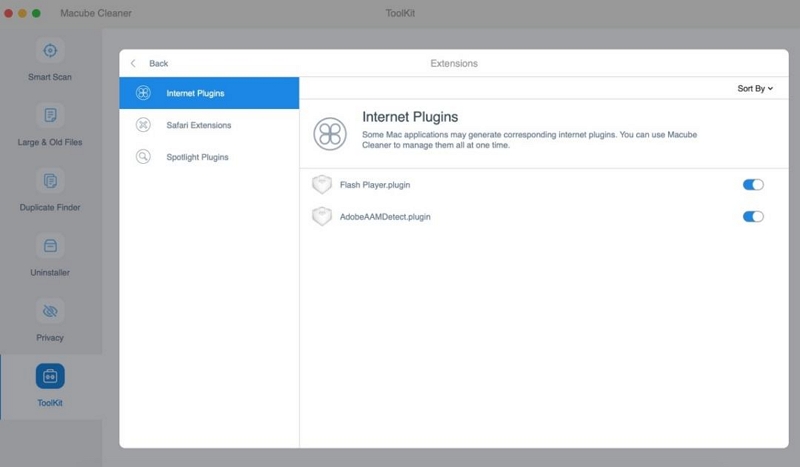
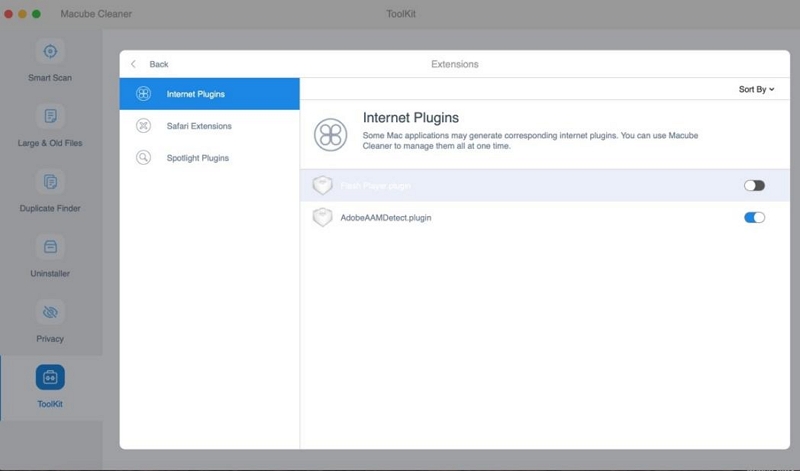
Step 3. Turn off the extension as prompted by the notification.
Way 6. Update macOS Ventura
macOS Ventura still has some unfixed features, so it's possible the issue is just a bug in the software. To rule this out, try updating your system to the latest version. However, before this, it is recommended that you clean up the space storage first, so as to avoid being interrupted during the update due to insufficient memory, affecting subsequent use.
Macube Cleaner can help you quickly clean up junk files in your Mac to free up more storage space on your Mac, and avoid making your digital life look like dreadful Hoarders. Proceed as follows:
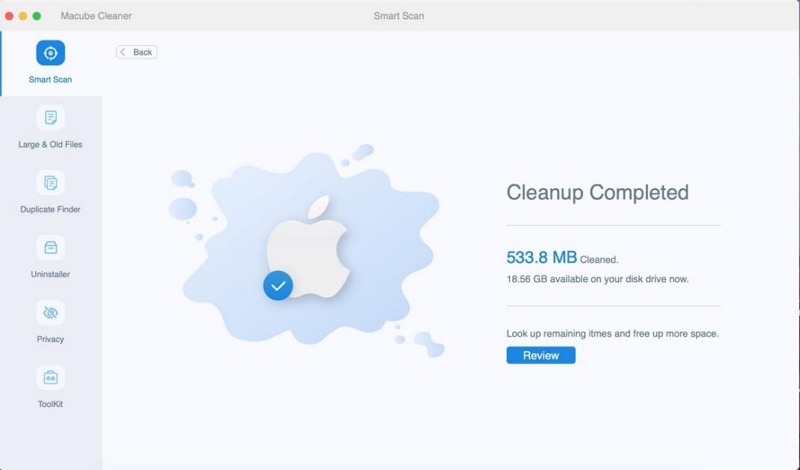
First, select the first function on the left sidebar - Smart Sacn. Scan the computer disk.

Secondly, carefully preview the results of Smart Scan and select the files you don't need.
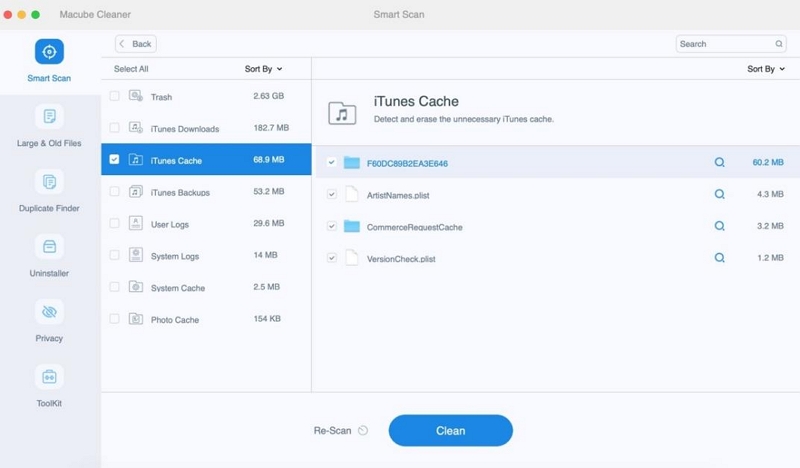
Finally,clear junk files and free up your disk space with one click.
Macube Cleaner not only has the above three functions, it also has the function of finding duplicate files, videos, photos, and duplicate music in iTunes. And large files, or files that haven't been used for a long time, can be mined and deleted.
Way 7: Disable Notification for Problematic App.
You can also disable notifications for problematic apps until a patch is released to fix the issue. However, this also turns off the app's push notifications, which can cause you to miss important alerts.
In any case, here's how to disable notifications for specific apps:
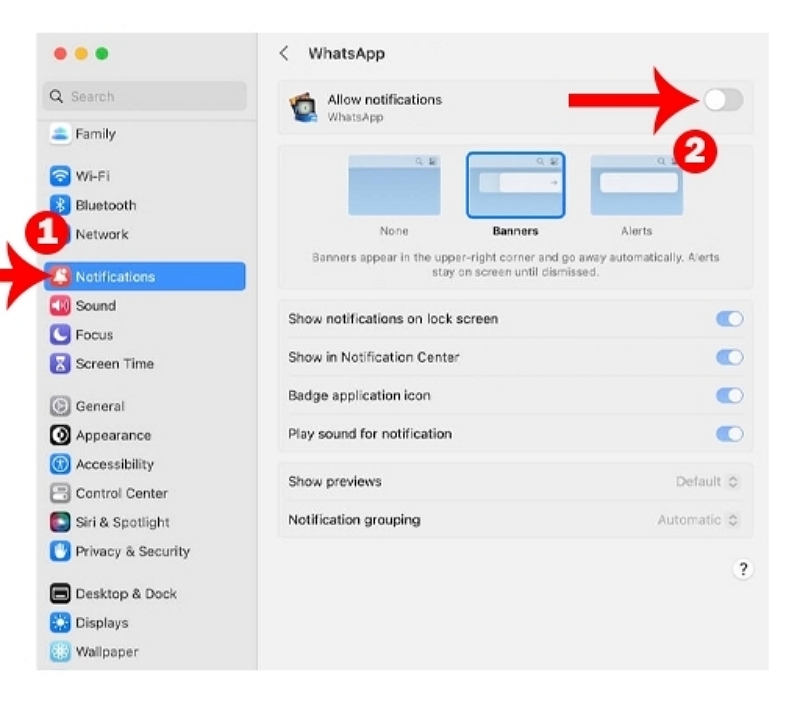
Step 1. Click on the Apple icon > System Settings > Notifications.
Step2. Select the app you want to disable notifications.
Step 3. Look for ‘Allow Notifications’ and disable the option.
Restart your Mac and check to see whether the "Background Item Added" notification appears.
Way 8: Turn Off Login Items.
Another way is to disable Login Items on your Mac. This will prevent the "Background Item Added" notification from showing. At the same time, it also prevents your preferred applications from launching at startup.
If you don't need a startup item, here's what you can do.
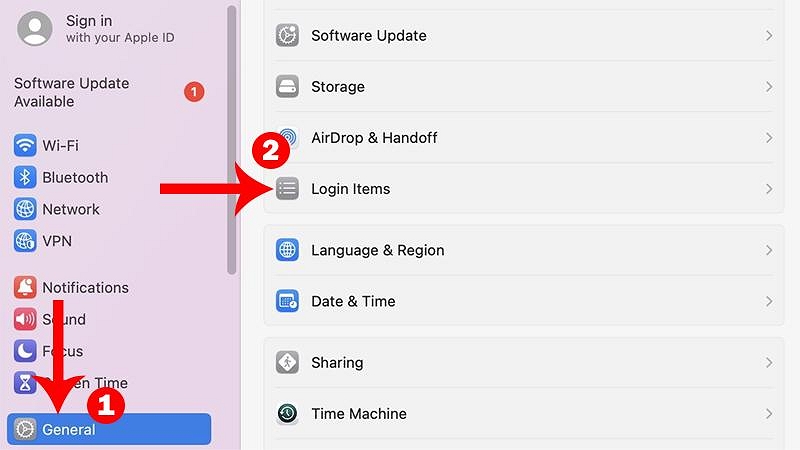
Step 1. Click on the Apple icon > System Settings > General > Login Items.
Step 2. Select an app under Open at Login and click the – button to remove it. Repeat this step until you’ve disabled all login items.
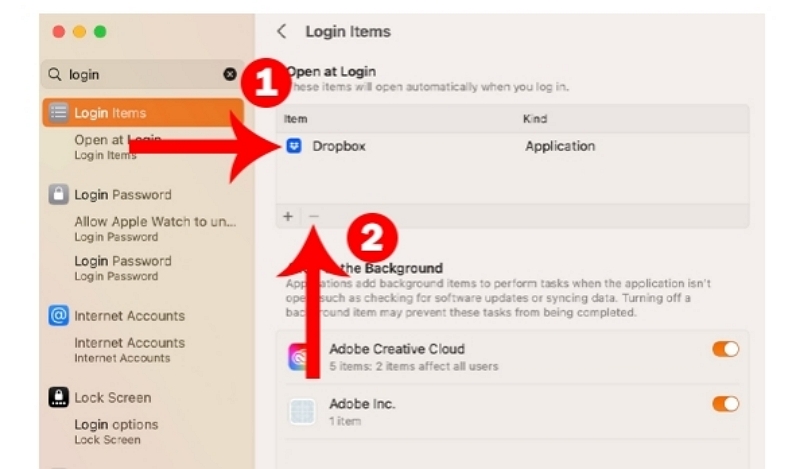
Step 3. Scroll down to Allow in the Background and disable all applications.
Reboot your Mac and see if the "Background Item Added" notification still appears.
Way 9: Enable Login Items One By One.
If you're still seeing persistent notifications after following the steps above, one of your login items may be causing the issue.
To verify this, enable one login item at a time, then restart your Mac.
When the problem recurs, the last login item you enabled is causing the problem. Delete the application or try reinstalling.
Part 3: FAQs
Q: Can I customize the “background items added” notification on Mac?
Yes, you can customize the “background items added” notification on Mac by going to System Preferences > Notifications > Finder and selecting "None" for the "Alert Style" option.
Q: What does background items added mean on Mac?
"Background items added" is a notification on Mac that indicates new items have been added to the login items list, which are applications or processes that launch automatically when you log in to your Mac.
Conclusion:
All in all, there is always one suitable for you, if you are not a computer professional, you can choose the third party software - Macube to help you, of course, if you are a certain basis of professional, you can choose other solutions, but you may also need to bear a certain risk. If you still have any questions, you can find answers in other Macube articles.
Macube Cleaner
Speed up and troubleshoot your Mac super easily with a Macube full-featured free trial!
Start Free Trial