Just like any other computer system, Mac computers are not above encountering perplexing issues that can disrupt your workflow. From sudden slowdowns to unresponsive applications, and lots more. But the good thing is Apple has equipped users with a powerful toolset for such circumstances: “Mac Diagnostic”.
If you're experiencing any issues with your Mac computer, you've come to the right page. Here, we have discussed the most efficient ways to run diagnostics on different Mac models quickly and easily. So, whether you're a beginner or a seasoned user, this guide will show you how to execute the operation smoothly.
Part 1: What is Mac Diagnostics?
Mac Diagnostics is a built-in utility on Apple Mac computers running macOS Big Sur and macOS Monterey that enables users to identify hardware issues. It performs a series of tests to check the system's components, including the RAM, battery, power controller, and other wireless components to detect problems and provide error code and descriptions to assist users in troubleshooting.
To access Mac Diagnostics, you need to restart your Mac and hold down the ‘D' key or through the Apple menu.

Part 2: Importance Of Running Mac Diagnostics
Running Mac diagnostics is crucial for various reasons, which includes the following;
- Identifying Hardware Issues: This is the main purpose of running Mac diagnostics. It can detect hardware problems such as failing hard drives, faulty RAM, or overheating components. Early detection allows for timely repairs or replacements, preventing more significant damage.
- Optimizing Performance: Another importance of running Mac diagnostics is to help discover issues that can compromise your Mac performance, including speed, responsiveness, etc.
- Preventing System Crashes: Running Mac Diagnostics can detect hardware issues that might lead to system crashes or unexpected shutdowns. Addressing these problems proactively can help maintain system stability and reliability.
Part 3: How to Run Apple Diagnostics
The procedure to run Apple Diagnostics on your Mac varies depending on the type of Mac you're using. But worry less. Here, we will walk you through how to operate on any Mac without any complication.
Opt 1: Running Apple Diagnostics on M1 & M2 MacBook Pros
If you have an M1 or M2 MacBook Pro with Apple Silicon, you can run Apple Diagnostics by following these steps:
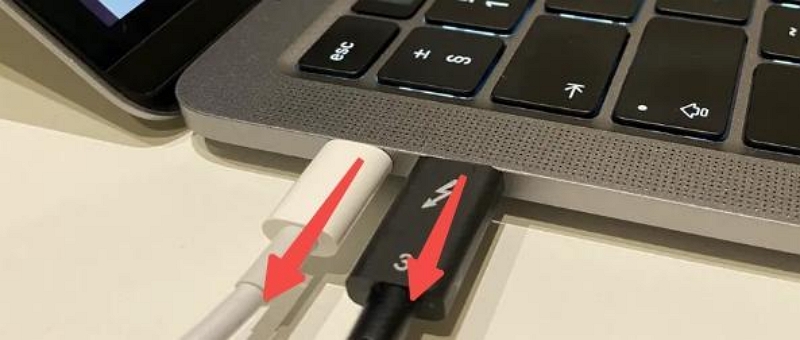
Step 1: Shut down your MacBook Pro and disconnect all connected peripherals.
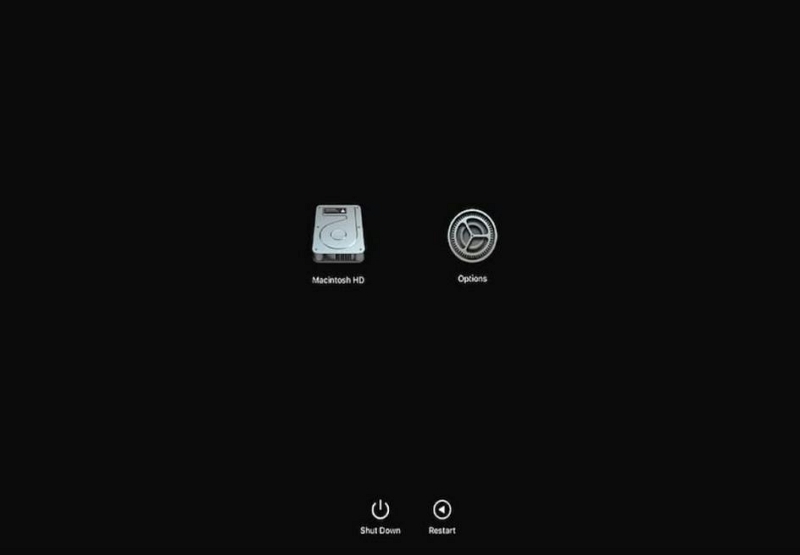
Step 2: Press and hold the “Power” button to turn your system back on. But don't release the “Power” button until you see the startup options.
Step 3: Simultaneously press “Command + D” to start running the Diagnostics test.
Opt 2: Running Apple Diagnostics on MacBook Pros with Intel Processors
If you have a MacBook Pro with Intel processors, you can run Apple Diagnostics by following these steps:
Step 1: Turn off your Mac system.
Step 2: Turn it on, and immediately press and hold the “D” key until you see the Apple Diagnostics screen.
Step 3: Select your language, then click the arrow button.

Step 4: Wait for the diagnostic process to complete.
Opt 3: How to Run Diagnostics on MacBook Pros Introduced Before June 2013
MacBook Pros released before June 2013 may require different steps to run the diagnostics. If your Mac is running Snow Leopard or earlier, you'll need to connect the disc or flash drive with the OS X media to your MacBook.
Otherwise, the steps are same as above:
Step 1: Shut down your MacBook Pro
Step 2: Unplug peripherals, except those listed above and the installation media.
Step 3: Press and hold the D key on your keyboard immediately after you press the power button to turn on your Mac.
Step 4: If your Mac was released in 2011 or later, you can use Option + D to launch Diagnostics over the Internet.
Part 4: Maintain your Mac's performance
The most effective way to maintain your Mac’s performance is by executing a deep clean on its hard disk using Macube Cleaner. It is an excellent Mac cleaning and optimization software that has been a go-to option for many users, including newbies and tech experts.
With Macube Cleaner, you can get access to a wide range of helpful tools, including large & old files finder, duplicate files finder, smart clean, etc., to manage your Mac storage efficiently. Plus, it supports an additional toolkit that offers built-in tools like similar images finder, extension manager, and filed shredder, that enables you to delete similar images, manage plugins and extensions, and eliminate files from your Mac smoothly.
Key Features
- Clean up and optimize Mac storage using advanced smart clean algorithms.
- Easily find and remove duplicate contents from your Mac within three steps.
- Protect your privacy by cleaning your browser caches and history with the help of an excellent privacy protector.
- Facilitates complete uninstall Mac apps and their associated file.
Step 1. Download and install the Macube Cleaner app on your Mac.
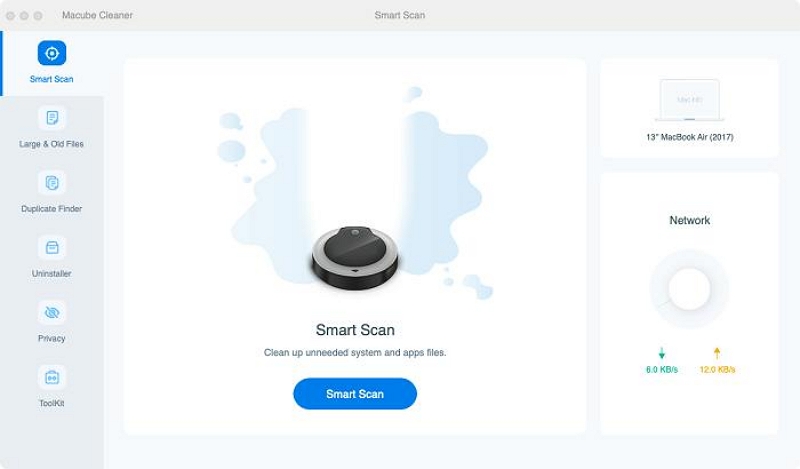
Step 2. Start the installed program and navigate to the left pane. Then, click on the Smart Scan feature.
- Click the Smart Scan button to initiate an in-depth scan of your Mac disk.
Step 3. Macube Cleaner will begin to scan your Mac for junks, caches, iMessage history, iTunes, and other irrelevant files that could compromise its functions. After that, all detected files will be displayed on your screen in different categories. You can Preview each of them by clicking the magnifying glass next to them.
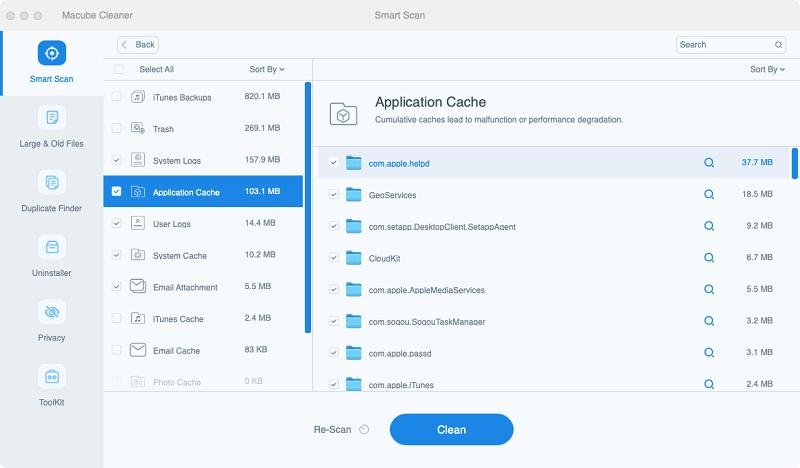
Step 4. Finally, select the junk files and other useless files and click the Clean button to clean up and optimize your Mac disk.

Conclusion
It's easy to run Mac diagnostics on your system once you understand the ideal techniques to perform the operation. In the article above, we've discussed the steps to run Mac diagnostics on any kind of Mac, including Apple Silicon Macs and Intel-based Macs. And as you’ve seen, you don’t necessarily need to be tech-savvy to get the job done.
Also, to maintain your Mac's optimal performance, we recommend you perform regular maintenance using Macube Cleaner. It offers all you need to keep your Mac operating smoothly and efficiently.
Macube Cleaner
Speed up and troubleshoot your Mac super easily with a Macube full-featured free trial!
Start Free Trial