Hi there,
A few days ago, my friend updated me about the new Mac operating system and the fascinating features that come with it. I’m tempted to install it but I’m skeptical it might be filled with bugs, which I don't want. Is there anyone who has successfully performed a clean installation of macOS Ventura? Please help!
Does the above sound familiar?
Well, Apple is one of the smartest technology companies of this century. It's well known for its creative innovations, which is why the demand for its product has skyrocketed overtime. The company introduced macOS Ventura, a new OS that features Stage Manager, Freeform, Spotlight, Safari, and many others.
While this OS update is tempting to download, many users are skeptical about it just as in the case above. The reason for such is because of the bugs that usually come with new updates. If this is the same for you too, we are here to help you, as we discuss how to clean install macOS Ventura without complicating your Mac computer.
What Is Clean Install?
Clean install is simply an installation that lets you wipe out the previous version of system software/app on your device before installing the most recent version. It's quite different from the normal OS update, which usually involves an upgrade with additional features. No data loss is incurred in this scenario.
However, clean installation, on the other hand, helps you erase your device so you have enough storage space to install the new macOS Ventura or any other app you want to add to your system. This installation also protects your device from bug attacks.
A clean installation is mostly recommended/suggested when your Mac computer system isn't functioning well. So if you feel your device has slow performance, a clean install would be helpful.
Why You Clean Install macOS Ventura
As previously mentioned, a clean installation of macOS Ventura would be mostly needed when your device isn't working at the optimal level. Clean install wipes the entire device and lets you enjoy the following:
- Stable and smooth operation with no lags incurred.
- Excellent compatibility with several applications.
- Enhanced storage space to improve system performance and efficiency.
Part 1. The Things You Need to Do Before Clean Installing macOS Ventura
Before you proceed to clean install macOS Ventura on your Mac computer, there are some things you need to put in place. Some of them include:
1.Check Mac Compatibility
macOS Ventura isn't compatible with all Mac computer systems, so checking your system’s compatibility is crucial. Here are some Mac computer systems that support this latest update:
- Mac Pro (2019 or later)
- MacBook Air (2018 or later)
- Mac Mini (2018 or later)
- iMac (2017 or later)
- iMac Pro (2017 or later)
- MacBook (2017 or later)
- MacBook Pro (2017 or later)
Now you know which Mac supports macOS Ventura, let's proceed to how to check your system’s compatibility:
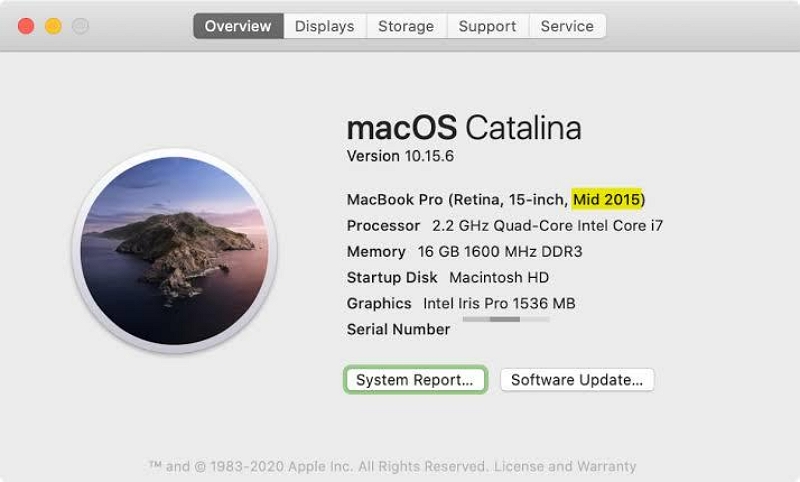
- Locate the Apple Menu icon at the upper left corner of your Mac screen and click on it.
- Select About This Mac in the drop-down menu.
- Now another screen will come up with a few details about your device. On this page, you will see your Mac’s model and year.
- For more details, tap on the More Info icon to see the display resolution, storage space and others.
2.Clean up and Back up Mac
After checking your Mac computer’s compatibility, you need to back up the files on it before you proceed to clean install macOS Ventura. This stage is crucial since clean installation usually results in data loss. So backing up your data helps you store vital data off your computer's local storage.
However, backup can take several minutes to hours to complete, so we advise that you clean up your system, so as to get rid of those useless files in bulk. You can do this manually, or automatically. But the automatic process is better, faster, and easier. All you need is a professional Mac cleaner like Macube Cleaner.
With Macube Cleaner you can easily clean up your Mac computer system from the comfort of your home. This software performs excellently as it lets you clear over 100 GB of data with just a few clicks at remarkably high speed. It works for all Mac computers, whether old or newer models. So compatibility isn't an issue.
Macube offers an array of cleaning services, such as uninstalling apps, file shredding, duplicate finder, and more- all of which work together to help you wipe your Mac. This software clears data such as and more so you have enough storage to install the new macOS Ventura.
Operating this software is pretty much easier than any other professional tool you will come across on the net- thanks to the smooth UI design and layout. All its features are properly aligned so you can quickly clear your computer easily.
Key Features:
- Macube Cleaner intelligently scans your Mac computer for useless files taking up the space, and then displays them on your screen for further action.
- 60X clean installation without compromising users’ data.
- Built with a nice and clear user interface that lets you navigate without confusion, thereby making clean installation faster than ever.
- Other interesting features; duplicate finder, uninstaller, file shredder, extension, privacy protection, and more.
Steps to Clean Up and Back Up Mac Using Macube Cleaner
With the instructional guide given here, you can easily clean up your Mac with Macube Cleaner:
Step 1: Add Macube Cleaner to the app list by downloading it from the official website, then proceed to install it. After completing the installation, run the software and select Smart Scan on the left sidebar.

Step 2: Next, Macube Cleaner will quickly read through all the content on your Mac computer, and then extract all the trash files that you can delete. Once done, the files will appear on your screen just as below:
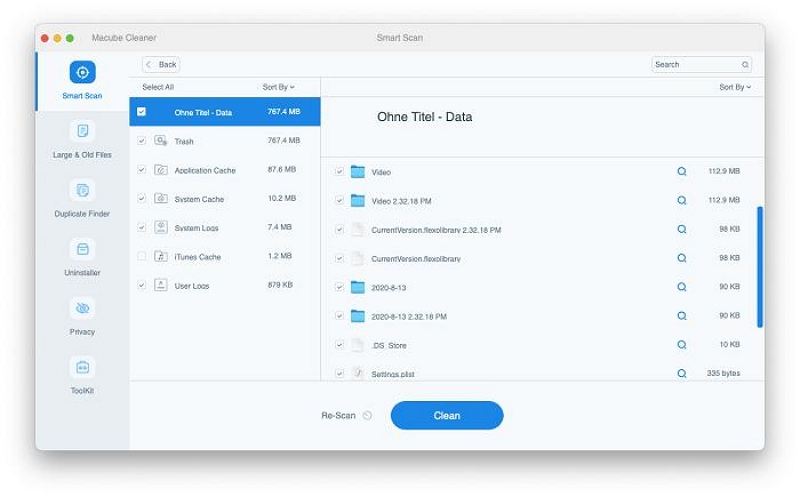
Use the magnifying glass to preview the content and the corresponding location on your system. Select the files you don't want on your Mac anymore, and hit the Clean button.
Step 3: Macube Cleaner will immediately commence the cleanup. Wait till that is finished, and the screen below pops up:
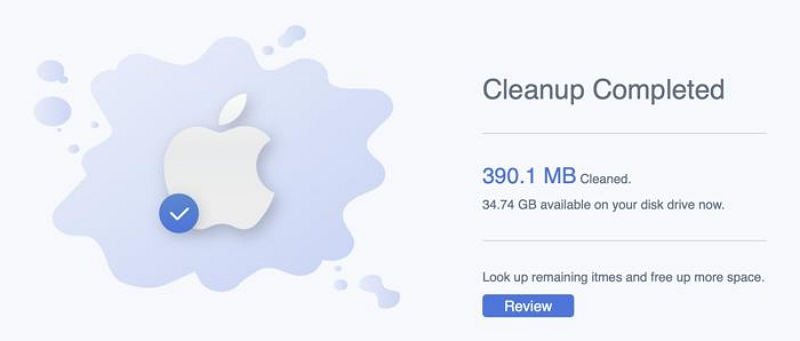
You can also scan your unwanted large files and old files to free up more space with Macube. After this, you can now back up your data files.
Part 2. How to Clean Install macOS Ventura?
Having discussed the things you need to know before performing a clean installation of macOS Ventura, let's proceed to the next thing- how to clean install macOS Ventura. Use the instructions given below to do this:
Step 1: Launch App Store on your Mac computer by simply clicking on the appropriate key. After that, select Install macOS Ventura on the screen that appears.
Step 2: Proceed to create a macOS Ventura installer on your computer. You can do that by entering a few command lines on the Terminal. Check out the directions below to do this:
- Run Terminal on your Mac computer system.
- Next, type the command line given below:
- Replace the Installer command with your USB driver’s name.
- Now tap on the Return icon, and the macOS Ventura installer will be created on your device.
- If you use M1/M2 Mac, just hold down the Power button till you find the Loading Startup Options pop-up on your screen.
- If you use Intel-based Macs, kindly hold down the Cmd + R keys when the computer starts.
- Connect a bootable USB Drive to the Mac computer system, and power it ON.
- Next, hold down the Option button till the boot options pop up.
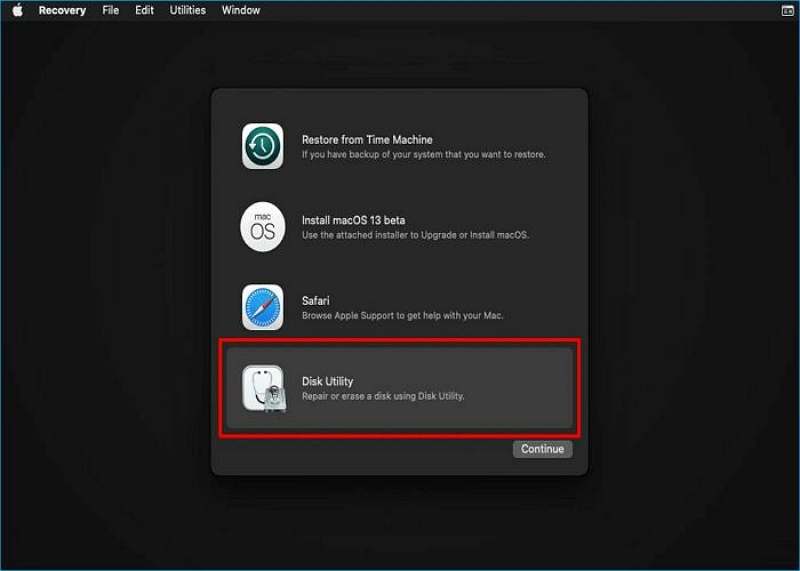
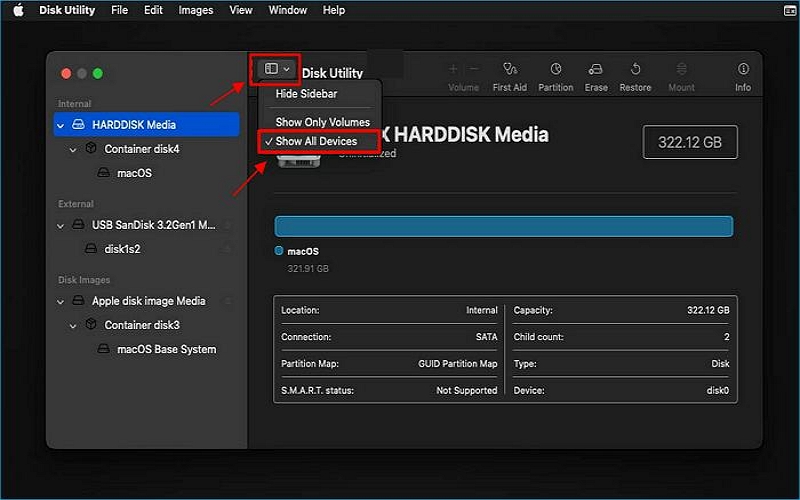
- Now select Disk Utility from the options that come up on the next page.
- Tap on View > Show all devices.
- Select your Mac's internal disk and click Erase.
- Once done, you will be required to choose a format. Select APFS format, and tap on Erase to wipe the disk.
- Now close the Disk Utility, then click Install macOS 13 Beta to perform a clean installation of macOS Ventura.
- 1-click to retrieve all your missing files, whether backed up or not.
- Alongside data recovery on Mac, you can also use it for 2000+ devices, which includes Windows, SSD, memory card, and more.
- Simple to use, and generates results at an exceedingly high speed.
- Open Finder on your computer and select Applications > Utilities > Activity Monitor.
- Select one of the process categories you will like to monitor, so as to gauge your system performance. Click CPU for the purpose of this write-up and select the format you want the result to be displayed.
- Firstly, you have to turn off the Mac computer system using the power button.
- After that, try to disconnect all external drives connected to the computer leaving the newly created Bootable Installer.
- Restart the computer and quickly hold down the Options button. Keep holding the button till Startup Manager comes up.
- Select USB Drive from the options to proceed.
- Next, it will display the options Drive Utilities, View, View ALL attached Drives.
- Choose the first Drive (also known as Apple SSD), so you can erase and format the computer as APSF.
- Now backup out Disk Utilities, and then select Install macOS to continue.
- Apply the on-screen instructions that pop up and your computer may reboot severally.
- On the final reboot, Setup Assist will display the newly installed macOS.

sudo /Applications/Install\ macOS\ Ventura.app/Contents/Resources/createinstallmedia --volume /Volumes/Installer –interaction
Step 3: Next, you have to restart your Mac, and boot it in Mac Recovery mode. Once your computer enters recovery mode, proceed to adjust the security settings on it. Here's a simple way you can use to do that:
Once some with either of the bulleted steps above, locate and click on the Utilities icon at the top of your screen then choose Startup Security Utility. Tap on No Security > Allow booting from external or removable media. After that, save the settings and turn off the Mac computer.
Step 4: Now that you’ve finished the steps above, the next thing is to clean install the macOS Ventura. To do that,
Part 3. Some Tips After Clean Installing macOS Ventura
Here are some helpful tips to use after a clean installation of macOS Ventura:
1. Forgot to Backup Some Important Data
Did you forget to back up your crucial files before carrying out a clean installation of macOS Ventura? If so, and you need to retrieve them, Eassiy Data Recovery is the appropriate tool to use.
With the software, you can easily bring back over 1000+ types of data on your Mac computer without hassles. Eassiy Data Recovery retrieves data such as photos, videos, documents, music, and more faster than any other software with or without backup.
This award-winning tool is highly trusted worldwide because of its excellent performance over time. It helps you recover data without compromising the quality. Users’ tech proficiency isn't a criterion for using this software, as the interface is nicely built with the features properly aligned.
Free Download Free Download Free Download Free Download
Key Features:
2. Check to see if your Mac has slowed down
Checking your Mac’s system performance is very important, so you know whether or not the computer is working at the optimal level. You can confirm this using the Activity Monitor on your Mac.
Use these procedures to check your Mac’s system performance:
You may need to read: [11 Solutions] Speed Up Old MacBook
3. How to uninstall macOS Ventura and return to Monetary if it has a problem
Don't like the macOS Ventura? Or does it give you issues? If your answer is yes to both questions, downgrading your device to macOS Monetary would come in handy. Here's the detailed procedure to use:
Final Words
Performing a clean installation of macOS Ventura should not be a challenge anymore, now that you have our comprehensive guide at hand. All information provided is helpful in the successful installation of macOS Ventura. Use them accordingly, and don't forget to always use the Macube Cleaner to clean your Mac before clean installation.
Macube Cleaner
Speed up and troubleshoot your Mac super easily with a Macube full-featured free trial!
Start Free Trial