"Macintosh HD drive cannot be unlocked" is a very common Mac error. When you encounter such a warning, you can find many solutions online. But none of them are as comprehensive as this article. You can read on. This article provides you with seven solutions, namely Run First Aid, Run First Aid, Find a Professional Data Recovery Service, Update macOS, Reset NVRAM, Reset password in recovery mode and Reset password in recovery mode. You can choose the solution that suits you best. Each step has detailed pictures to prevent you from making mistakes during operation and causing some bad situations.
Part 1: What is Macintosh HD & Macintosh HD Data?
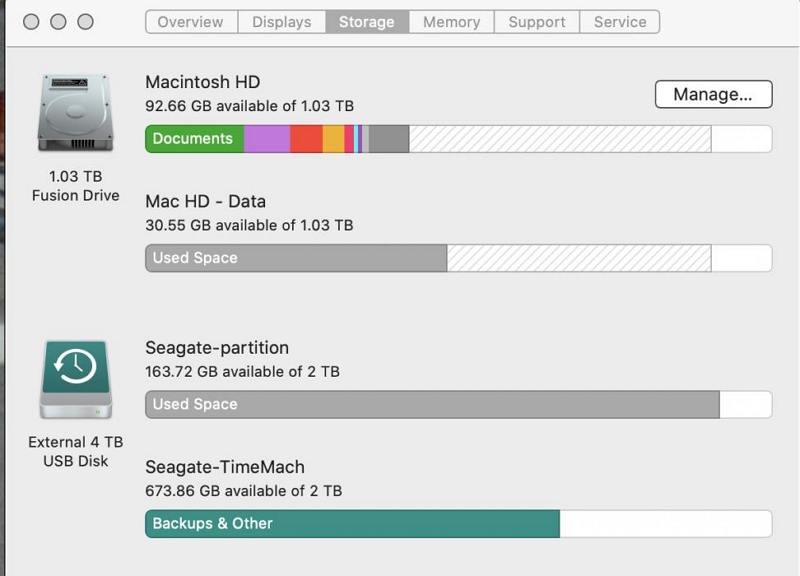
Macintosh HD and Macintosh HD Data are the two main storage volumes on a Mac computer. Macintosh HD contains the operating system, applications, and user data, while Macintosh HD Data contains user data only.
Part 2: Why does the "Macintosh HD disk cannot be unlocked" issue occur
If you receive the error message "Macintosh HD disk cannot be unlocked", it means that the volume containing the file is locked and cannot be managed by the user. You most likely have a redundant Mac OS disk on your Mac.
Macintosh HD is a storage drive that contains documents, pictures, applications, and more. It is a read-only volume, which means you cannot add, modify or delete files from it. You will lose access to files that can only be viewed when the Macintosh HD is unlocked.
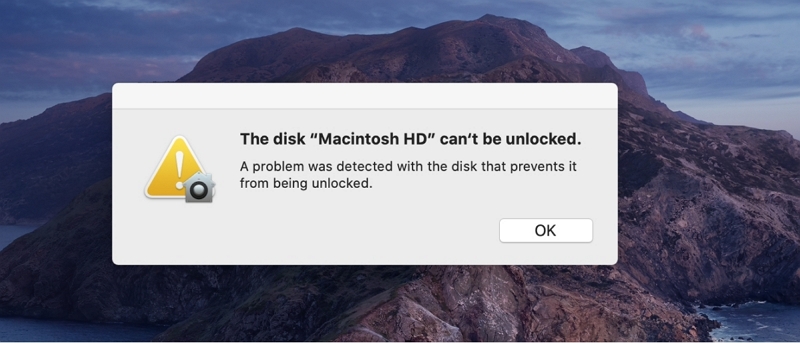
Many users encounter warnings like "The Disk Macintosh HD Can't be Unlocked", this is because your Mac most likely has a redundant Mac OS disk. You can choose to delete it, you can also upgrade the Mac OS, and you can use the computer's built-in program to perform first aid. Follow along with this article to understand what is Disk Macintosh HD and how to make this warning go away.
Part 3:How do I prepare my Mac before fixing the "Macintosh HD disk cannot be unlocked" issue
All the data in the computer may be useful to us, so we must be very cautious before fixing the problem. The suggestion in this article is to use the time machine to make a backup first. Here's how:
Step 1. Connect your external storage drive with Mac.
Step 2. Click Apple menu > System Preferences > Time Machine.
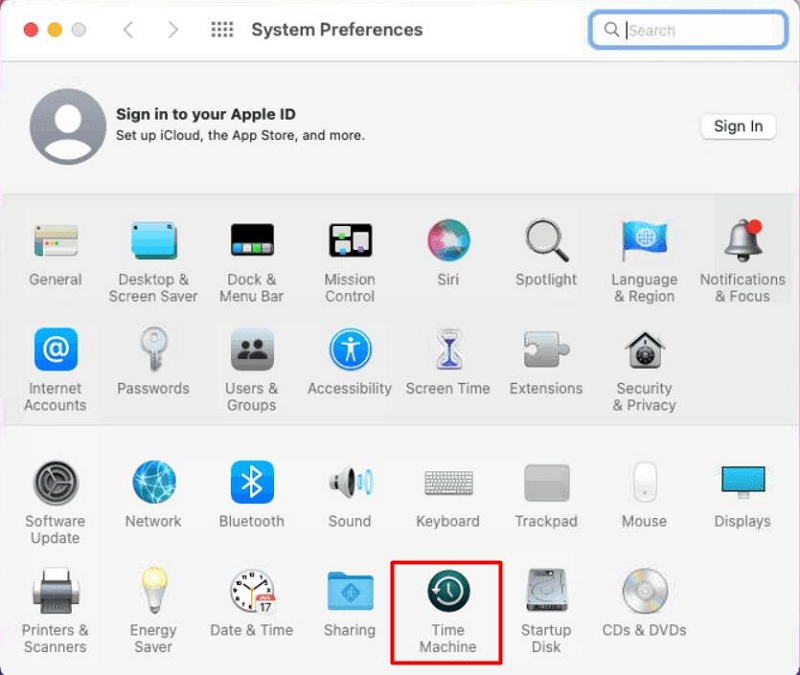
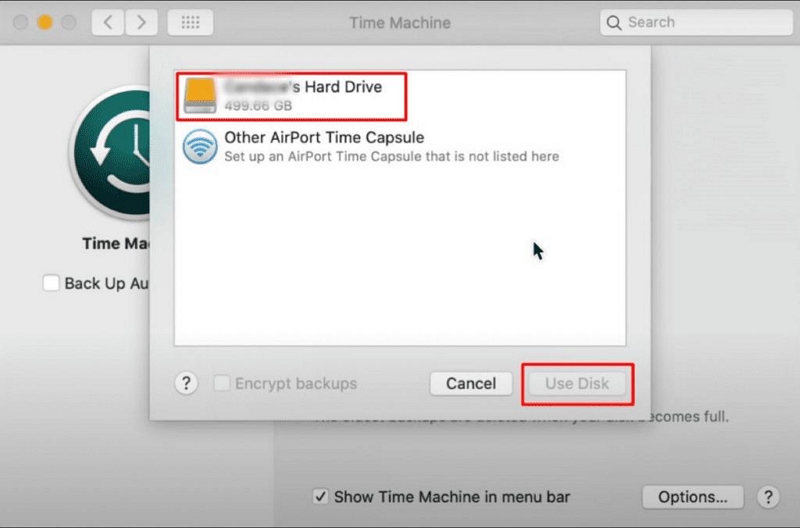
Step 3. Then Press Select Backup Disk, select your external drive name and press Use Disk.
The preliminary work for the repair was completed in a few minutes.
Part 4:7 Ways to Solve the "Macintosh HD disk cannot be unlocked" Problem
If you are sure that you have done a good job of backup, we can start to fix "Macintosh HD disk cannot be unlocked" this annoying problem. There are seven options below, you can choose the operation you like.
1. Run First Aid to check and repair Macintosh HD
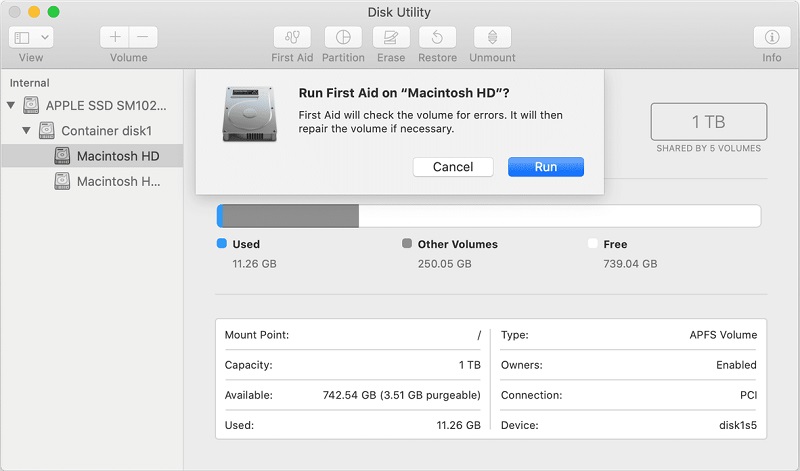
The First Aid utility can be accessed through Disk Utility and is used to scan and repair the internal hard drive, the Container, and all volumes within it. Although it may take some time, this method is the most efficient way to resolve the issue of being unable to unlock the Mac HD disk named Macintosh HD.
Step 1. Go to the macOS Recovery mode and boot your system using one of the two methods:
- If you are using an Intel-based Mac, press and hold the Command + R keys on your keyboard while your Mac restart.
- If you are using an Apple M1 Mac, press and hold the Power key on your system while your Mac reboots. Press and hold until you see "Loading boot options." Select Options >Continue to get going.
Step 2. Open the Disk Utility in Recovery mode.
Step 3. Go to the View menu from Disk Utility >> Show All Devices. It will show the desired disks and drives.
Step 4. From there, click the internal hard drive (Over the Container) situated at the left pane.
Step 5. Click First Aid.
Step 6. Run the pop-up window and let First Aid start checking the hard drive.
Step 7. Run First Aid individually for the Container, Macintosh HD volume, Macintosh HD - Data volume, and any remaining volumes. Doing so will help fix the Mac HD error.
Step 8. Make sure to include all the Containers and volumes.
Step 9. Then, at that point, reboot your Mac to check whether the "Macintosh HD data" issue endures or not.
2. Update macOS to the latest version
The occurrence of "The Disk Macintosh HD Can't be Unlocked" is most likely caused by a system mismatch, and you may need to download and update the latest system version to fix the disk-locked error.
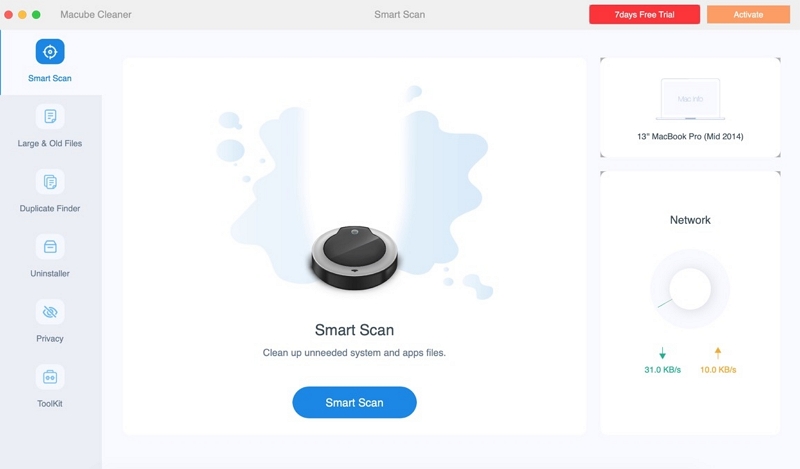
In order to avoid being reminded of "not enough space to complete the installation" when updating the system, you'd better clean up the computer's memory first. You can use Macube Cleaner, which is a cleaning software specifically for Mac. He can clean up 98.6% of the junk in Mac. You can even use it to find duplicate videos and files, similar photos, and use it to clean up Browser history, cache and attachments, as well as music and emails saved in iTunes, all have nowhere to hide.Below are the operation steps.
Step 1. Choose Smart Scan to find junk files in the entire Mac.
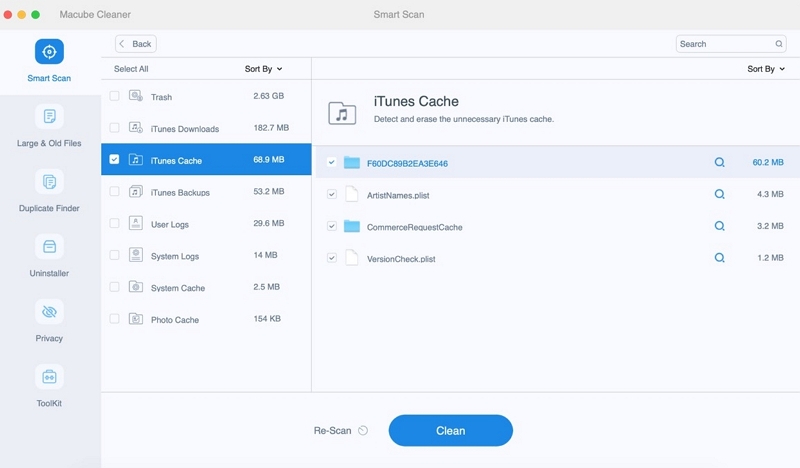
Step 2. Preview the scanned results, select the files you don't need, and click Clean.
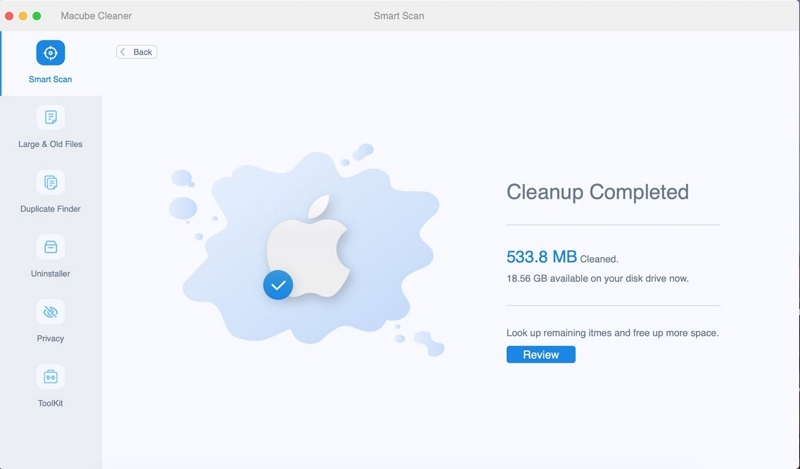
Step 3. Finally, you can see that the selected files have been completely cleaned up and your disk space has increased.
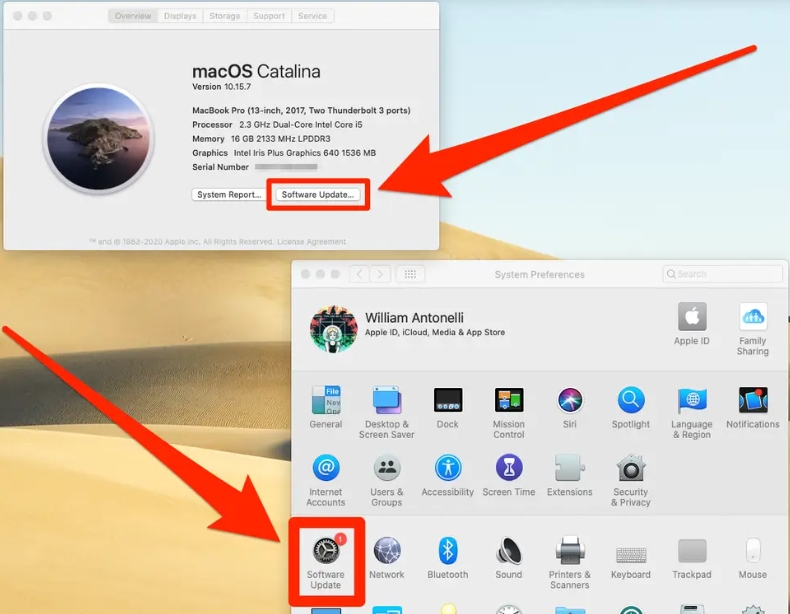
After making sure you have enough space for repair work, you can follow the steps below to reinstall macOS.
Click on the "Apple menu" > "System Settings" > “General" > "Software Update"
3. Reset NVRAM
If your Mac keeps asking for a password despite you having input the correct information, you can reset theNVRAM(nonvolatile random-access memory) to eliminate the notification. By clearing the corrupt NVRAM, you should be able to use your Mac as usual.
How to reset the NVRAM on Intel-based Macs:
Step 1. Shut down your mac.
Step 2. Hit the power button, then immediately press and hold the Command + Option + P + R keys.
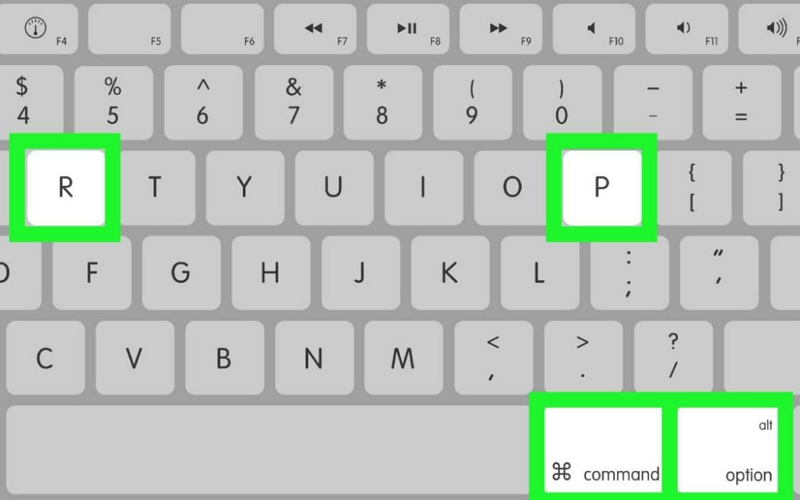
Step 3. Release the keys after about 20 seconds, during which you may hear the startup sound or see the Apple logo twice.
4. Reset password in recovery mode
If the issue persists, you can reset your password in Recovery Mode. Here, we'll introduce two ways to do it. Please choose according to your needs.
Step 1. Enter macOS Recovery by following the appropriate steps below.
a.On an Intel-based Mac: Shut down your Mac, then press the power button and immediately press and hold Command + R keys until seeing the Apple logo.
b.On an Apple Silicon Mac: Turn off your Mac, then press and hold the power button until seeing "Loading startup options" and select Options > Continue.
Step 2. Select an account and enter the administrator password. Choose one of the two ways below to reset your password, depending on whether you can enter macOS Recovery.
- If you're able to access the Utilities window where the Terminal app resides, use the following steps:
Step 1. Select Utilities > Terminal from the menu bar.
Step 2. Type the following command and press Enter:
Resetpassword
Step 3. Type your new password, give it a hint, and click Next.
Step 4. Click Restart.
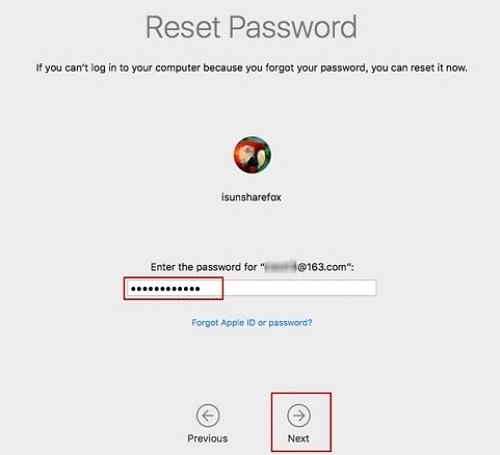
- If you can't enter macOS Recovery, you need to click "Forget all passwords?", then use your Apple ID credentials or the FileVault Recovery key to create a new password.

5. Delete extra duplicate volumes
Did you know deleting extra duplicate volumes might resolve the problem? Yes! That's right!
Here are some steps you need to follow:
Step 1. Open "Finder".
Step 2. Select "Go" from the menu, click "Utilities".
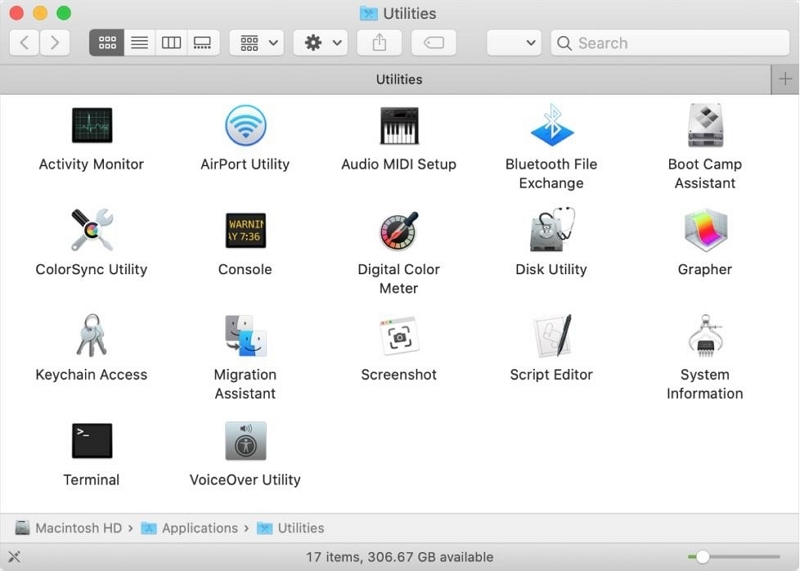
Step 3. Once again, select Disk Utility from the Utilities window.
Step 4.Locate the duplicate volume you want to erase from the list and select it.
Step 5. Press Erase.
Step 6. Enter your admin password if prompted.
6. Delete redundant volumes
Step 1. Go to macOS Recovery: Turn on your Mac, then, at that point, press and hold Command + R keys on your keyboard.
Step 2. Select a user and enter its password if asked.
Step 3. Go to Disk Utility > Continue from the utility window and click Macintosh HD in the sidebar.
Step 4. Click the Erase button in the toolbar, then, at that point, enter the following:
Name: Macintosh HD
Format: APFS or Mac OS Extended (Journaled)
Step 5. Click the Erase Volume Group button, or Erase.
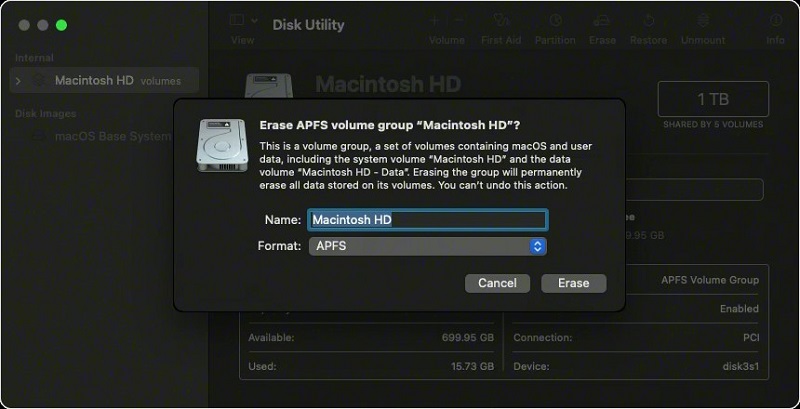
Step 6. Provide your Apple ID login information when prompted.
Step 7. After the Disk Utility is done deleting the volume, you can select other internal volumes in the sidebar and then erase them from your Mac by clicking "Delete Volume."
Step 8. During this progression, ignore Macintosh HD or Macintosh HD - Data volumes.
Step 9. Stop Disk Utility to get back to the utility window.
Step 10. Select Reinstall macOS in the utility window to start up again from the disk you erased. Install macOS by following the on-screen guidelines.
7. Find a Professional Data Recovery Service: Use Eassiy Data Recovery
Various software solutions can help you unlock the disk. But after deleting redundant volumes from Mac, all data will be lost and users might struggle to get their files back.
Free Download Free Download Free Download Free Download
If this happens to you, Eassiy Data Recovery software for Mac might help. It is such a Mac recovery tool that uses patented technology. This software guarantees a 98.6% chance of success in recovering lost files on any Mac device. You can recover any file type from Mac hard drive including pictures, audio recordings, documents, mail, and this is just the tip of the iceberg. People can also recover files from external drives and recycle bin using this tool. Get your data back on your Mac in three easy steps.
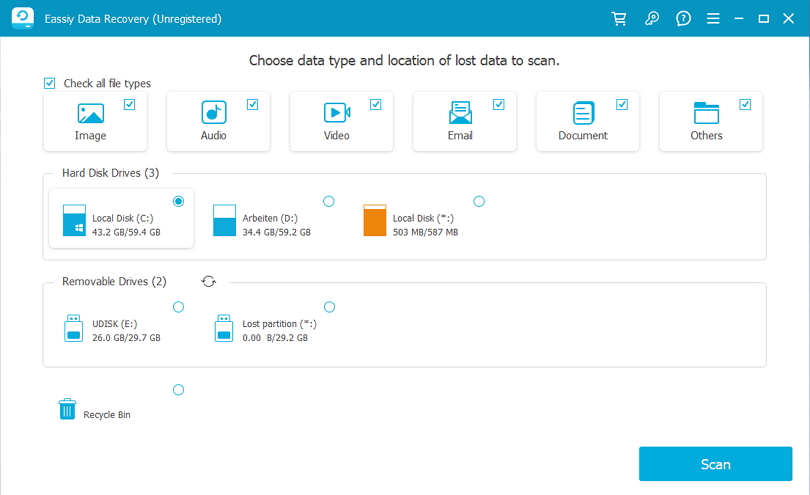
Step 1. Select Volume
Open Eassiy Data Recovery and select the type of data to recover and the volume to scan.
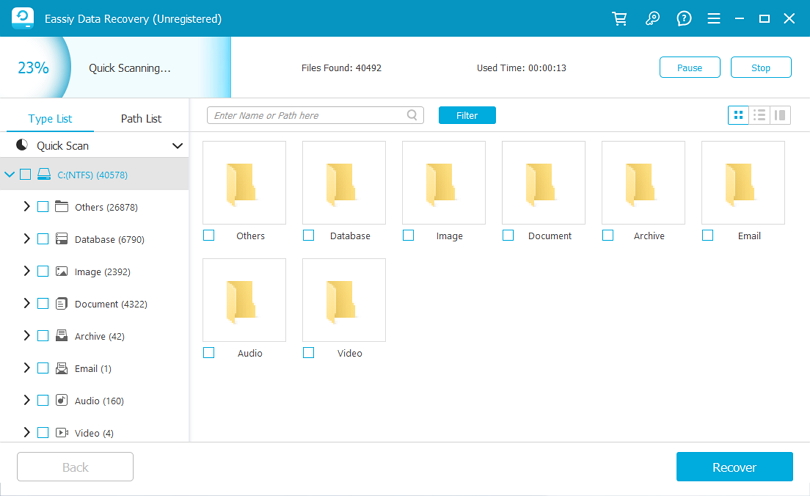
Step 2. Check the Scanned Results.
Eassiy Data Recovery has two scan methods, quick scan and deep scan. If you feel that the results of the quick scan are not satisfactory, you can perform a deep scan.
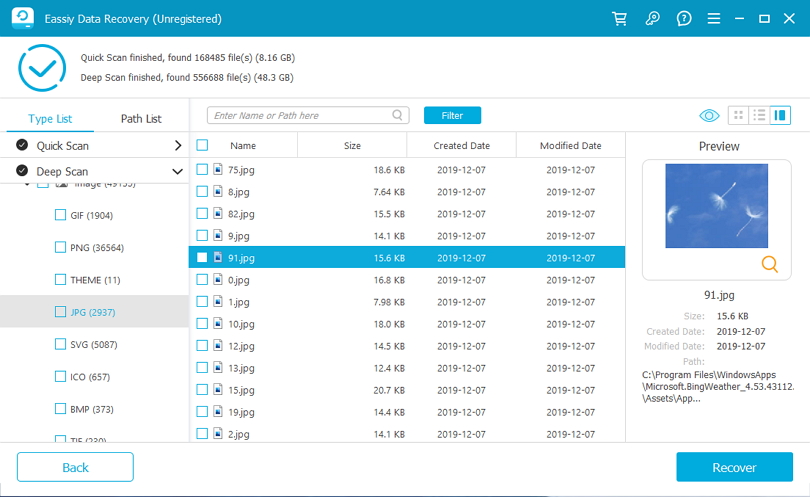
Step 3. Recover Selected Volume.
Tick the volume you want to recover in the results. Finally, restore the selected volumes by clicking on the "Recover" button.
Additional Help:
1. How to fix "Macintosh HD - Data can't be unlocked"?
To resolve the redundant Macintosh HD - Data volume issue, the common way is to delete it. How do I delete Macintosh HD data volume?
In the Disk Utility app on your Mac, select the APFS volume you want to delete in the sidebar. If Disk Utility is not currently open, click on the Launchpad icon located in the Dock, enter “Disk Utility” in the Search field, and then select the Disk Utility icon. Click the Delete Volume button in the toolbar.
2. How to prevent such warnings?
To avoid this system-related warning on your Mac, you can regularly clean up your computer's memory to make sure it always has enough space to run. In this way, there will be no problems such as stuck, unable to unlock or system cannot be updated.
You can use Macube Cleaner, an advanced Mac cleaning software. All system junk files or caches on Mac can be perfectly deleted. Duplicate files, similar photos, stubborn programs, music in iTunes can all be destroyed quickly. It can even help you clear browser history and login information, so as to prevent virus software from invading the computer and protect the security of your Mac.
Its operation interface is also very simple, the following will teach you how to permanently delete files.
Step 1. Download and start Macube Cleaner, click "Toolkit" to use files shredder.
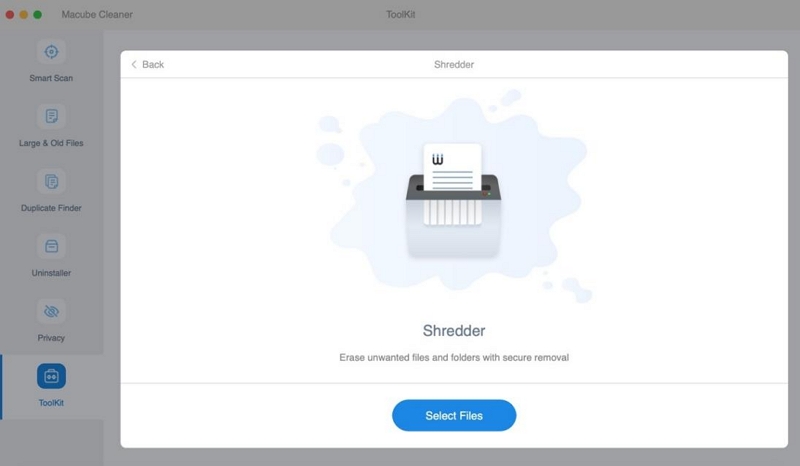
Step 2. Click “Select Files” to pick unwanted files. Then tap “Clean” and wait.

Step 3. Finally, you can see that the selected files have been completely cleaned up.
Conclusion
"Macintosh HD drive cannot be unlocked" is a very common Mac error. Here, the user cannot manage or access the drive. There are several reasons that can cause this issue like forgotten password, corrupted files, system mismatch etc. There are 7 solutions to this problem. For example, you can wipe redundant volumes or fix disk problems. You can also update macOS to the latest version. If you experience data loss while applying these solutions, turn to Eassiy Data Recovery for help. It is a powerful, easy-to-use and reliable data recovery software. Also don't forget to remember to use Macube Cleaner to clean your Mac regularly to ensure its smooth operation
Macube Cleaner
Speed up and troubleshoot your Mac super easily with a Macube full-featured free trial!
Start Free Trial