Our movie collections are no longer on shelves but stored on our Mac computers. As we collect various movies, TV shows, and videos, it becomes really important to find a good way to move around, arrange, and take care of these valuable films. In this guide, we will discuss how to find, delete and manage movie on Mac.
Discover how the Movies folder Mac works, like a special place for your movies. Arranging your movies isn't just handy, it changes things for the better. Find out how to neatly handle your movie files for easier access, storage, and better looks. Become an expert at organizing movies on your Mac to tidy up and create your digital entertainment center.
Part 1: Locating Your Movies Folder Mac
Usually, macOS keeps videos in a folder called Movies. You can find this folder by using Finder. Here are the steps to locate your movies folder Mac –
Step 1: Press the icon that looks like a happy face in blue and white on the Dock.
Step 2: At the very top of the screen, in the menu bar, choose the "Go" option.
Step 3: Choose "Home" from the drop-down menu, and it will lead you to your folder.
Step 4: In the main folder on your computer, you'll find different folders like "Desktop," "Documents," and "Downloads." Keep scrolling until you see the folder called "Movies." It will have an icon that looks like a strip of film.
Normally, the "Movies" folder is found in the same place as your main user folder, along with familiar folders like "Desktop," "Documents," and "Downloads."
Remember, the names of the folders are sensitive to capital letters. So, be sure to search for "Movies" with a big "M."
If you can't see the "Movies" folder where your files are stored, it could be because someone moved it or removed it. If that happened, you might have to look around your computer or check the trash to find it.
Keep in mind that on macOS, you can change where folders are and what they're called. This means the folder might have been put in a different place or given a new name.
Part 2: Understanding Mac Movies Format and Storage
A. Common Movie Formats
Mac computers can play many types of movie files. Some of the common ones are:
- MP4: Popular format for good quality and reasonable file size, works on various devices.
- MOV: Suited for Macs and QuickTime Player.
- AVI: Works on Windows and Mac with possible additional software.
- MKV: Supports various multimedia, may need extra components on Mac.
- WMV: From Microsoft, requires workarounds for Mac.
- FLV: Used for online streaming, better to convert to newer formats.
- WEBM: Web format, not universally supported on Mac.
B. Optimal Storage Locations
The best place to keep your movies depends on different things like the type of movie, how you use them, and where you can store them. Here are some ideas:
- On your computer's hard drive for frequently watched movies.
- An external hard drive for rarely watched movies to save space.
- Shared storage for accessing movies across multiple devices.
- Online storage services like iCloud Drive, Dropbox, or Google Drive for remote access.
- Copying digital versions of DVDs or Blu-rays onto your computer or another hard drive for convenience.
Remember, if your movies are really big and need a lot of space, think about how much space you have and how you use your movies. Also, it's a good idea to make copies of your movies, especially if they're special to you.
Part 3: How to Organize and Manage Your Movies Mac
A. Creating Subfolders
To make it easy to find your movies, you can put them into different folders based on their types like action, comedy, drama, or science fiction. Here's how you can create subfolders:
Step 1: Click on the "Finder" icon on your computer's taskbar to open a window that helps you find and manage your files.
Step 2: Find the "Movies" folder on your computer. If you're not sure where it is, follow the earlier instructions to locate it.
Step 3: Right-click inside the "Movies" folder or use the top menu to create a new folder.
Step 4: Give the new folder a name that tells you what kind of movies you'll keep inside, like action, comedy, or others.
Step 5: Move your movie files by dragging them into the right folders. Or you can right-click on a movie, choose "Cut," then go to the right folder and right-click again to "Paste" it.
When you put your movies in folders, you won't have to look through a big jumble of files. It will be much easier to find the kind of movie you want to watch.
B. Adding Metadata and Descriptions
Making your movie files easier to recognize and find can be done by adding extra information and explanations. On a Mac computer, you can use the "Get Info" tool to add this extra info:
Step 1: Right-click on the movie file you want to add information to. Then pick "Get Info."
Step 2: A window titled "Get Info" will appear. There are spots where you can put in different kinds of details. These might be things like the "Name" of the movie, what "Genre" it belongs to, "Comments" about it, the "Year" it was made, and more.
Step 3: You can use the "Comments" section to write a short explanation about the movie, its story, or anything else important. This is useful for keeping track of your collection.
Step 4: You can also edit other parts of the details, like the movie's name, type, when it came out, and even add a picture for the cover. Having this info makes it easier to quickly find your movies.
Step 5: Once you've added or changed the information, click the "OK" button to save the updates.
Adding more information doesn't just help you keep things organized, it also makes watching movies more interesting because you'll know more about each one.
C. Delete unwanted Movies folder Mac
1. Smart way to delete unwanted movies or duplicate large videos
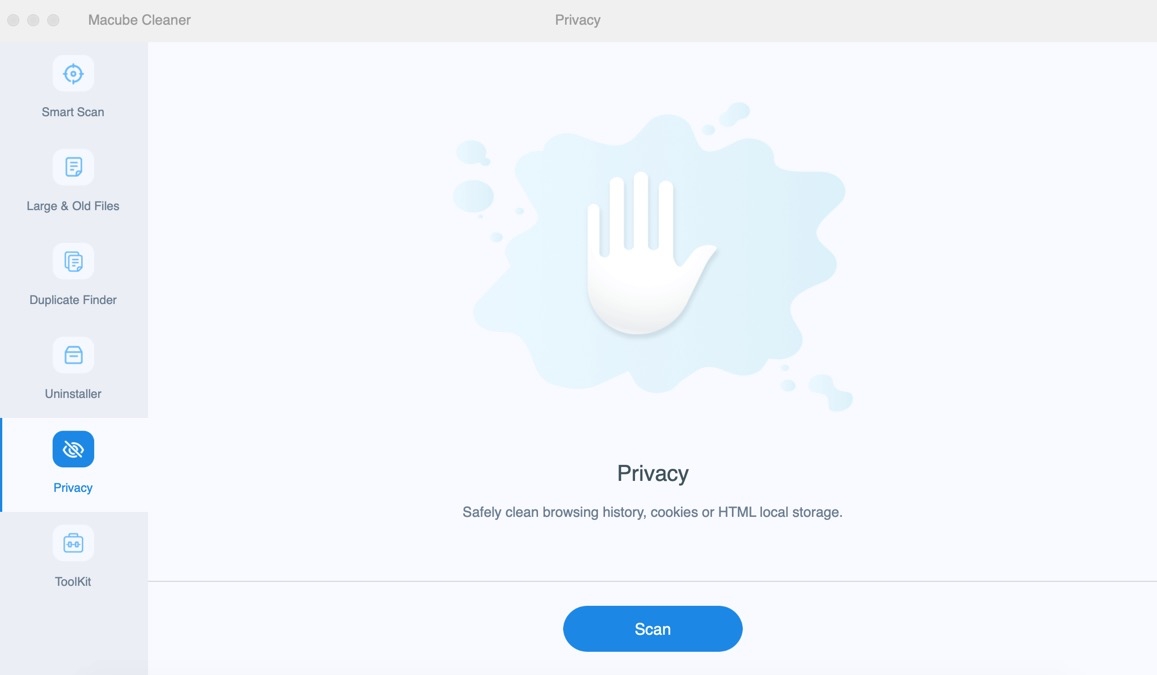
Lots of people prefer an easier way to get rid of movie files completely instead of doing it themselves, especially when the files are large. Finding and deleting them one by one can take a long time. Luckily, there's a tool that can help with this called Macube. This program is commonly used to clean up a Mac and make space, and it's good for deleting big movie files too. This Mac cleaner has various tools like junk cleaning, removing duplicates, and privacy protection. It's good at finding and deleting extra files in important parts of macOS like iTunes, photos, mail, browsers, and old big files. You don't need many apps anymore. Macube does everything in one strong package for your Mac's optimization.
Features:
- Make your private stuff more secure by getting rid of your browser's saved stuff like websites and history.
- Get back all the space that an app took up, even more than usual.
- Take apps off your Mac completely, without leaving any app leftovers.
- Find big and old files on your Mac easily by clicking just once.
- Provides a clear list of files so you don't delete the wrong ones by mistake.
Here are the steps to delete unwanted folders or large files on Mac –
Step 1: Get this program on your Mac by downloading and installing it.
Step 2: Open the program and choose "Large & Old Files" on the left side.
Step 3: Press Scan to find all your big movie files.
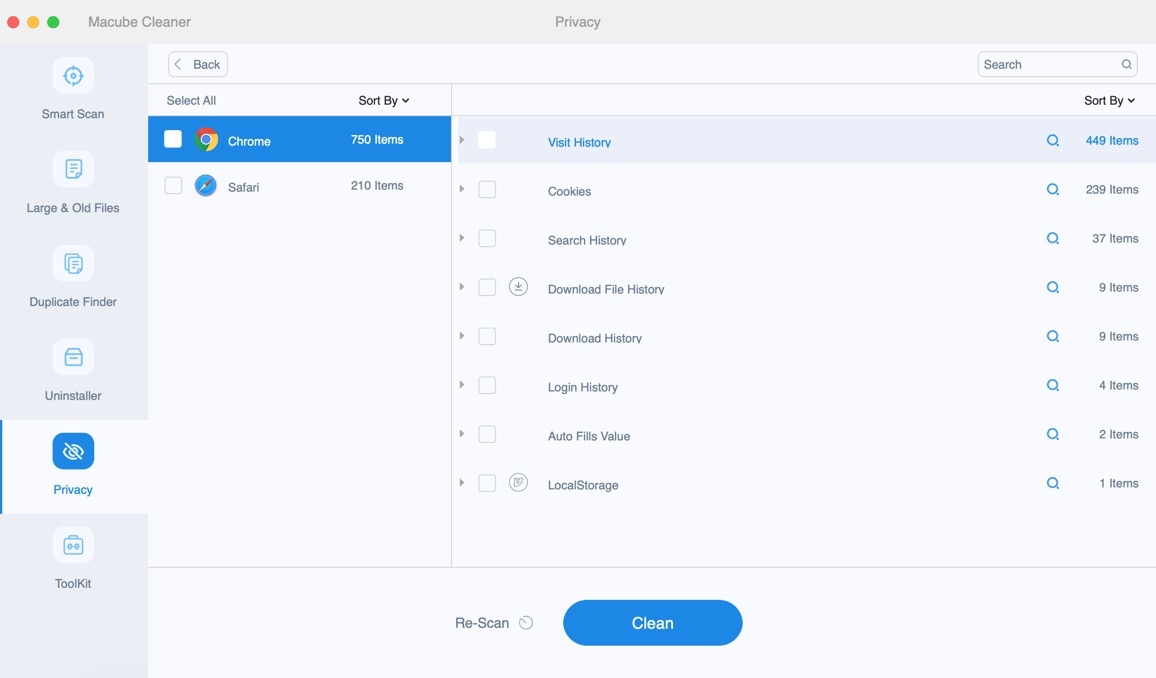
Step 4: You can arrange the files by size or name by clicking Sort By. Or you can type in the movie file format like MP4 or MOV to only see those kinds of files.
Step 5: Choose the stuff you want to get rid of, then tap Clean.
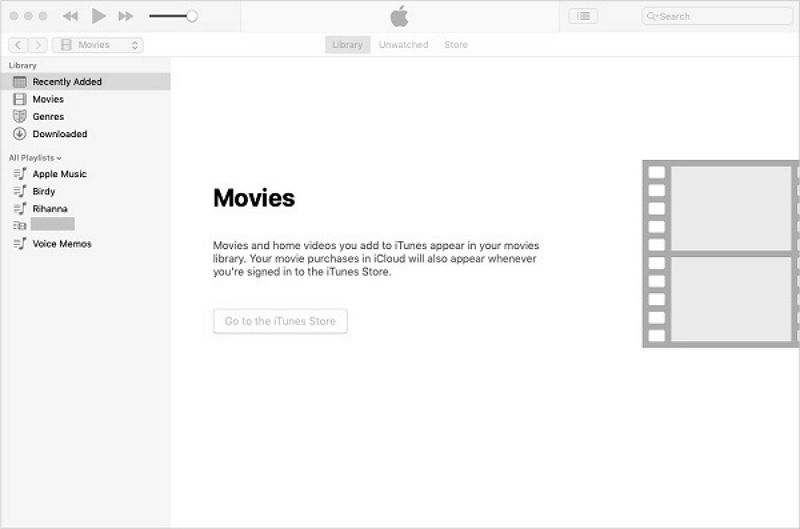
2. Delete movies from iTunes
If your Mac has an older version than Catalina, you can still use iTunes. If you have iTunes, you can take out movies from your collection. To get rid of movies from iTunes, do these things:
Step 1: Open iTunes and then, click on Library.
Step 2: Press the main menu button and pick "Movies."
Step 3: Find and pick the videos you want to get rid of. Then, click Delete. Or, you can also hold down the Control key and click on a video, then choose Delete from the library.
Step 4: Make sure you want to delete the file if asked.
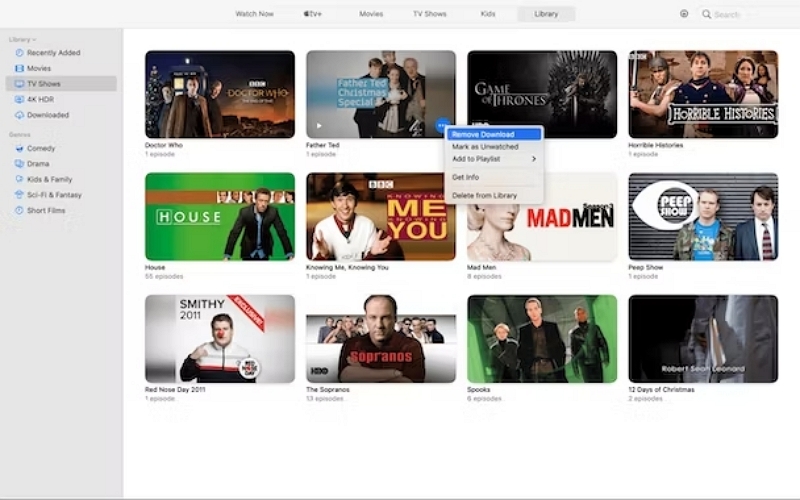
3. Delete movies in the Mac Apple TV app
If you get movies or TV shows from Apple TV and save them on your Mac, they're like video files. Here's how to delete movies in the Apple TV app –
Step 1: Open the Apple TV app and click on the Library tab.
Step 2: Hover your computer's cursor over the movie or TV show you wish to delete.
Step 3: Press the button with three dots that says "More."
Step 4: Pick the option to delete and then click on it.
Part 4: Search all Videos on Mac and Managing Movies
A. Method 1: Using Spotlight for Quick Searches
Spotlight is like a smart search tool on your Mac computer. It helps you quickly find files, apps, and more. Here's how to use Spotlight to find movies:
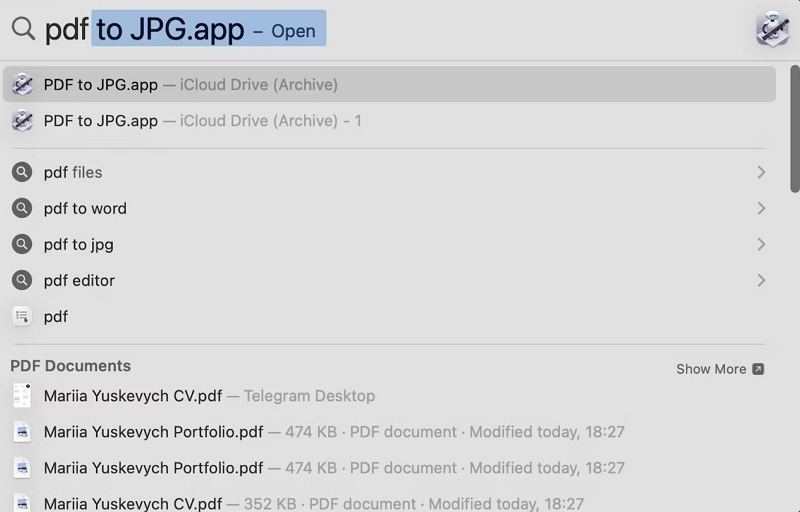
Step 1: You can open Spotlight in two ways: press Command + Space on your keyboard or click the magnifying glass in the top-right corner of the screen.
Step 2: Once Spotlight is open, type the name of the movie you want. Spotlight will show suggestions as you type. If the movie's name is unique, it should be at the top. Click it to open the movie.
Step 3: If the movie isn't at the top, press Enter. This shows all the results. Scroll to find your movie.
Step 4: If you don't remember the movie's full name, use related words like actor names or genre. Spotlight will try to match these.
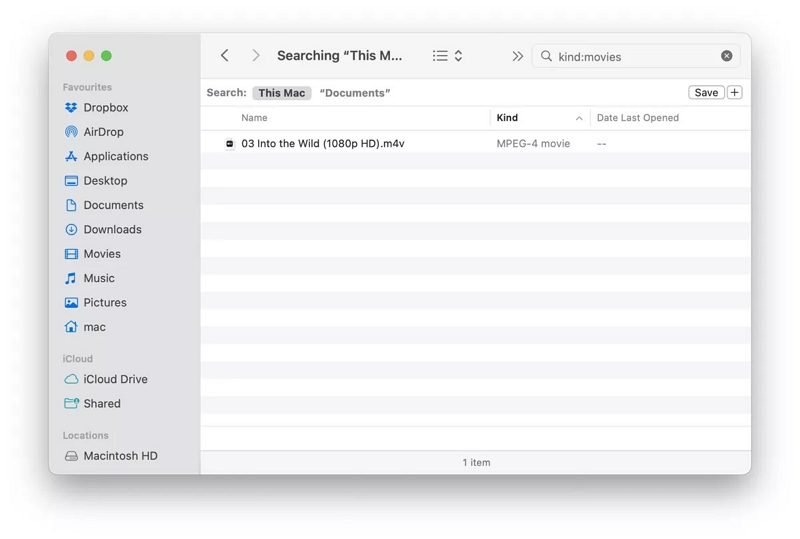
Step 5: You can use special instructions to narrow down the results. For example, use "kind:movie" to search only for movie files.
B. Method 2: Sorting and Filtering Movies
Finder is like the main tool on your Mac for finding and organizing your files. If you have some movie files and want to make them easier to find, here's how you can do it:
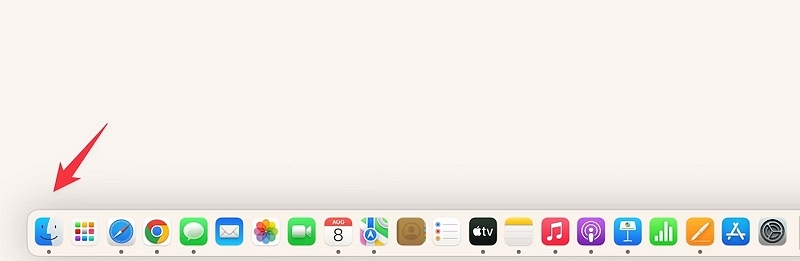
Step 1: Find and click on the blue and white smiley face icon on your screen.
Step 2: Go to the place where you've put your movie files. This could be in your Documents, Movies, or another folder.
Step 3: Click on the labels at the top of the Finder window to arrange your movie files.
Step 4: At the very top of your screen, look for the "View" menu. Click on it, and then pick how you want to see your files - as big pictures, as a list, or in columns.
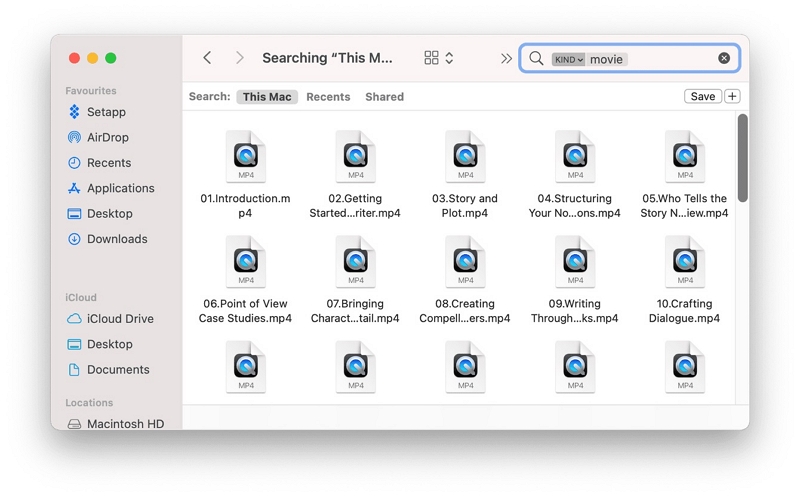
Step 5: Go to the "View" menu again and pick "Show View Options”. In this new box, you can set up special rules to only show certain types or sizes of files. To only show movies, click on "Kind" and pick "Movies."
Step 6: Look at the top right corner of the Finder window - there's a search bar there. You can type in the name of a movie or other things you remember, and Finder will only look for those in the folder you're in.
- Guide users on sorting and filtering options within Finder.
Part 5: Optimizing Your Movie-Watching Experience
A. Choosing the Right Media Player
Picking the best media player can make your movies more enjoyable. Check out these media player apps:
- VLC Media Player: Does a lot, many people use it, works with different video types, is good quality and you can change how you use it.
- IINA: Easy macOS player, looks nice, plays smoothly, and can also stream online.
- Plex: Not just a player, it sets up your stuff neatly and you can watch far away.
- QuickTime Player: Simple choice for Mac, not heavy, and plays common videos well.
- MPV: Simple player, shows good quality, can change things, works with different videos, and has advanced choices.
B. Considerations for Streaming and Downloading
When you want to watch or save movies on your Mac, remember these tips:
- Streaming Sites: Use good internet for places like Netflix, Amazon Prime, and Disney+. Each needs a certain app or browser.
- Saving Movies: Some let you save for watching without the internet. Check how long and the rules.
- Quality: Faster internet means better picture (like clear), but uses more internet.
- Internet Use: Watching needs the internet, so be careful if you don't have a lot. Save stuff on Wi-Fi.
- Legal Stuff: Only do legal things. Copying movies illegally is against the rules.
- VPN: If you're far away or want to see different things, a VPN can help. Pick a safe one.
Make your Mac movie time the best by picking a good player and thinking about these things.
Conclusion
In this guide, we've learned about moving movie collections from shelves to Mac computers. It's important to organize and enjoy these special films well as our collection gets bigger. We've looked at the Movies folder on Mac, which is like a special place for movies. Keeping things tidy makes watching movies easier and helps store them better.
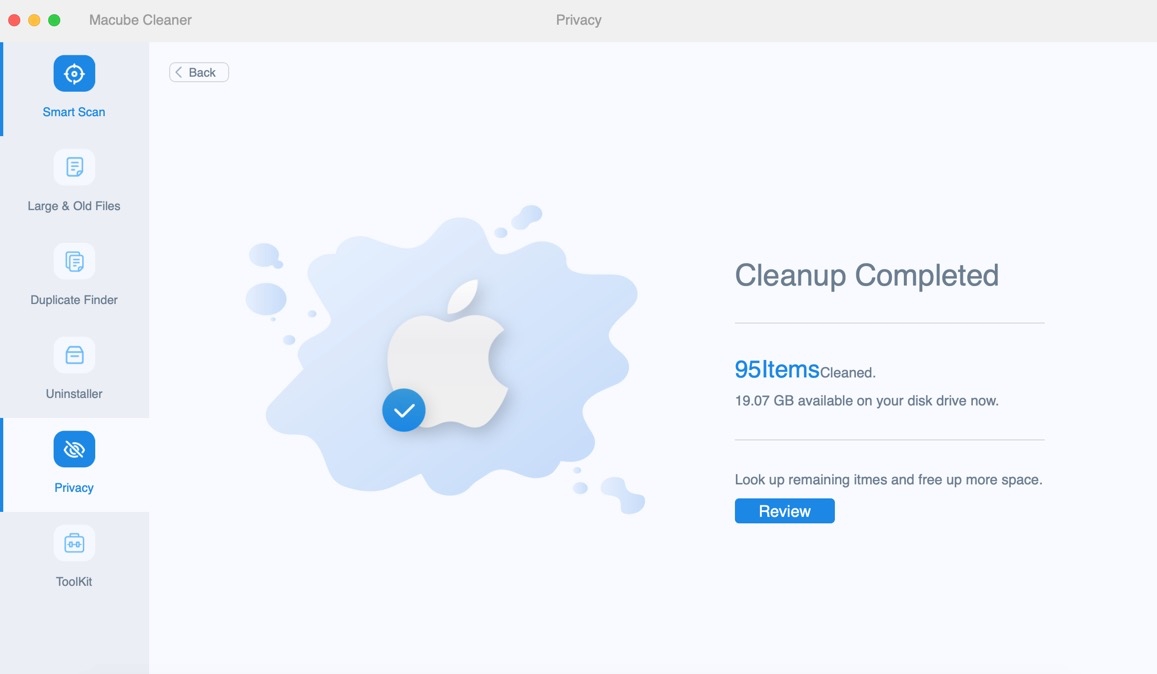
Taking care of your movies makes them more enjoyable and easy to find. Don't forget to make folders inside folders, add details about the movies, and use Macube Cleaner to keep your Mac working well and give you more space. This handy tool helps you tidy up your Mac in a smart way. It can clean out large movie files and give you more space, making your computer work better.
Macube Cleaner
Speed up and troubleshoot your Mac super easily with a Macube full-featured free trial!
Start Free Trial