"Hi there, recently, Spotify has been malfunctioning. It’s either unresponsive to clicks or stops working for no reason. I tried checking my Mac to see why such an issue would occur, only to discover that the Spotify streaming platform has too much cache data which needs to be cleared for the app to function at optimal level. Please how do I clear Spotify caches on Mac?"
Like every other installed app, Spotify also keeps a record of your streaming activity in a folder called cache. Some of the activities stored include streaming history, recent streams, and many more, all of which pile up to take up a significant portion of your mobile or computer memory space temporarily.
While the storage consumed by Spotify cache is temporal, it can cause the streaming platform to malfunction, just like in the scenario shown above. If you are faced with a similar challenge on your Mac computer, this post is for you. Here, we discuss in detail everything about Spotify cache, and how to clear Spotify caches on Mac. Read on!
Part 1. Everything You Need to Know About Spotify Cache
What is Spotify Cache?
Spotify cache will contain info such as music download history, most streamed songs, recently added music, favorite albums, and several others. So we can put that Spotify cache as the track record of all the activities you’ve carried out while using the music streaming app.
Why Does Spotify Take So Much Caches?
If you stream or download music often on this platform, you should be ready to forfeit a large portion of your storage to caches, as Spotify usually records your activities in several megabytes/gigabytes.
Reasons for Deleting Spotify Cache on Mac
Here are some of the reasons why you need to manage Spotify caches on your Mac computer:
- Optimize Mac Storage
The speed of operation of every electronic gadget, including Mac, depends on how much RAM and internal storage it has left. And since the Spotify cache can take up a great portion of your temporary storage (usually RAM), your device can start running at a slow pace or even show some error.
- Improve the Performance of Spotify
Spotify cache affects the streaming platform itself. You may start experiencing issues like sudden breakdowns in Spotify operation, Spotify unresponsive to clicks, and many other errors when the cache is in excess. To fix this, you need to manage your Spotify caches.
Part 2. Different Ways on How to Clear Spotify Cache on Mac
There are multiple ways to manage Spotify cache on Mac, but this section will introduce you to the best 2, which include the automated and manual approach. Check out which technique suits you and follow the guide underneath carefully.
Way 1: How to Clear Spotify Cache from Mac Using Macube Mac Cleaner
Macube Cleaner is a professional system cleaning suite designed specifically for Mac users to manage and optimize storage. This software offers a simple yet automated approach to handle all the junk including Spotify caches and useless data like duplicate images which takes up storage on your computer.
With the interactive interface, you can easily create several gigabytes of storage on Mac without leaving your comfort zone. No need to reset your system before rescuing it from unwanted data. Macube has got your back, as it offers 8 cleaning modes that you can choose from to clean your system.
Key Features
- Detects several gigabytes of Spotify caches and clear them without compromising other data.
- Offers a 7-day free trial for you to test all the cleaning features.
- Effectively protects your privacy by permanently erasing sensitive files.
- Effortlessly removes stubborn and undeletable files.
Steps to Clear Spotify Caches from Mac with Macube Cleaner
Make sure you have the most recent version of Macube installed on your Mac, then follow the steps below to clear Spotify caches:
Step 1: Open Macube Cleaner, and hit the Smart Scan tile on the left hand panel.

Proceed to the bottom of your screen and hit Smart Scan again, so the software can look through your entire storage for Spotify caches.
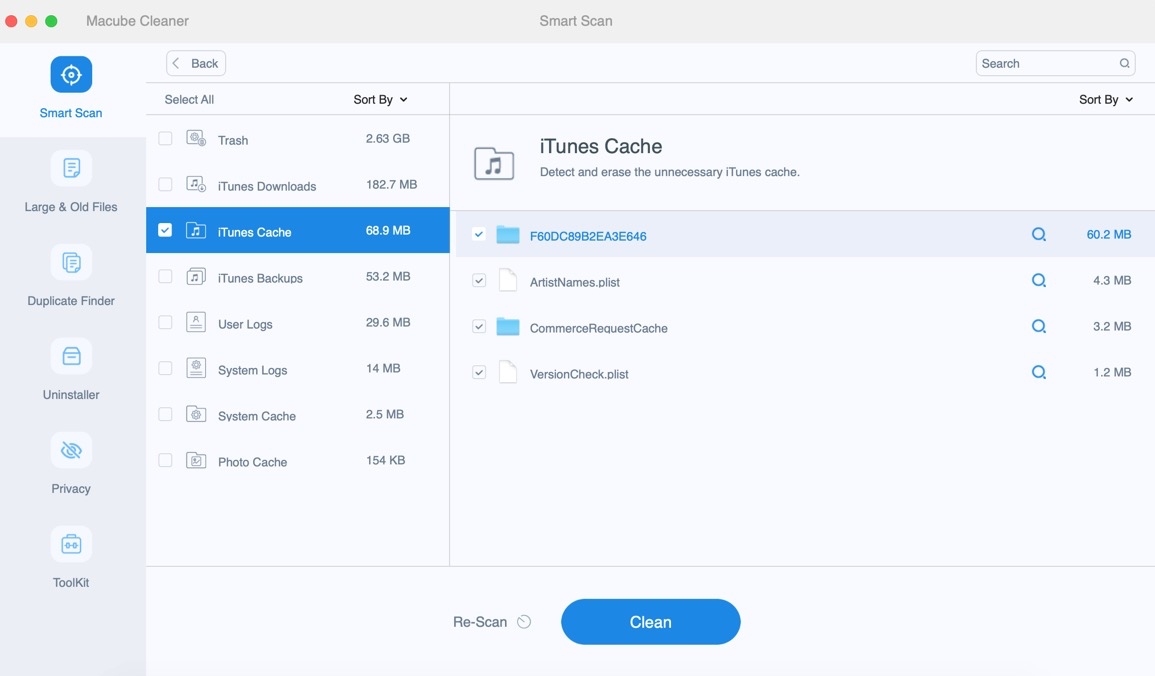
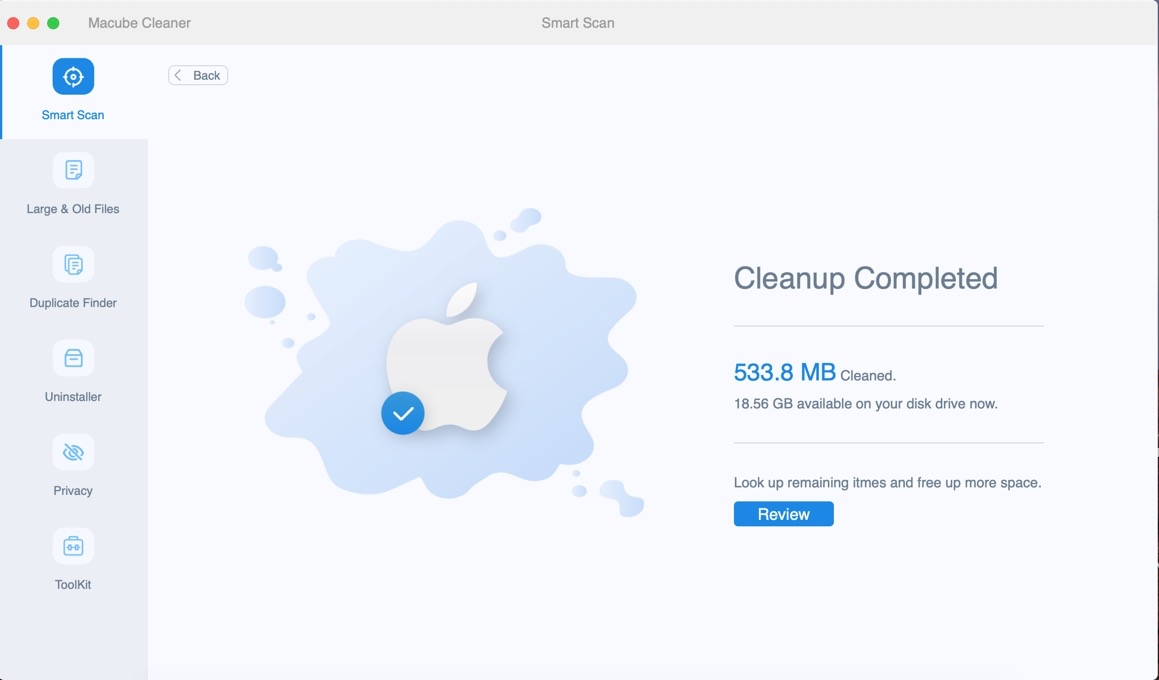
Step 2: When the scanning is finished, select Application Cache on the left and check Spotify cache on the right hand panel. After that, hit the Clean button and Macube Cleaner will initiate Spotify cache deletion in no time.
Way 2: Manually Clear Spotify Cache on Mac
For folks who don't want to install a Mac cleaner, you can still clear the Spotify cache from your system. This is a manual process which can be done directly from your Mac computer. Use these steps to clear Spotify cache manually:
- In the Dock panel, locate and click on the Finder icon.
- Navigate to the upper left corner of your screen, and hit the Go icon, then select Go to Folder from the menu that unfolds. Alternatively, you can press down Command + Shift + G simultaneously to open the Go to Folder.
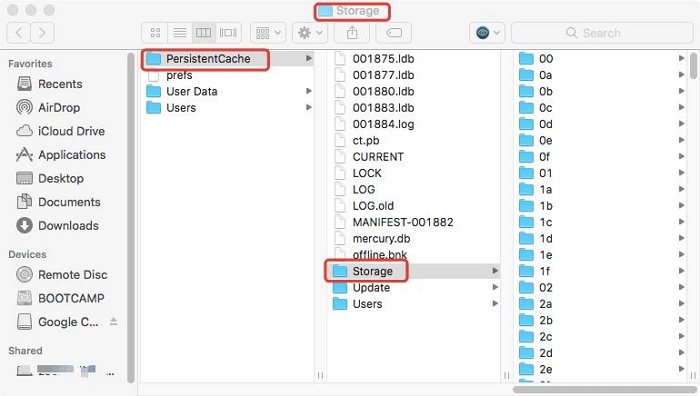
- Next, in the search bar, type ~/Library/Application Support/Spotify/PersistentCache/Storage to launch the Spotify cache.
- Proceed to delete the caches. After that, open Trash and empty the Spotify caches you recently deleted.

Part 3. How to Transfer Spotify Music to External Hard Drive for Freeing Up Storage
Instead of deleting Spotify cache to manage and optimize storage on your Mac, you can consider transferring Spotify music to an external drive. This solution helps you keep a record of your favorite Spotify songs on another media so you don’t lose them while clearing caches.
To do this, follow the instructions below:
- Firstly, copy the Spotify music from the appropriate storage.
- Grab a USB Drive or another external storage you have, and connect it to your Mac computer via the USB port.
- Once done, launch Finder by tapping the corresponding icon in the Dock panel. Alternatively, you can hold down Command+ Space to launch the Spotlight index, and enter Finder in the search bar.
- Locate the USB Drive on the left sidebar, and click on it.
- Now, paste the copied songs into your preferred location on the USB Drive, and wait for the process to complete. After that, proceed to eject the USB Drive, then delete Spotify caches with any of the aforementioned solutions.
Part 4. FAQs
Q1. How do I reduce Spotify cache size on my Mac?
Reducing Spotify cache size is one of the many professional ways to manage storage on Mac and optimize the operation of the music streaming app. To do this,
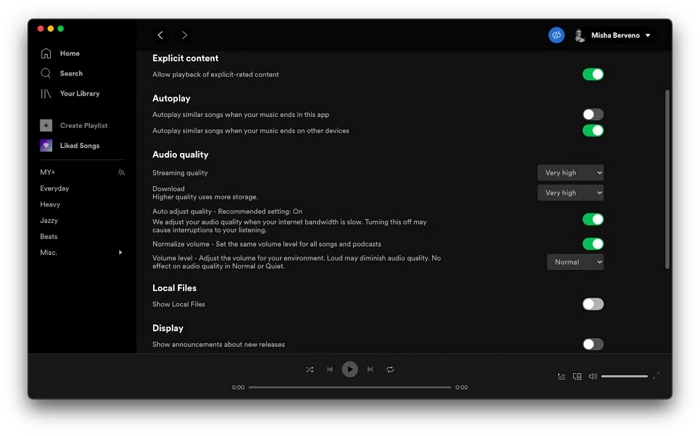
- Go to Spotify on your Mac, and head to the Settings panel by holding down Command + , buttons simultaneously.
- Next, navigate to where you have Audio Quality and change it from Very High to a lower format.
Q2. How often should I delete the Spotify cache on Mac?
You should delete Spotify caches on Mac occasionally. If possible you should perform the operation immediately after listening to your favorite music on the Spotify app so you don’t forget and cache doesn’t build up on your system.
Q3. What happens when I clear Spotify caches?
Once you proceed to delete Spotify caches, all of your activities, including recent downloads, most played songs, and more will automatically clear from your system. However, in the future, when you use Spotify again, caches will build up.
Conclusion
There you go with the 3 simple yet professional techniques you can follow to clear Spotify caches on your Mac. All techniques are simple to comprehend and apply. However, our best option is the one with Macube Cleaner. The software handles all types of system junk and unnecessary data that's worth clearing from your device.
Hot Articles
Macube Cleaner
Speed up and troubleshoot your Mac super easily with a Macube full-featured free trial!
Start Free Trial