Nowadays, we take a lot of photos, but it's hard to keep them organized on different devices. That's where iPhoto Merge Libraries comes in. The iPhoto Merge Libraries changes how you manage photos. It combines different photo collections so that you can easily find and share them. It also helps you save space by getting rid of duplicate photos. With so many gadgets and online services, our photo collections get bigger, but they also get messier. This article talks about the challenges of managing lots of different photo collections and why it's a good idea to merge libraries in photos. In this guide, we will teach you how to merge photo libraries Mac.
Part 1: Why Merge Photo Libraries?
Combining your photo collections has many benefits that make handling your photos simpler and tidier:
- Easier Access: When all your pictures are in one place, you can quickly find and see them without checking various devices.
- Sharing Made Simple: Merging your photo sets makes it effortless to share pictures with your friends and family. You won't need to switch between different groups of photos.
- More Storage Space: Combining libraries get rid of duplicate photos, freeing up space on your devices and keeping only the best ones.
- Better Storytelling: When your photos are together, it's simpler to tell a clear story or show events in order.
- Managing Made Easy: Instead of handling different sets of photos separately, you can do tasks like organizing, tagging, and editing all in one place.
- Safer Backup: Backing up one library is safer and more convenient than managing backups for many scattered ones.
Overall, combining photo libraries makes managing your photos simpler, helping you find, organize, and share your special memories more easily.
Part 2: Preparing for iPhoto Merge Libraries
A. Backing up Photo Libraries
Before you start combining your photo collections using iPhoto Merge Libraries, it's really important to make a copy of your current sets of photos. This step is super important because it makes sure that your special memories are safe in case anything unexpected happens while you're putting the collections together.
B. Organizing Photos
Getting your photos organized efficiently before putting them together can make the combining process easier and give you a library that makes more sense. Gather and review all your photos, removing unwanted ones, and then organize them into folders or groups based on their content. Additionally, add tags or labels for easy searching, and arrange them chronologically by date for a more organized collection.
Part 3: Methods for Merging Photo Libraries in iPhoto
When you want to put your photo collections together with iPhoto Merge Libraries, there are different ways you can do it. Each way has its good points and things to think about. You can pick the way that works best for what you want. Here are the methods for merging photo libraries in iPhoto:
Method 1: Using Eassiy Phone Transfer to Merge Photo Libraries
Eassiy Phone Transfer is a tool that helps you move stuff between different gadgets like phones, tablets, and computers. It works for different types of files like contacts, messages, photos, videos, and music. You can use it to move stuff between iPhones, Android phones, or both. You can also move stuff between your computer and your phone. This is helpful if you want to keep your things safe or put them on a new device. Apart from just moving files, Eassiy Phone Transfer can do other things like managing your data, making backups, getting back lost data, and putting your data back after a backup. It's easy to use and works for everyone, whether you're good with tech stuff or not.
Pros:
- Helps you to take care of, make copies, and bring back files on your iPhone or Android device from your computer.
- You can move things like contacts, messages, videos, and photos between iPhones and Android phones without any restrictions.
- This tool can make moving stuff between Android devices simple.
- Allow you to choose specific things from your phone to make a copy on the computer.
- Supports moving stuff from the computer to the phone without any restrictions.
Cons:
- If you want to use all the things the app can do, you have to pay for it.
Here are the steps to use Eassiy Phone Transfer to merge photo libraries –
For iPhone users:
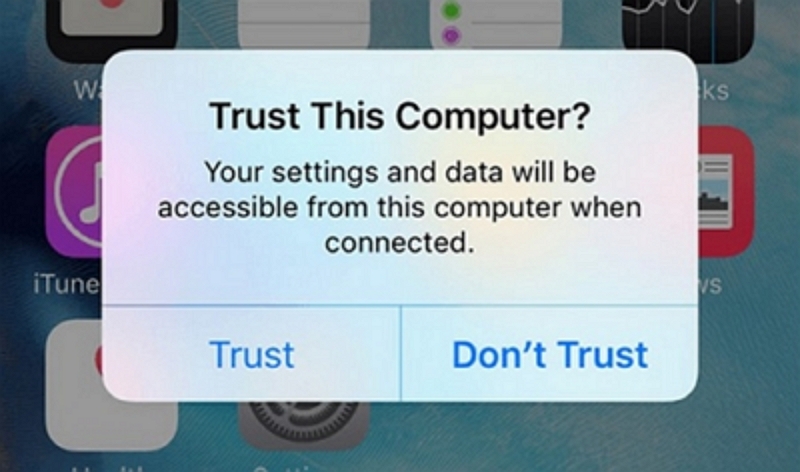
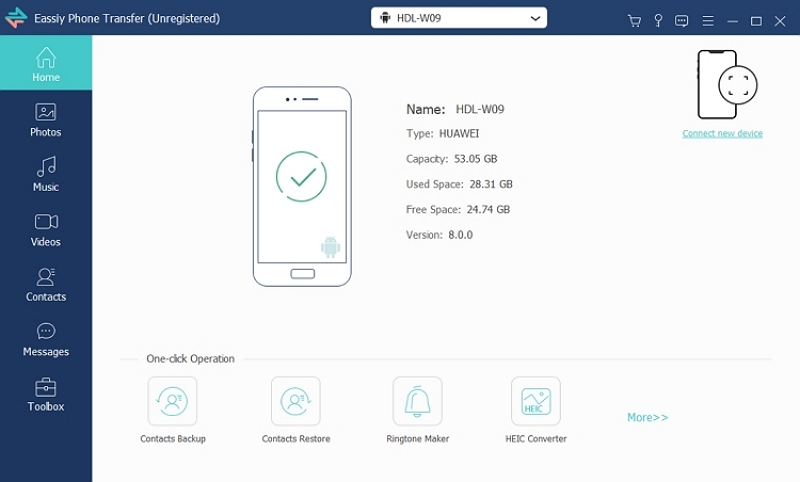
Step 1: Start by plugging your iPhone or iPad into your computer using a special cable. Then, open up Eassiy Phone Transfer on your computer. If it's your first time using it, you might get a message asking if you trust this computer. Just tap "Trust" and put in your iPhone or iPad password. This lets Eassiy Phone Transfer connect properly.
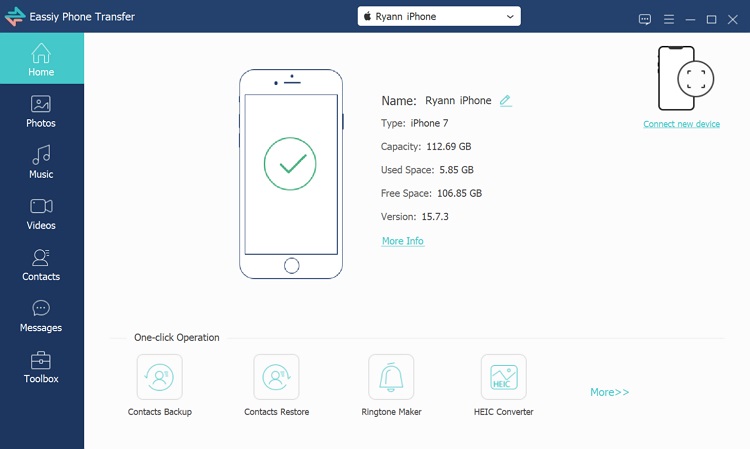
When your iPhone or iPad connects to Eassiy Phone Transfer, you'll see its info on the screen. This includes the device's name, what kind it is, how much space it has, and the version it's using. You'll also see what things you can do with Eassiy Phone Transfer.
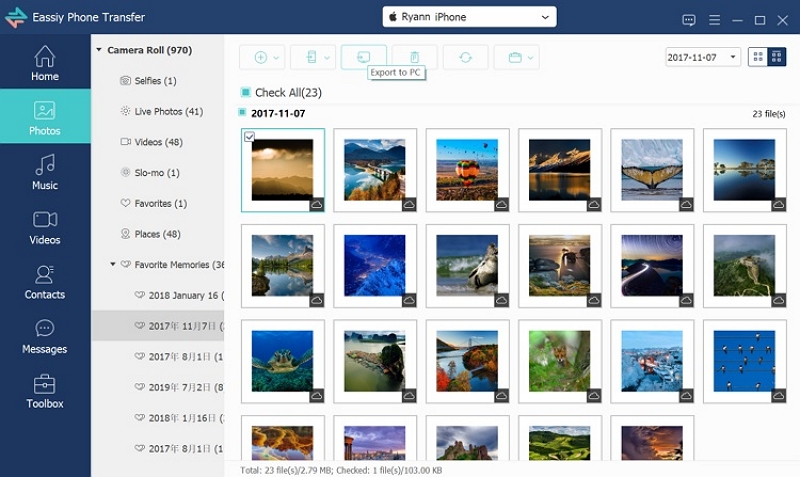
Step 2: At the left side of the screen, you'll find a list of different things like pictures, songs, videos, contacts, messages, and Toolbox. Tap on the one you want to move. You can see all the things inside it, like their names, when they were made, and how big they are. Choose the things you want to move.
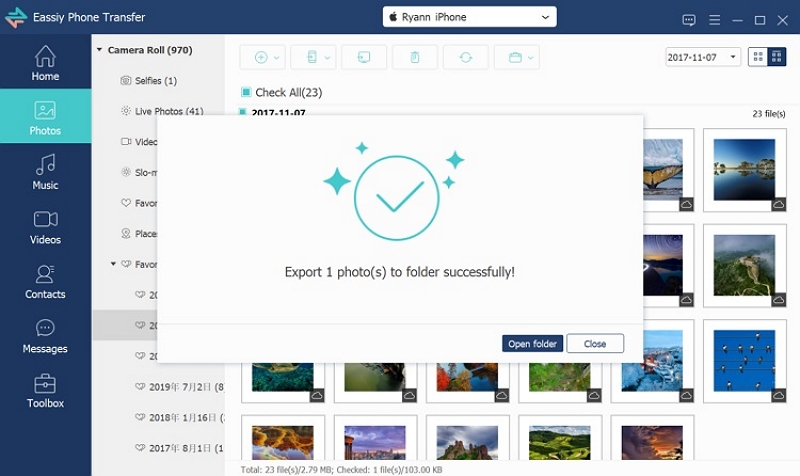
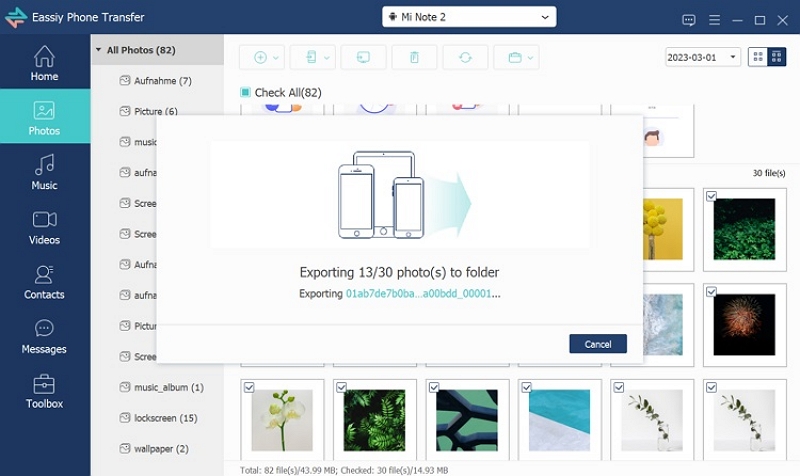
Step 3: Once you've picked the files you want to move, just tap the "Export" icon to start moving them. Eassiy Phone Transfer will put the files on your computer or iPhone all at once. It's usually quick, and Eassiy Phone Transfer will let you know which files got moved and which didn't.
For Android Users:
Step 1: To begin using Eassiy Phone Transfer, link your Android device to your computer with a USB cable. When you open Eassiy Phone Transfer on your computer, your Android device will be recognized and linked automatically. On your Android device, you might need to switch the USB settings to "File Transfer" mode so you can move data between your Android and computer.
If you're using Eassiy Phone Transfer for the first time, you might need to put the Eassiy Phone Transfer app on your Android device. To do this, go to "Settings" and turn on the "Install via USB" choice. This way, you can put the app on your device using a USB connection.
Step 2: You'll see different types of files on the left side of the Eassiy Phone Transfer screen, like Photos, Music, Videos, Contacts, Messages, and Toolbox. If you want to move a certain type of file, just click on it. Then, choose the specific files you want to send to your computer.
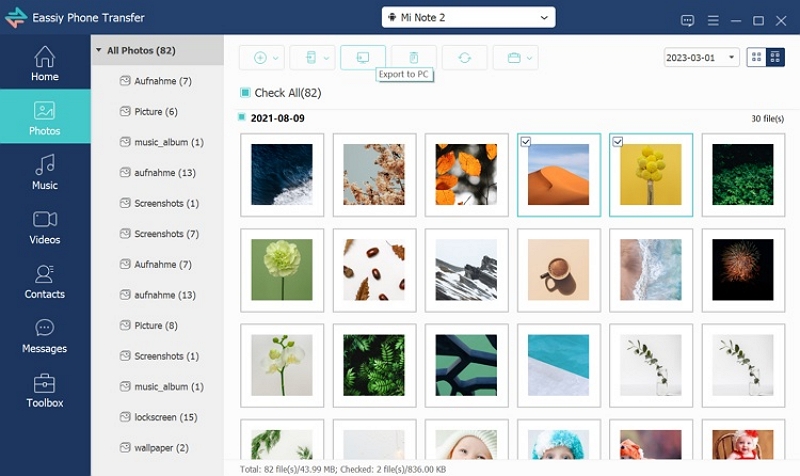
Step 3: After you choose the files you want to move, just press the "Export to PC" button. Then, Eassiy Phone Transfer will quickly start moving the files you picked to your computer.
Method 2: Using Photos app to Merge Photo Libraries
Using the Photos app to merge photo libraries can make everything easier.Pros:
- The steps are quite easy, especially if you already know how to use the Photos app.
- The app puts the libraries together, so your photos become simple to handle and look at.
- In the Photos app, you can find tools to help you organize, edit, and share your combined photo collection.
Cons:
- The way the Photos app combines photos might not let you change things as much as other outside tools can.
- You have to take care of finding and getting rid of copies on your own while you're putting things together and even after you're done.
- If you're using the Photos app for the first time, it could take a little while to get used to how it works.
Here are the steps to use the Photos app to merge libraries in photos –
Step 1: Click to open the Photos app on your Mac.
Step 2: If you don't already have a main library, make a new one this way: Click on "File," then choose "New Library." Give it a name and pick where you want to keep it.
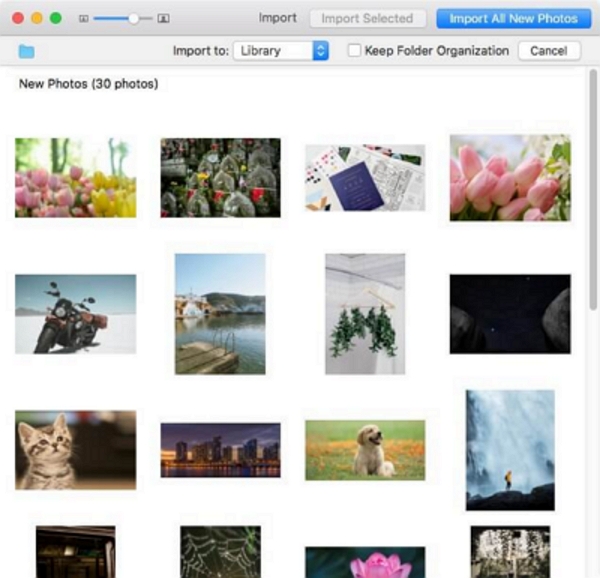
Step 3: Tap on "File," then pick "Import," and choose the first library you want to mix. Do step 3 again for every library you want to put together.
Step 4: After you bring in your pictures, look through them. Remove any copies, make groups, and put them in order the way you like.
Step 5: Keep your main collection open and just drag pictures or groups of pictures from the other collections into it. Doing this moves the pictures and keeps the changes and how you organized them.
Step 6: After you've put all the things you want in one place, close the extra libraries you added and keep using the main combined library.
Method 3: Using iCloud to Merge Photo Libraries
Using iCloud to put all your photos from different devices in one place can be a smart idea.
Pros:
- Pictures are smoothly shared between your devices, making it easy to put them together.
- You can look at your combined photo collection on any device that has iCloud Photo Library turned on.
- iCloud keeps a copy of your photos safe, so if your device gets lost or broken, your pictures are still protected.
Cons:
- If you have lots of photos, you might need to worry about how much space you have in iCloud.
- You need a good internet connection to sync and look at your photos.
- You might have to sort out repeated photos and arrange your pictures in the combined collection by yourself.
Here are the steps to use iCloud to merge photo libraries –
Step 1: Using your web browser, log in to iCloud, and then click on Photos to go to your iCloud Pictures.
Step 2: Click two times on photo library 2 to open it using Photos.
Step 3: At the top of the screen, click on "Photos," and then choose "Preferences."
Step 4: Go to the General section and click on Use as System Photo Library.
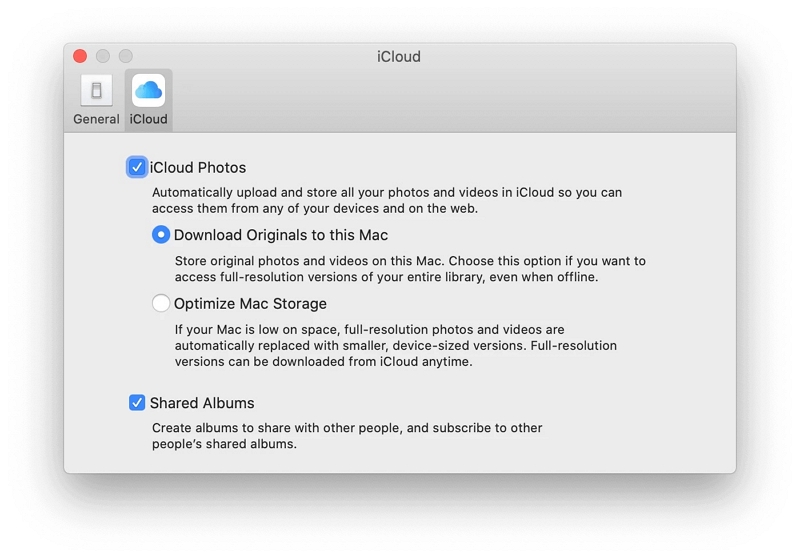
Step 5: Click on the iCloud tab and choose the checkbox that says iCloud Photos. Also, turn on the option that says Download Originals to this Mac.
Step 6: All the pictures in the second photo collection will be sent to iCloud Photos. Just wait until all of them are done uploading.
Step 7: Click two times on the first photo collection to open it in Photos. When it asks, click on "Switch."
Step 8: Photos will begin getting the pictures. Just wait until it's done.
Part 4: Tips for Successfully Merge Libraries in Photos
A. Handling Duplicates
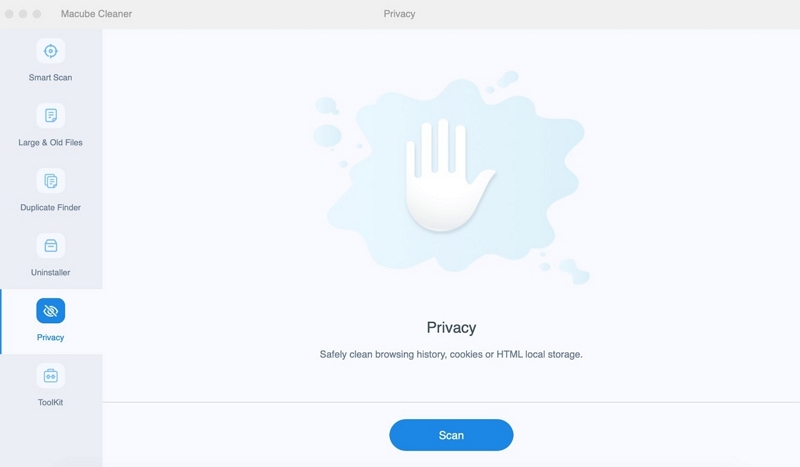
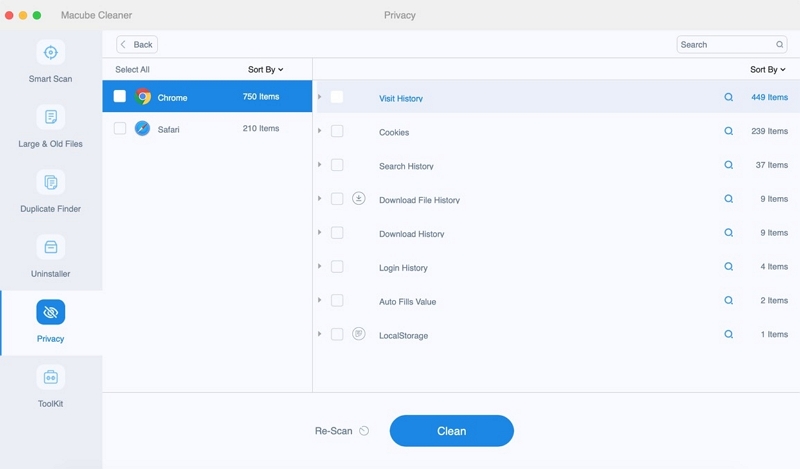
When you merge iPhoto collections, you might end up with copies of the same files or unnecessary items. If this happens, it's a good idea to use a tool like Macube to get rid of these extra files. Macube does more than just remove duplicates – it also helps with other tasks. Using this Mac cleaner can help you maintain a tidy and organized Mac device.
Features:
- Provides you with a 7-day free trial with full authority.
- You can remove duplicate files/junk with just 1 simple click.
- Before deleting any file, you can preview them and ensure safety.
- Helps you to protect your privacy by cleaning your browsing history.
- Supports customizing your Mac by managing extensions.
Here are the steps for deleting files on Mac –
Step 1: Launch Macube on your computer and start the scanning process after selecting a certain path.
Step 2: Preview the scanning results once the scanning process is done. After previewing, you need to select the unwanted duplicate files.
Step 3: Now you have to tap the “Clean” button and clear the duplicate files to get more disk space.

B. Organizing the Merged Library
Once you've successfully mixed your photo collections, the next step is to make them organized in a way that's easy to look at and remember. Here are some tips to help you put your photos in order and group them well in your mixed collection:
- Make Albums or Folders: Put your photos into groups based on what they're about, like events, times, or themes. This helps you find certain photos quickly and keeps things neat.
- Sort by Dates: Put your photos in order by when they were taken or when things happened. This makes a timeline of your memories.
- Add Tags: Give your photos tags that make them easy to find. This is super helpful if you have lots of photos.
- Use Places: If your photos have places in them, you can group them by where they were taken. This is great for trips or special places.
- People and Faces: If you have photos of people, use a feature that recognizes their faces. This way, you can find their photos easily.
- Special Events Albums: Make albums for birthdays, vacations, and other important times. This helps you quickly find photos from special moments.
- Make a Backup: After you've organized your collection, make a copy to keep it safe in case something goes wrong.
- Tag Favorites: Use a "Favorite" or "Star" button to mark your favorite photos. This way, you can find them easily.
- Smart Albums: Use smart albums to put photos together automatically based on things like dates or words.
Remember, the goal is to make your mixed collection fun and easy to look through. When you set it up the way you like, looking at your special moments becomes enjoyable.
Conclusion
The iPhoto Merge Libraries simplify the management of your expanding photo collections across devices. By merging photos, you enhance access, sharing, storage, storytelling, and organization. In this guide, we have introduced some methods to combine photo libraries Mac. However, we would recommend you choose Eassiy Phone Transfer above all the methods. Eassiy Phone Transfer is the safest way to merge photos library Mac without any restriction. Besides this, you can try Macube to remove duplicate files/junk.
Macube Cleaner
Speed up and troubleshoot your Mac super easily with a Macube full-featured free trial!
Start Free Trial