It's frustrating when you fail to discover the files you want. You have no ideas where you've save the files, which is very typical and most of us may meet with the same problem. Finding a wanted document among the disorganized files can be very time-consuming and annoying. So it's time to change. It's necessary to have things neat so that you can easily access the files whenever you need them.
I've put together a list of some file management tips below which have been tested to be workable for most of the users. Now, you can check the below tips and learn the best way to organize your computer files.
Tips 1: Create Folder and Move Scattered Files to It
Some people may be used to creating a document or saving the files such as images, videos, music randomly on the desktop or somewhere on your Mac. It turns out that when you need to use a file, it is extremely difficult to find them out. So if you are asking how to organize folders on Mac desktop or manage computer files, the first thing you should do is to create a folder.
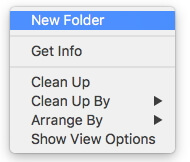
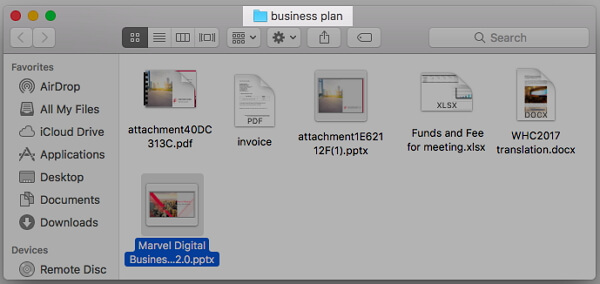
Now, name your new folder. In some of the cases, people would name a folder according to category or the subject you are working in. For instance, you are making a business plan for your company. So you would name the folder as "business plan" and move all of the related files such as photos, videos, documents to this folder.
After you move the scattered files into a folder, you will discover the desired files much easier!
Extra Tips:
You have two folders, but the contents are related? Want to merge them? I know you have tried, but a little mistake may overwrite the original file, resulting in loss of data. The following will give you a detailed introduction to the relevant process of merging folders, to help you better understand this measure, the security of merging the folders needed.
A. Merge similar folders using Finder
During the merge process, if the newly written folder contains files with the same name as the original folder, Mac will ask you if you want to replace the original file with a new file with the same name, or pause the process. The new and original folders have the same name, but the contents are different, and you need to select Stop to prevent the old folders from being overwritten. The solution is as follows.
1. Drag the folder again, hold down the Option key and then release.
2. You should now have a new option called "Merge", then click on it.
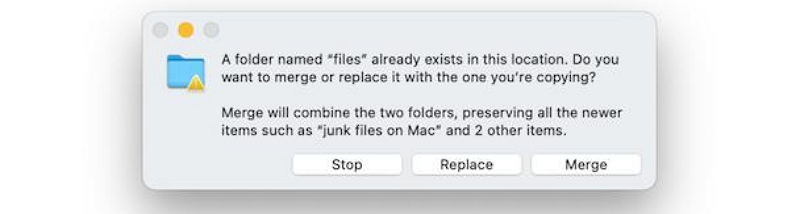
3. If there is already a file with the same name, it will be automatically renamed with a "2" added to the file name. This ensures that both the original file and the new file are kept, and no data is lost.
B. Merge similar folders using terminal
1. Open the Launchpad icon in the Dock
2. Enter Terminal in the search field, and click Terminal.
3. Type: ditto ~/source_folder ~/target_folder into the terminal.
Please use the actual name of the folder instead of "source_folder" & "target_folder". You can also simply drag the folder into the terminal window so you don't have to enter the folder path.
Tips 2: Manually Arrange Files in A Folder
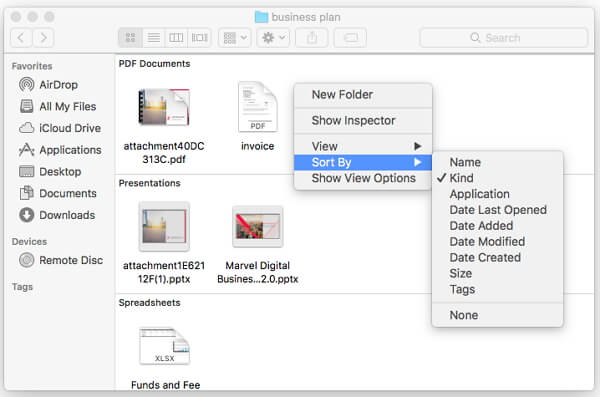
After you create new folders for the scattered files, it comes to how to manually arrange files in a folder. The Arange By and Sort By feature will help you with the task. Right click in an open space in the Finder window and you will see the Arrange By option. Normally, you can arrange and sort files on Mac by Name, Date, Size, Kind, Application and so on.
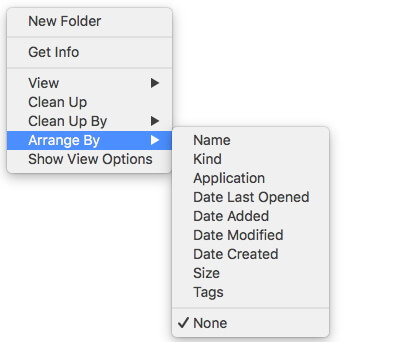
For example, if you arrange your files by Name, it allows you to arrange items from Mac Finder in alphabetical order by name (from A-Z). If you select Date, you will get your files organized according to the date you created, added, modified or opened them. Selecting Kind is also helpful sometimes. You get groups for different files such as folders, documents, images, music and so on.
After you use the Arrange By to organize the files into group, you can continue to use the Sort By to make it more straightforward. For instance, if the files have been arranged by Kind, you will see the Arrange By option in the contextual menu changes to Sort By when trying to right click in the open space in the Finder window and hold down the Option key. Then you can continue to sort out the files within each group by name, date or other options. You can choose your own way to arrange and sort files and it is totally on your preference.
Extra Tips: How to name a file
A good file name will allow you to find it faster when you need it. What is a good file name?

- A project name.
- A brief description of the file’s content.
- The date the file was created or last edited.
- Your initials if you will share the file with others.
- A version number, if applicable.
To keep files name in chronological order, you can use strategies such as placing the date at the beginning of the file name.
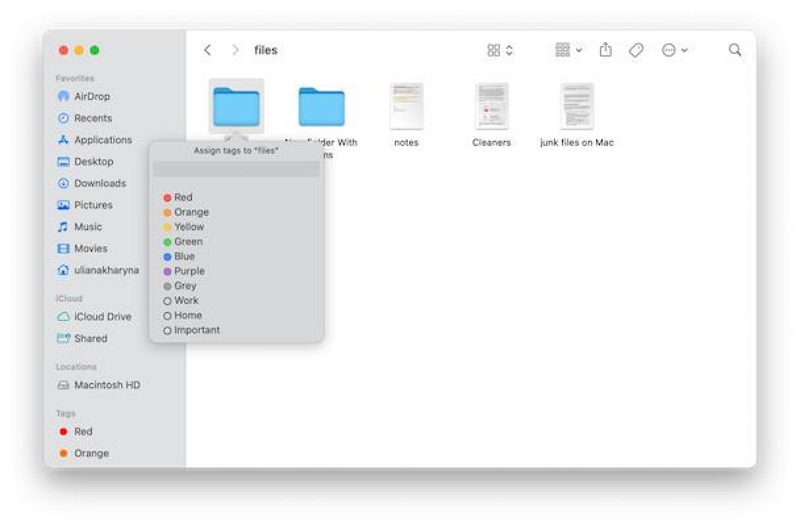
Another way to organize files is to tag them. It only takes two steps to complete, and once you've labeled your files, finding them will be much easier.
Step 1. Open a new Finder window. Then go to the file or folder to which you want to add the label.
Step 2. Right-click or hold the Control key on the file. Finally, you can select a pre-configured tag or click tags to create your own tag.
Tips 3: Lock the Important Files
For some important files you would never want to change or delete, you can simply lock it. In this way, it will be always saved on your Mac and never get lost accidentally. To do this, you need to go to the file and select it. Then press Command+I and check the box next to "Locked".

Tips 4: Try Draft, Final, And Archive Folders
Using draft, final, and archive folders will help to enhance the work efficiency a lot. Imagine that you are working on a business plan and it may take several days to finish. If it is on the progress, you can put it in a draft folder. Then you will be able to find it out easily on the next day working. Once it is approved by your boss and the job is complete, you can save it in the Final folder. As time goes by, this business plan document is hardly to be used. Now, you are able to put it into an Archive folder, which is for the old materials and files.
This method is highly recommended for business. As we need to deal with many task every single day, using this three folders allows us to figure out the work progress at any time and also make it clear to check.

This method is highly recommended for business. As we need to deal with many task every single day, using this three folders allows us to figure out the work progress at any time and also make it clear to check.
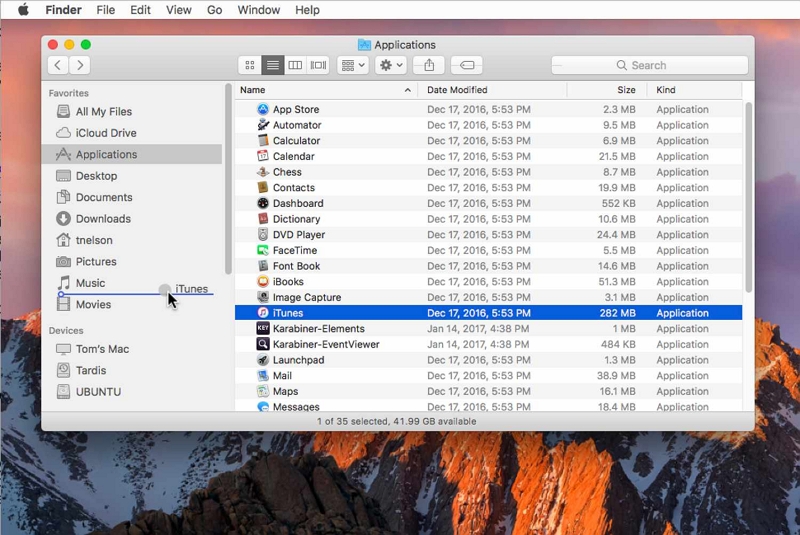
If you've been using a file a lot lately, you can add it to your favorite folder, just like clicking a love button in your photo library. This way you can find the files you need more quickly. Here are steps:
Step 1. Start a new Finder window.
Step 2. Drag the folder you want to favorite into your sidebar.
Tips 5: Clean Up Mac Hard Drive
To organize and manage Mac files, you may also need to delete junk files such as cache files & logs, erase unnecessary files, remove large or old files that you don't need anymore, remove the duplicated items, delete the similar photos in certain folder and so on. You are able to deal with the above tasks and free up disk space on Mac manually, of course. However, we understand that some people are short on time and it is difficult to perfectly manage and clean up the useless files in such a short time. So, I would like to introduce a best computer file organization software: Macube Cleaner, which is an all-in-one Mac app to optimize your iMac or MacBook. Here's a step-by-step video explanation:
The steps are as follows:
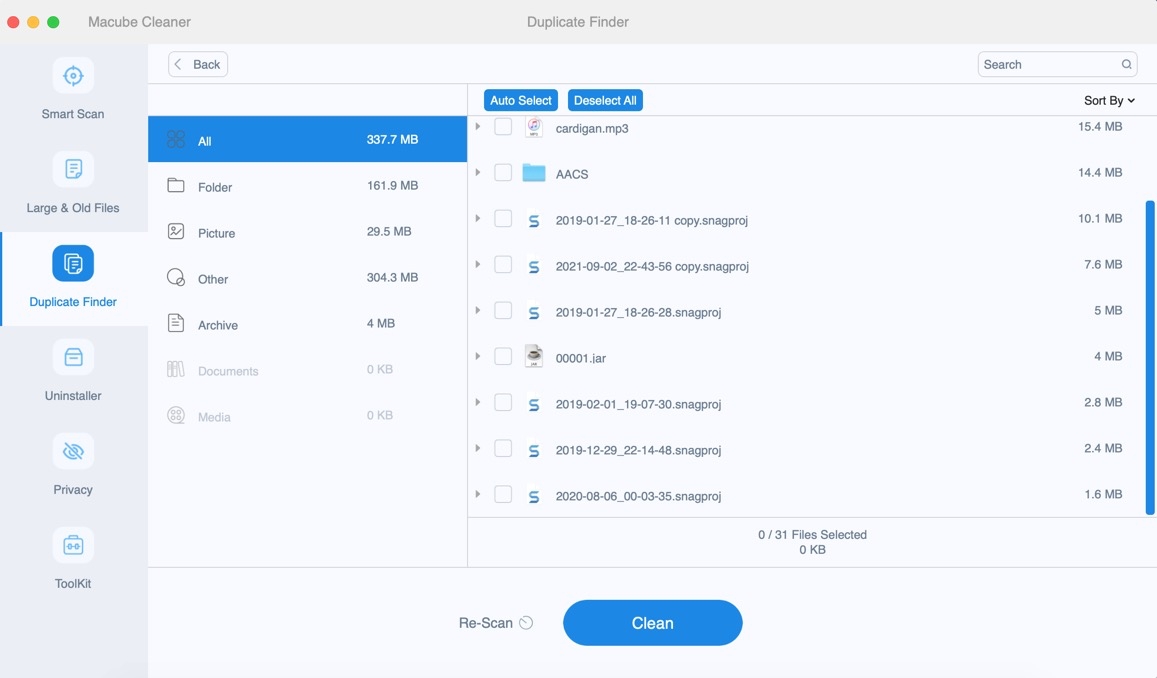
Step 1: Remove duplicate files that you don't know when you saved twice to help you identify meaningful files better and faster. Please click Scan and let Macube automatically scan your hard drive storage.
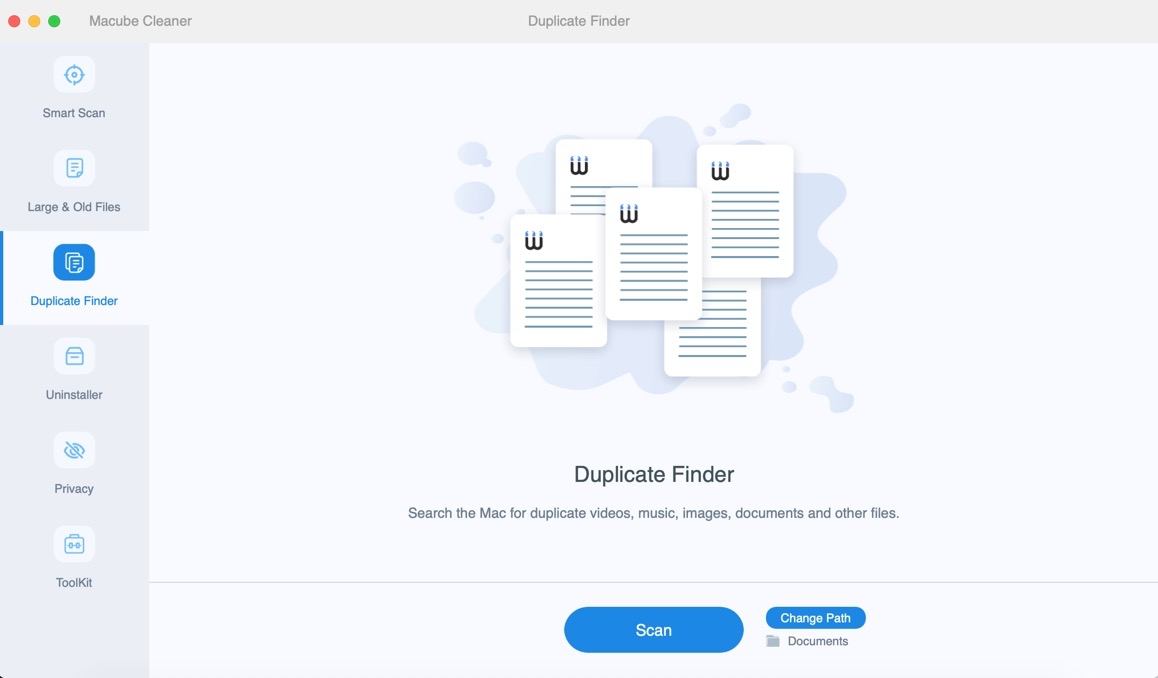
Step 2: When the scan is complete, you can see all the duplicate file types and sizes, and you can also customize the duplicate level to find more duplicate files. Check the copies you want to delete, and then click Clean to clean the files.
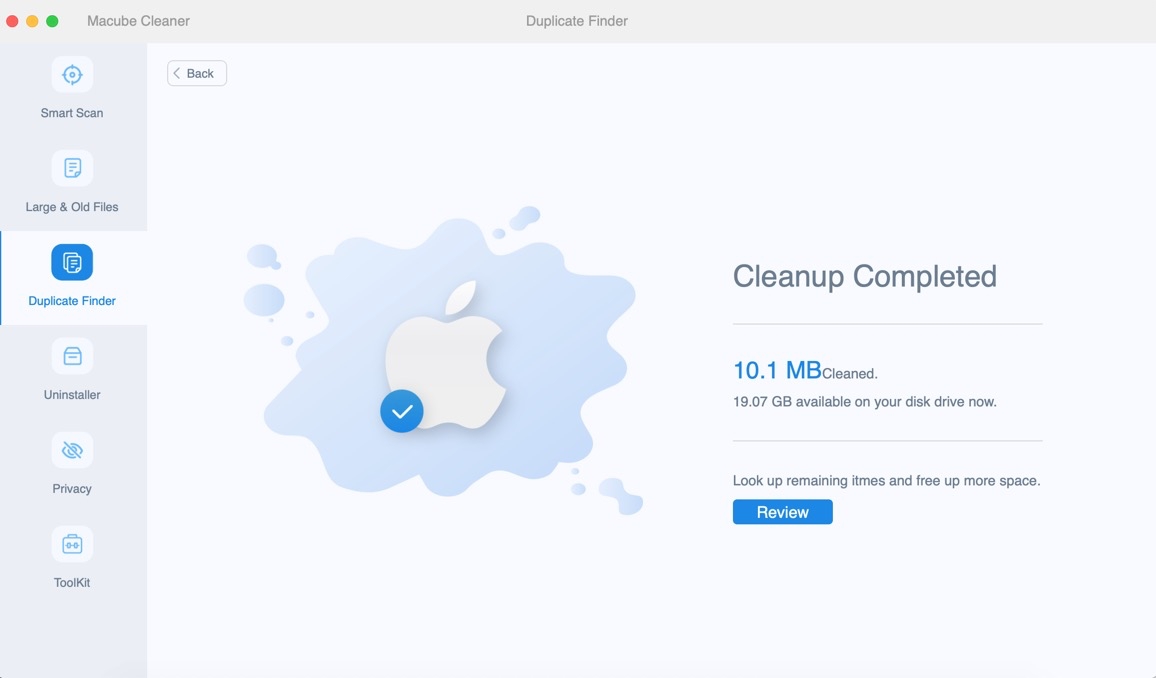
Step 3: Wait for a moment, and your duplicate file will disappear without a trace.
Please free download the Mac file organization software: Macube Cleaner to have a try on your own.
Macube Cleaner is very easy to use. After you download and install it on your Mac, you can then see different features on the left pane. Choose the options and you can start to clean up Mac hard drive and arrange and organize Mac files in several simple clicks. Want to know more about this program? Please also see:
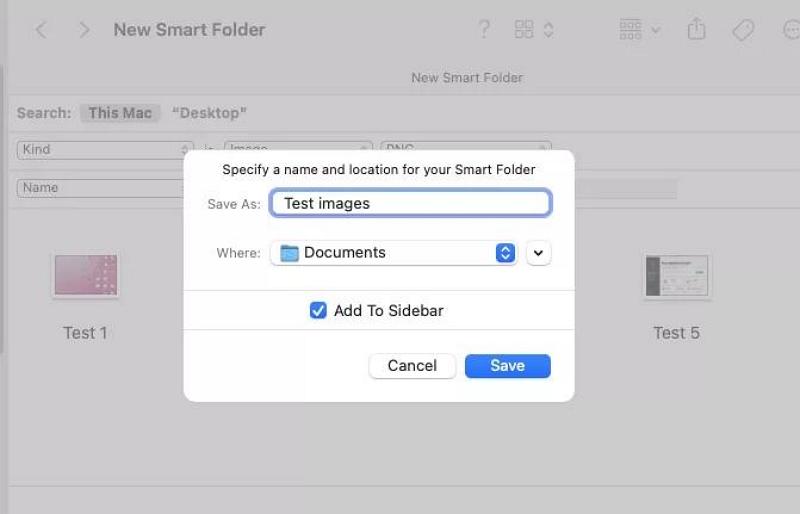
Tips 6: Group Files Using Smart Folders
Tagging files is useful, but you need to tag files and folders manually. Sometimes, you might want some files that meet the same criteria to be saved in the same folder by themselves. Smart folders for Mac can do that. They're basically a saved search pattern, but they look and behave like folders. The files in the smart folder don't actually move from their original location, just make a copy on your Mac.
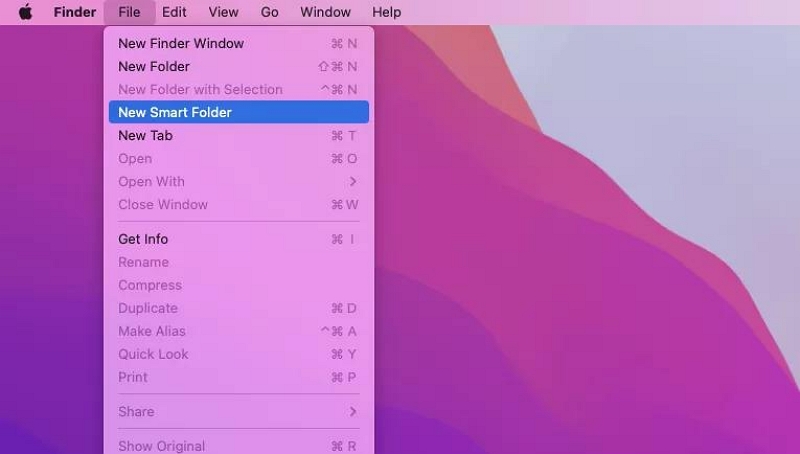
Step 1. Choose File > New Smart Folder from the Finder's menu bar.
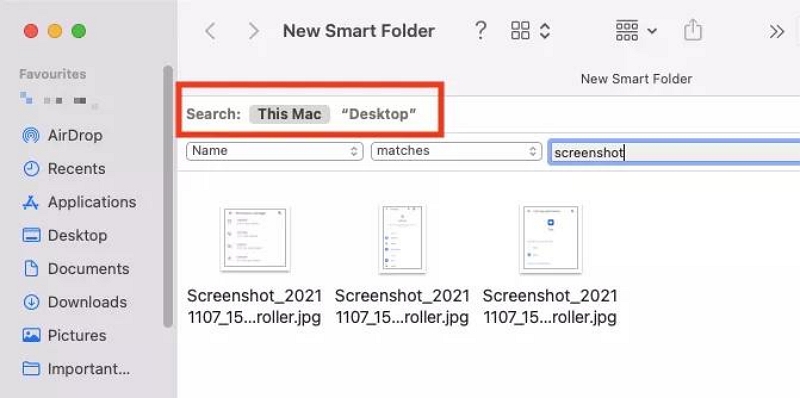
Step 2. Now, you have the option to limit your search to your current location or search everything on this Mac.
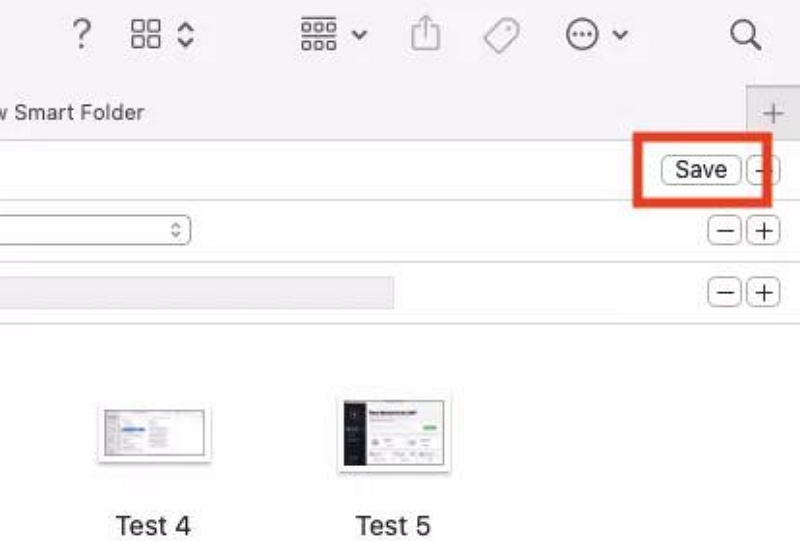
Step 3. To add a new search criterion, simply click on the plus icon.
Step 4. Use the drop-down menus to select criteria such as Kind, Name, and Created Date.
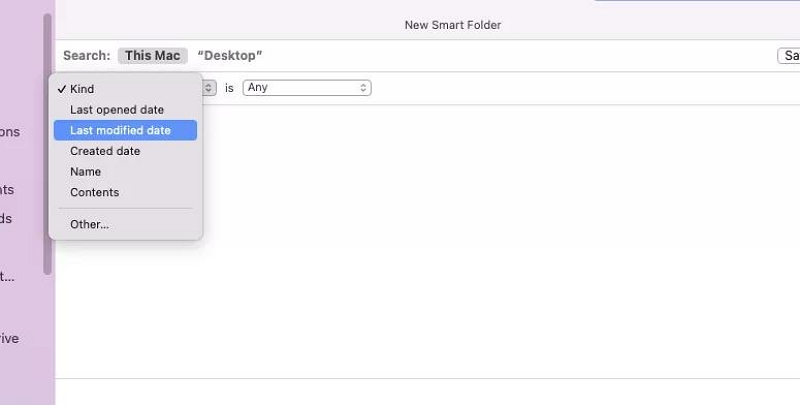
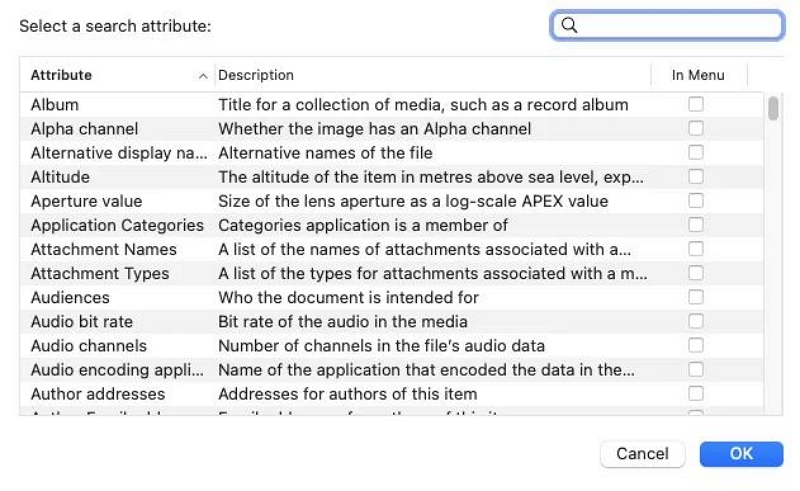
Step 5. If you choose the "Other" option, more search options will become available.
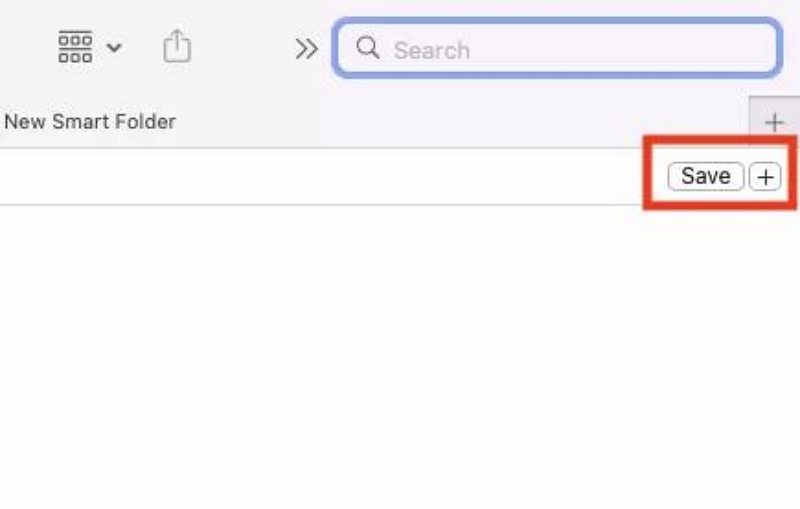
Step 6. Continue adding search criteria until you are satisfied, then click on Save.
Step 7. Provide a name for your Smart Folder and choose a location for it. You can also decide whether you want it to appear in the Finder sidebar. Click Save to complete the process.
Step 8. From now on, any new file that matches your search criteria will be automatically added to your Smart Folder.

If you have any question about this guide, please drop us a comment below to let us know!
Macube Cleaner
Speed up and troubleshoot your Mac super easily with a Macube full-featured free trial!
Start Free Trial