Organizing and deleting documents on your Mac maximize productivity, optimize storage, and offer several advantages. Efficient file management enables swift access to vital documents, declutters your system, and frees up valuable disk space. These actions elevate workflow, ensure optimal performance, and empower you to take control of your digital workspace. A clutter-free system enhances performance, facilitates easy file retrieval, and creates a visually pleasing and focused environment for heightened productivity. In this guide, we will show you how to delete documents on Mac.
Part 1: Locating Documents to Delete
A. Navigating Through Your Mac's File Structure
If you want to effectively find and delete documents on your Mac, you can make use of Finder, the Documents folder, and the Desktop. Here's a helpful guide for you to locate documents to delete:
1. Finder
The Finder application comes pre-installed on macOS and functions as a centralized hub for browsing and managing your files and folders.
Step 1: To open Finder, you can either click on the blue and white face icon in your Dock or press Command + Space to activate Spotlight and then type "Finder."
Step 2: To access frequently used folders like Documents, Downloads, and Desktop, utilize the left-hand sidebar within the Finder window.
Step 3: To open the Documents folder and access your saved documents, simply click on "Documents" in the sidebar.
Step 4: Inside the Documents folder, you have the option to explore subfolders or utilize the search bar located in the top-right corner to find specific documents.
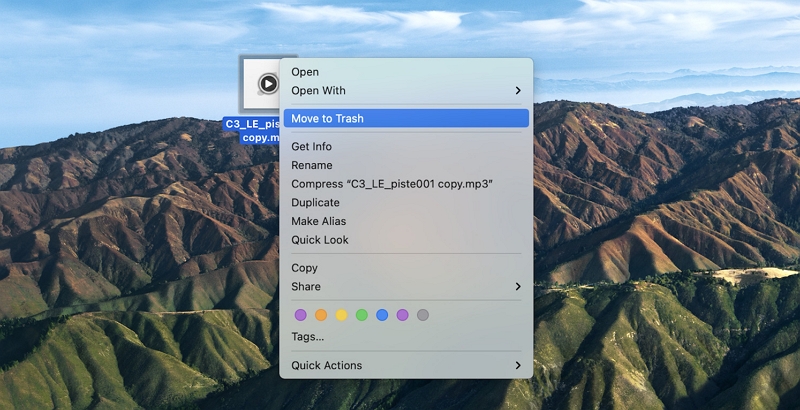
Step 5: After identifying the documents you wish to delete, you can proceed by either right-clicking on them and choosing "Move to Trash" or dragging them to the Trash icon located in the Dock.
2. Document Folder
On your Mac, the Documents folder serves as the default location for saving files.
Step 1: To ensure that Finder is active, simply click on the desktop.
Step 2: To navigate to your Home folder, click on "Go" in the menu bar at the top of the screen and choose "Home" from the dropdown menu.
Step 3: To open the "Documents" folder within your Home directory, simply double-click on it.
Step 4: Within the "Documents" folder, you can review the stored documents and folders. If you wish to delete any unwanted files, you can either right-click on them and select "Move to Trash" or simply drag them to the Trash icon in the Dock.
3. Desktop
The Desktop serves as a convenient location for easy access to frequently used files.
Step 1: To activate Finder, simply click on the desktop.
Step 2: To view the files and folders on your desktop, click on "Desktop" in the sidebar.
Step 3: Take a moment to review the items currently present on your desktop and choose the ones you wish to delete.
Step 4: For the selected items, you can either right-click and select "Move to Trash" or simply drag them directly to the Trash icon in the Dock.
By leveraging Finder, the Documents folder, and the Desktop, you can effectively locate and remove documents on your Mac, streamlining your system and enhancing your productivity.
B. Efficient Search Techniques for Identifying Specific Documents
Here are some tips to efficiently find and delete files on your Mac:
- Use the search bar in Finder to search for specific file names or keywords.
- Refine your search by adding search parameters like file type, date modified, or size.
- Sort files and folders in Finder by clicking on the column headers (e.g., Name, Date Modified, Size).
- Create smart folders that automatically gather files based on specific search criteria.
- Combine search, sorting, and smart folders for an efficient file management workflow.
- Regularly review and clean up your smart folders to keep them organized.
By utilizing these methods, you can quickly locate and delete files, optimizing your file organization and storage space.
Part 2: Methods for How to Delete Documents on Mac
Looking for methods to delete documents on MacBook? Here, we are providing some methods for how to delete documents on Mac
Method 1: Delete Documents on Mac with Macube
Macube is a remarkable third-party application designed to automate the deletion of specific types of documents on Mac. It distinguishes itself in the market by providing a comprehensive suite of features, including a duplicate finder, management of large and old files, and a shredder. By utilizing this program, you can swiftly clean up your Mac in a matter of seconds and free up a remarkable amount of storage space. With Macube, the process of eliminating bothersome duplicates, which would otherwise consume hours of your time, becomes effortless. Furthermore, Macube efficiently removes unnecessary documents and enhances the organization of your documents. Its advanced algorithm even can detect similar images, allowing you to remove them before deciding which ones to keep. Macube prioritizes privacy and ensures the protection of your sensitive data. It enables you to clear your browsing history and keep your browser data private with just a single click. By leveraging this powerful Mac cleaner, you can effortlessly and securely eliminate unwanted documents within a few minutes.
Features:
- Allows for the permanent deletion of any file on your Mac.
- With just a single click, effortlessly eliminate apps and caches from your Mac, ensuring thorough removal.
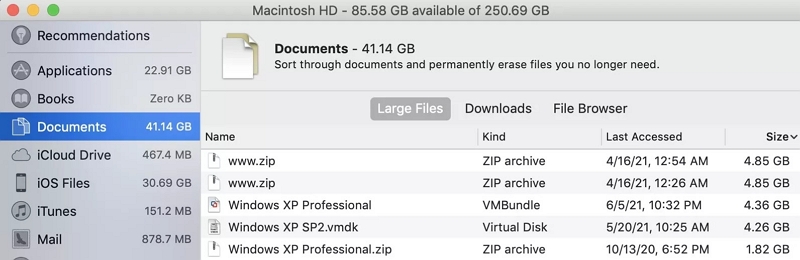
- It efficiently detects gigabytes of unnecessary files within macOS system folders, iTunes, photos, mail, browsers, and even large old files.
- Simplifies the process of clearing junk files on Mac with a single click, making it effortless for you.
- Provides expert assistance by promptly responding to your emails within a 24-hour timeframe.
Here are the steps to delete documents on Mac.
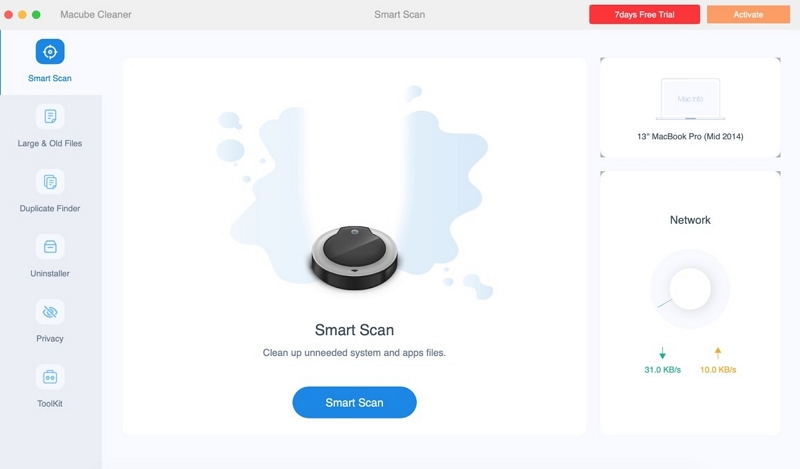
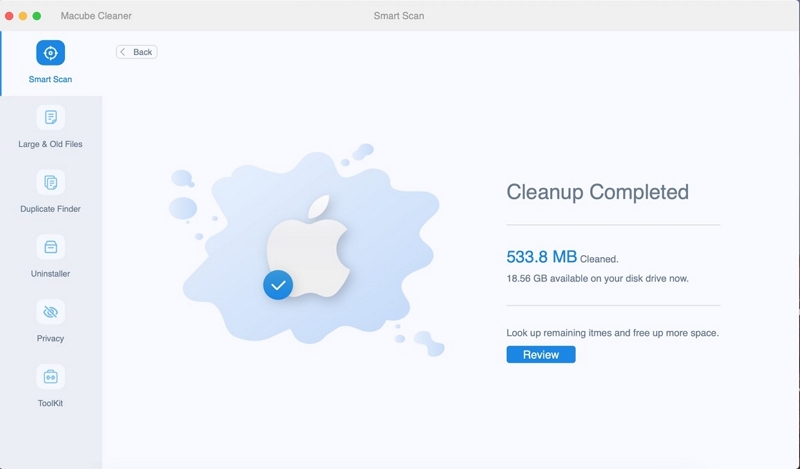
Step 1: Opt for Smart Scan, a streamlined approach to efficiently locate and eliminate unnecessary documents throughout your entire Mac.
Step 2: After reviewing the scan results, carefully choose the documents you no longer need and proceed to remove them.
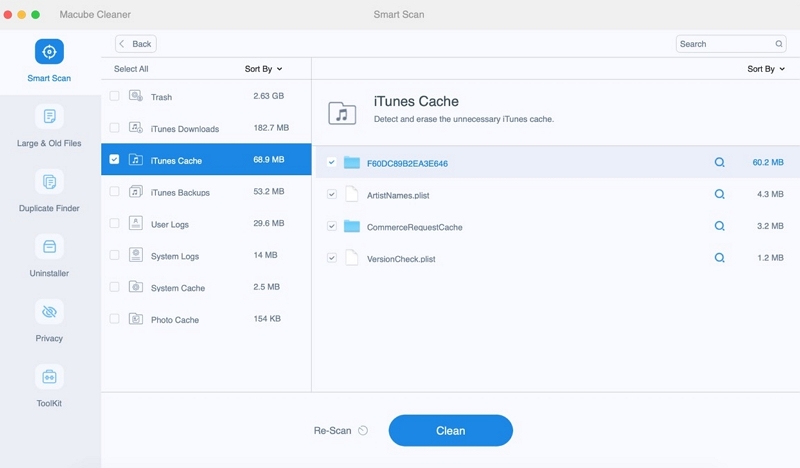
Step 3: Reclaiming your disk space has never been easier. With just a simple click, you can effortlessly clear away all unnecessary documents.
Method 2: Drag and Drop to the Trash Bin
The Trash Can is the most common method for deleting documents on a Mac, offering a simple process for most users. Follow the below steps to delete documents on Mac using the drag-and-drop feature.
Step 1: To delete documents individually, simply drag each document to the Trash.
Step 2: To delete multiple documents that are adjacent to each other in a folder, hold down the Shift key and click on the first and last document in the series. Then, drag the selected documents to the Trash.
Step 3: To select and delete non-adjacent documents, hold down the Command key and click on each document you want to delete. After selecting the desired documents, drag them to the Trash.

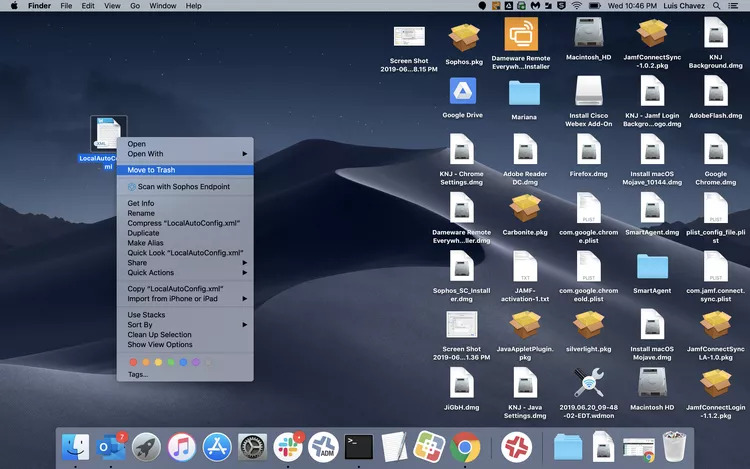
Method 3: Streamlined Deletion with Right-Click Menu
Here are the steps to streamlined deletion with right-click menu:
Step 1: To delete a document, simply right-click on it and select "Move to Trash" from the context menu.
Step 2: After removing the document, click on the Trash Can icon to open your Trash folder.

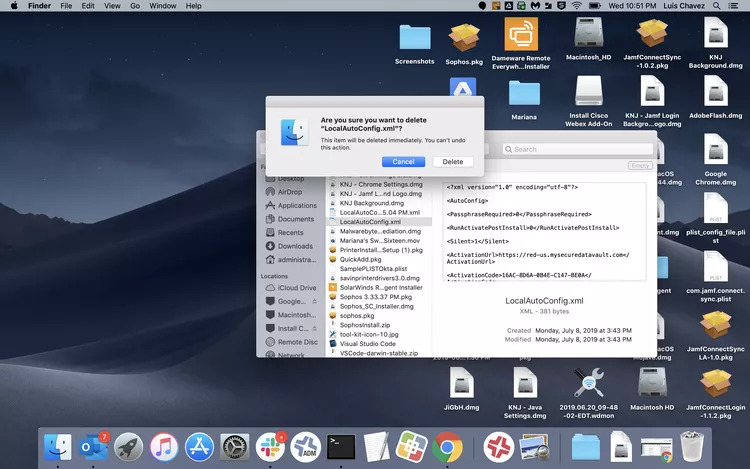
Step 3: To permanently delete the documents in the trash, right-click on the deleted documents and select "Delete Immediately" from the context menu.
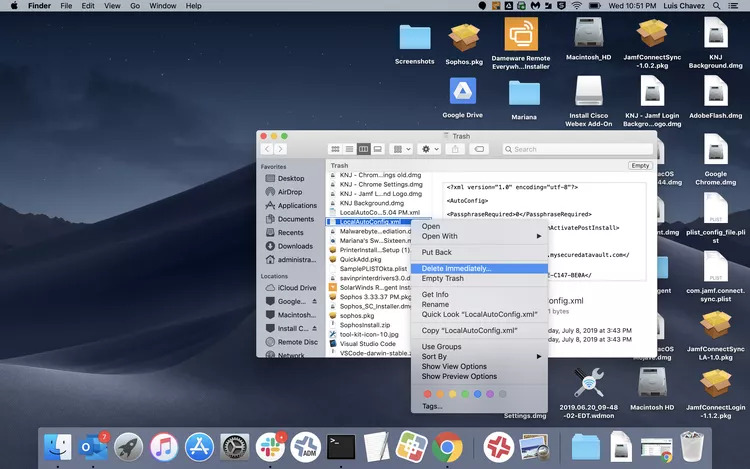
Step 4: A confirmation prompt will appear asking if you truly want to delete the documents. Click "Delete" to permanently remove the documents from your system.
Note: To save time, consider emptying the Trash if you want to remove all documents from the Trash can. However, before proceeding, ensure that you don't need to restore any of the documents stored there.
Method 4: Swift Keyboard Shortcut (Permanent Deletion)
- To permanently delete a document without sending it to the Trash, press the Option + Command + Delete keys.
- To move a document to the Trash, press the Command + Delete keys.
- To empty the Trash, use the keyboard shortcut Command + Option + Shift + Delete.
Method 5: Using Terminal Commands for Advanced Users
You have access to multiple commands that can be advantageous to you. Certain commands may be more effective in specific situations, so take a look at the list and determine which ones best suit your needs.
- Command: rm
To delete a single document, use this main command. Simply type the command followed by the document name, like this: rm filename.
- Command: y
To remove write-protected documents, you can employ this specific command. Occasionally, when attempting to delete a write-protected document, you might be prompted for confirmation. Here's an example:
rm: Are you sure you want to delete the write-protected regular empty file 'filename'?
When you encounter this prompt in your Mac's terminal, enter "y" and press "Enter" to proceed with removing the write protection.
- Command: rm docname1
To delete multiple documents at once, use this command. Simply type "rm" followed by the names of each document, separated by spaces. For example rm docname1 docname2 docname3.
- Command: rm*
To delete multiple documents that match a certain pattern, you can utilize this command. In Terminal, you can employ wildcards (*) to match multiple documents with the same type or extension and delete them accordingly. For instance, if you wish to delete multiple doc files in the current directory, enter the following command in your Terminal: rm *.doc.
- Command: rm –i
To enable confirmation before deleting each document, you can employ this command. If you prefer to be prompted for confirmation before deleting a document, use this command before specifying the document name(s). For example rm -i docname(s).
- Command: -f
This command allows you to delete documents without being prompted for confirmation. Consider it a "brute force" command that efficiently removes the documents from your Mac. Even if the documents are write-protected, this command eliminates the need for additional input. To utilize it, simply type the command followed by the name(s) of the document(s). For example rm -f docname(s).
Part 3: Handling Locked or In-Use Documents
When unable to delete certain documents due to restrictions, try these solutions:
- Unlock the document: Locate the file, right-click, choose "Get Info," and deselect the "Locked" checkbox.
- Quit applications: Force quit the application using the document from the "Apple" menu or by pressing Command + Option + Escape.
- Use Terminal: Access Terminal, type the "rm" command followed by the file's path, and press Enter.
- Adjust file permissions: Modify permissions by accessing the file's info, expanding "Sharing & Permissions," and changing settings.
Note: Prioritize data backup before attempting any solutions to avoid data loss.
Conclusion
In conclusion, effective document management and deletion on your Mac are vital for productivity and system performance. By utilizing the methods discussed, such as Finder, search techniques, shortcuts, Terminal commands, and Macube, you can efficiently locate and delete documents on Mac. However, our recommendation will be Macube for your better experience in deleting documents on Mac without facing any issues. Regular organization, deletion, and backup practices contribute to a clutter-free workspace, improved workflow, and enhanced productivity. Remember to exercise caution and backup files before deletion to avoid data loss. With these practices in place, you can optimize your Mac experience and enjoy a clean and organized digital workspace.
Hot Articles
Macube Cleaner
Speed up and troubleshoot your Mac super easily with a Macube full-featured free trial!
Start Free Trial