After upgrading to macOS 10.13 High Sierra, you may notice that there is a category named "Other Volumes in Container" in Storage and "Other Volume" in Disk Utility on your Mac. The problem is that when you get the warning "your disk is almost full" from the Mac, other volumes in container have already taken ten or even hundred gigabytes of your Mac storage space. Some users also notice that the size of other volumes in container keeps growing on their Macs, but they don't even know what other volumes in container mean, let alone how to delete other volumes in container on Mac.
So, in this post, we are going to explain to you what other volumes in container are on Mac and how to clear other volumes in container to reclaim your Mac storage.
1. What Are Other Volumes in Container on Mac?
In APFS, the new file system that Apple introduced to macOS High Sierra and later, a container is similar to a partition in other file systems. A physical disk could have multiple containers and a container includes multiple virtual volumes, which all share the storage space of the container. For example, a standard macOS startup APFS container includes volumes as follows:
Macintosh HD: the volume with macOS software system installed, which is usually shown in Disk Utility as Macintosh HD.
Preboot: the volume that manages boot, which is created during macOS High Sierra update to support booting to Macintosh HD. It is usually hidden.
Recovery: the volume that contains the recovery system of your Mac, which you can boot into by holding CMD + R during startup.
VM (Virtual Machine) : the volume that supplements your RAM to store files like sleepimage, and swapfile, which is too large for RAM to run. So VM volume usually takes up most of the storage space.
Other volumes in container mean the last three volumes: Preboot, Recovery, and VM in APFS container. Other volumes cannot be removed because they are needed for macOS to function properly.
How Can We View Other Volumes in Container?
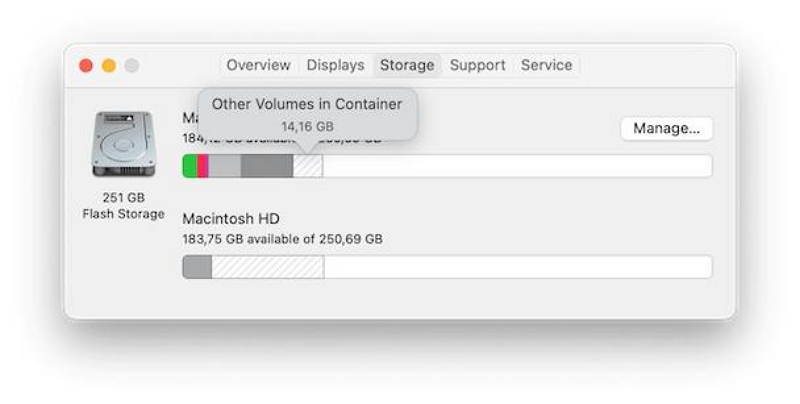
Step 1: Select the Apple menu > Click About this Mac in the left bar> Choose the Storage. Here you can see all the space occupied by the other volumes.
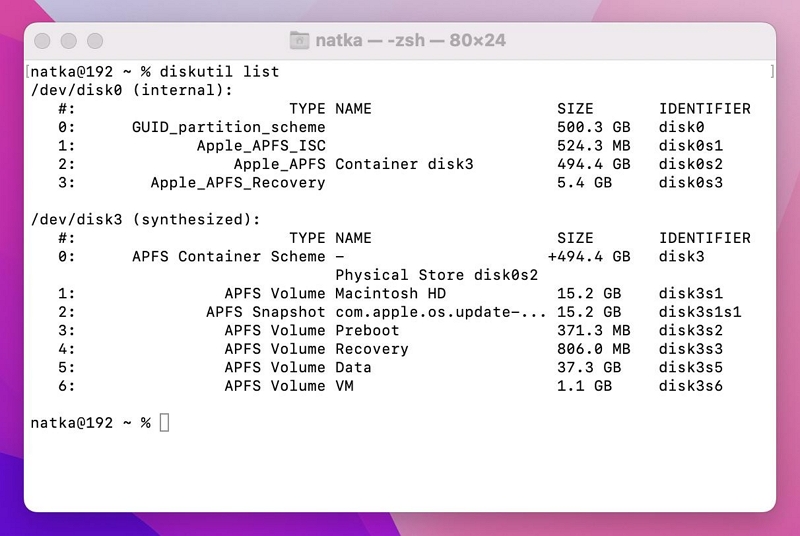
Step 2: Go > Utilities > Terminal > Input the command: diskutil list > Click Return. Here you can see how much memory other volumes take up on disk. For example, in the following picture, the volume VM occupies 1.1 GB.
Can We Delete Other Volume in Container?
Although we know what other volumes in the container are, it doesn't mean that we can easily get rid of other volumes in the container. In fact, we cannot completely delete other volumes in container on Mac because it is important for the system to run. However, there are still some ways to stop other volumes from expanding or reducing the space that other volumes currently use.
 Tips:
Tips:
- Except for other volumes in container that need to be cleaned up, you can also clear other storage on Mac to free up more space.
2. How to Remove Other Volumes in Container in Storage
There are 7 fixes shared by Mac users who have successfully regained storage space from other volumes in container. Hopefully one of them may work on your case.
Method 1. Using a Mac Cleaner
To free your storage from other volumes, the easiest and the most effective method is using a professional Mac cleaner, as the manual ways usually require you to have related knowledge to prevent mistaken deletion.
Here we’ll introduce the Mac cleaning expert - Macube Cleaner. It is a great assistant when you are facing a "your startup disk is almost full" warning while other volumes in the container are eating up your space, as it can safely and quickly remove them from the Mac storage. In addition, the best thing is, that Macube offers a free version that you can enjoy full functions for up to 7 days, so you can make use of it to clean the “other volumes.”
One of the powerful features of Macube Cleaner is Smart Scan. It can quickly locate the junk files that are hard to find directly on your Mac, including system caches, application caches, log files, and help you clean them up in one click to efficiently free up your Mac space.
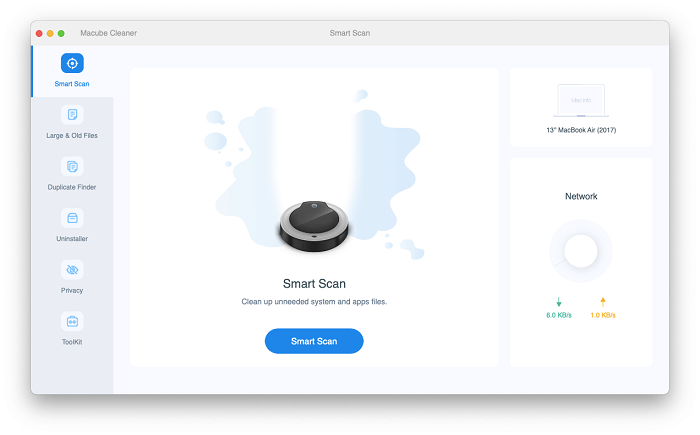
Step 1. Download and launch Macube Cleaner.
Step 2. Choose Smart Scan in the left column. Hit Smart Scan to let the tool find all the junk files on your Mac.
Step 3. Select the files you want to delete. Before removal, you can preview the files listed and locate them by clicking the magnifying glass icon to do a double-check. When you confirm, click Clean to start cleaning.
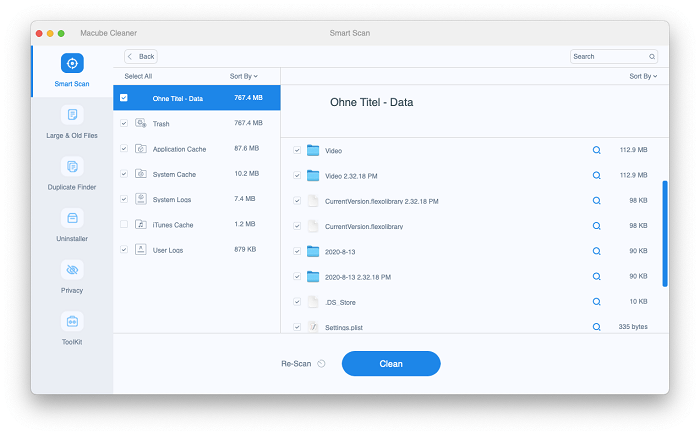
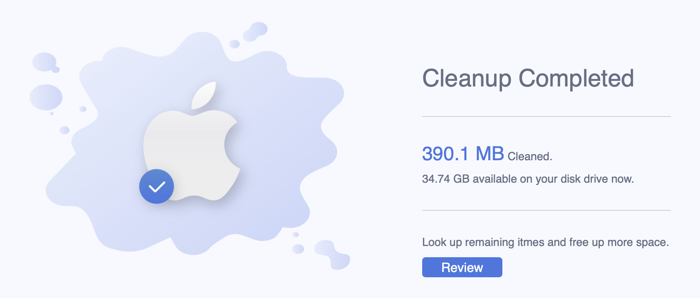
Step 4. The cleanup will be completed within seconds.
Tips:
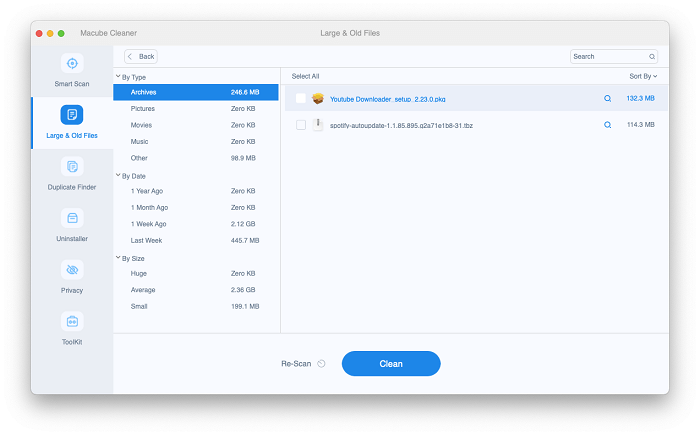
- Besides Smart Scan, Macube Cleaner offers more practical features to free up space on your Mac. For example, the Large & Old Files feature. It scans out the large or old files on your Mac and allows you to sort them by size or date, which can help you better decide what to delete and free up your Mac space ASAP.
Macube Cleaner is easy to use and meanwhile effective. So, it can be the first choice when you come across the problem “your disk is almost full”. Just download, register, and use the software, without paying a dime or spending too much time, you can slim down the disk space immediately. Isn’t it worth a try?
We also provide you with other manual solutions for you to choose from. Please follow the guide and do not skip every step. Otherwise, it may cause the system to crash.
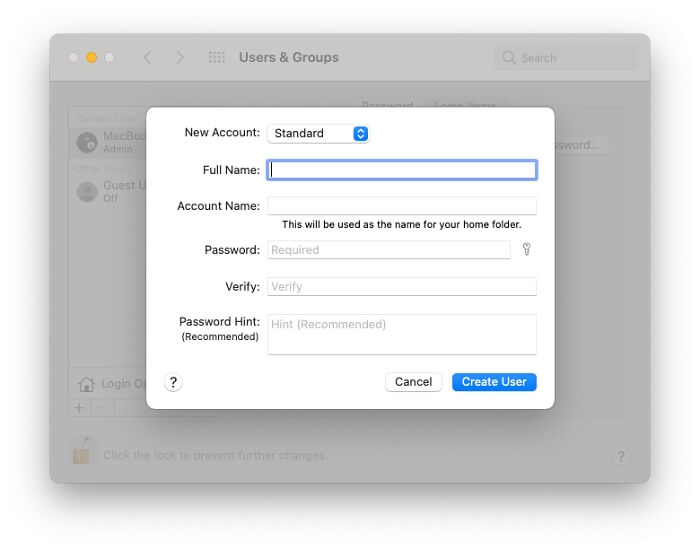
Method 2. Create a New User Account
Create a new user account and then use the new account to sign in to your Mac. By signing in with the new account, other volumes in container in storage are reduced.
How to create a new user account?
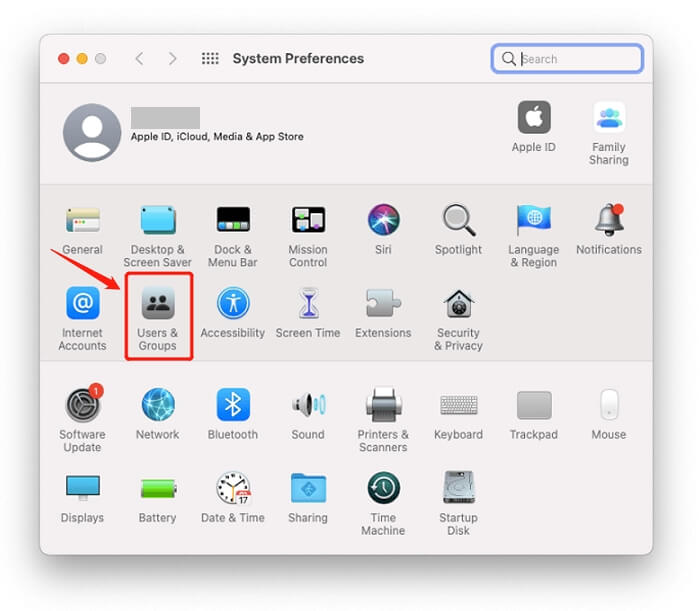
1. Go to Apple Menu > System Preferences > Users & Groups.
2. Click on the lock icon and enter the passcode of the Mac when prompted.
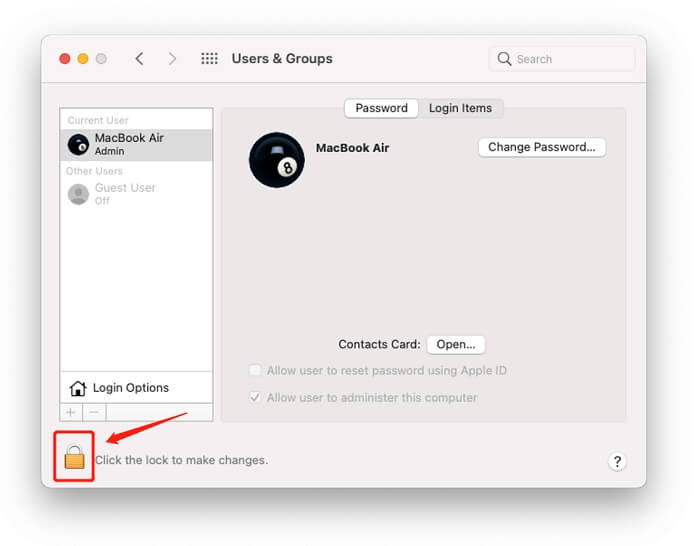
3. Click the Add [+] button under Login Options to add a new admin account.
Then log into your Mac with a new account and check if other volumes are taking up lots of space.
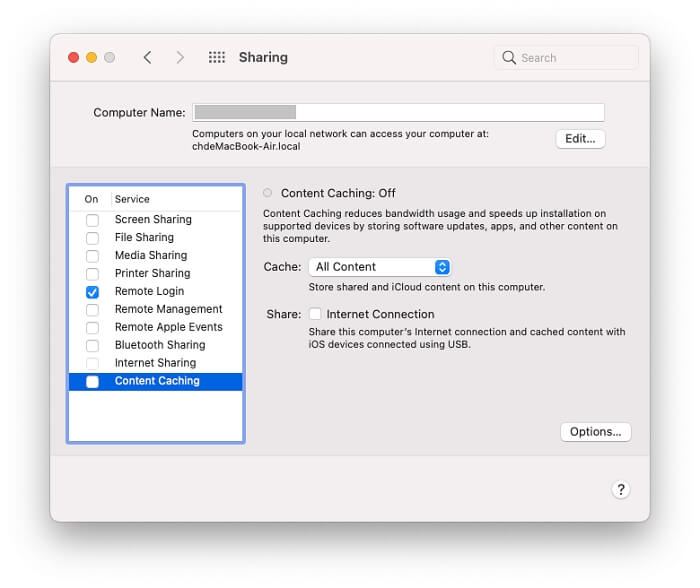
Method 3. Turn off Content Caching for "Cache iCloud Content"
iCloud content caching is a new feature in macOS High Sierra to speed up software updates on Macs and more. If you have turned it on, you can uncheck content caching to reduce the size of other volumes in the container.
1. Go to Apple Menu > System Preferences > Sharing > Content Caching.
2. Uncheck Content Caching or turn off Cache iCloud content totally.
Method 4. Uninstall Suspicious Third-Party Apps
We may unconsciously download third-party apps on the internet by entering a malign web page or clicking the wrong button. These apps take up a certain part of Mac storage and lead to the problem “your disk is almost full”.
You can go to Application > Utilities > Activity Monitor and check on the Memory tab. If there is any process that is using an extraordinarily huge space of your Mac storage, the app that is running the process could be the culprit.
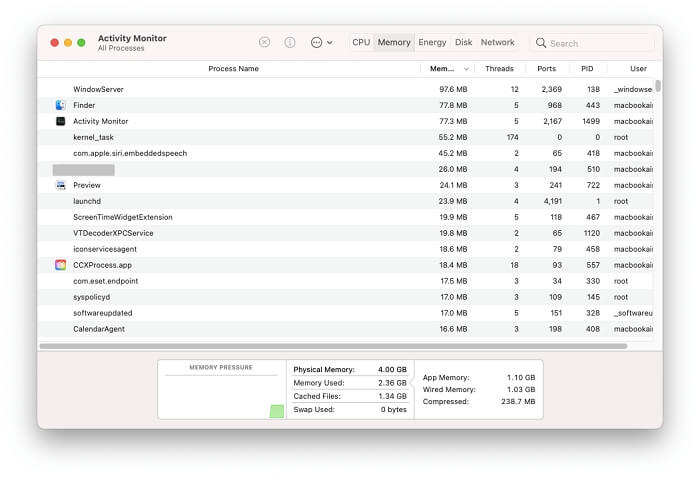
So, kill the process and then check if other volumes in container are still taking up lots of space. If other volumes give back your space, then go on and completely uninstall the app.
By completely uninstalling an app, it doesn't mean simply dragging the app to Trash. You need to delete the app as well as its data.
Method 5 Remove Extra APFS Volume
If you have read the methods above and still don’t know what to do, it is recommended to have a clear picture of what volumes your drive consists of first. We can run this Terminal command: diskutil list.
After the window pops up, check if there is more than one Macintosh HD - Data volume. If there is an extra Macintosh HD volume, it is very likely that the extra one has been eating out your space.
To delete this volume, follow the instructions below.
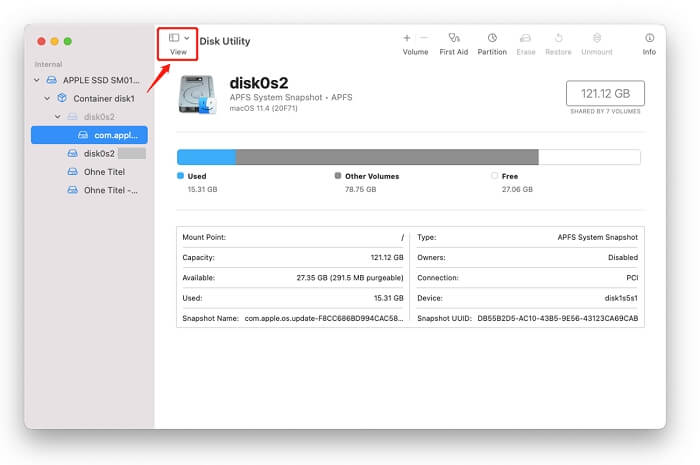
1. Open Applications > Utilities > Disk Utility on Mac.
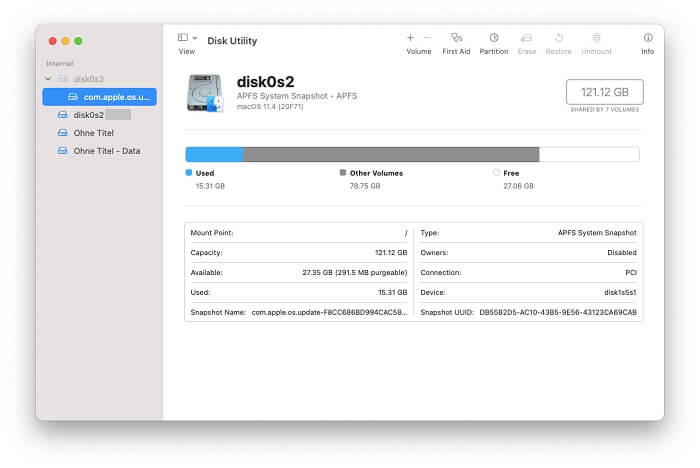
2. Click “View” at the top left menu and select “Show All Devices”.
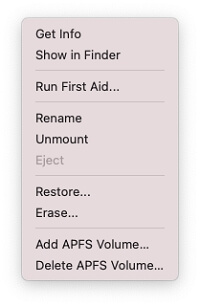
3. Select the APFS Volume you want to remove, right-click and choose “Delete APFS Volume”.
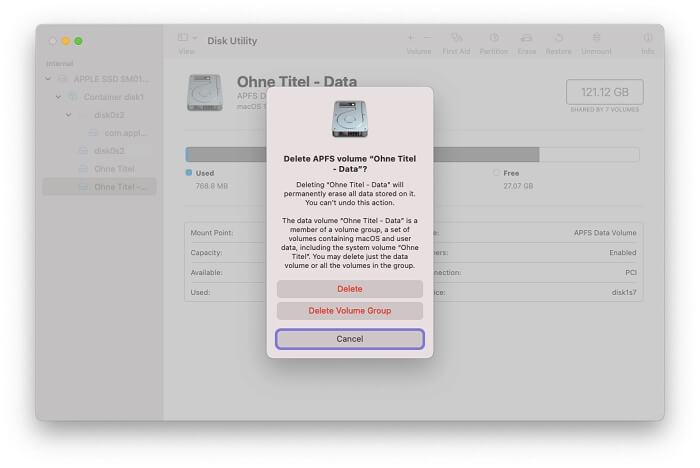
4. Hit “Delete” to confirm. If the delete button is gray, the selected volume is in use, which means you cannot delete it. To delete the volume, you need to go to Disk Utility in macOS Recovery.
Start the Recovery function from macOS:
1.For Intel-based Macs: To enter Disk Utility on Intel-based Macs, hold down the Command-R keys during startup > Release the keys when you see the Apple logo/rotating globe/other startup screen > Open the Utility > Select Disk Utility.
2. For Macs with Apple silicon: hold the power button while turning on the Mac. As soon as the startup options window appears, release the button. From there, open Disk Utility and follow the same steps mentioned above to delete any additional Disk Utility volumes.
Note:
- Remember to back up your data to avoid losing any important files.
Method 6. Erase Disk & Reinstall MacOS
There is also a way to solve this problem, or virtually every problem on Mac -erasing the disk and reinstalling macOS. This method will erase all the files on your disk, so remember to back up your data beforehand.
Follow the steps below to erase your disk on Mac:
- Press and hold Command + R on Mac's startup to enter Recovery mode.
- Select Disk Utility > Continue from the Utilities window.
- Select Macintosh HD and click Erase.
- Use Macintosh HD as the name.
- Choose APFS/Mac OS Extended (Journaled) > Erase.
- Clear all the volumes that may be left in the sidebar except the Macintosh HD volume you just erased.
- Quit Disk Utility.
You will see the Utilities window once again. Click Reinstall macOS. When it’s done, the other volumes should be gone.
Method 7. Hardware Solutions
If none of the above methods works, the problem may exist in the hardware. Some users found other volumes in container stopped growing together with the changes of the following two hardware.
- Replace the old battery. This does the trick for those MacBooks with really old batteries.
- Unplug USB drives. A user found that without USB drivers connected to Mac, other volumes of storage stopped increasing. It is worth a shot.
3. Conclusion
To sum up, here we explain the meaning of other volumes in container on Mac, and then introduce 7 ways to free up Mac storage space, which would go a long way towards solving the problem “your disk is almost full”.
Among these methods, using a Mac cleaner is the easiest and the most effective one. Unlike the other 6 methods which only focus on one particular aspect, a professional Mac cleaner like Macube Cleaner offers various solutions based on the needs of all users.
FAQs:
Q1: Why Is My Mac Storage Full of Other Volumes?
Some users report in Reddit that there are several tens or even hundreds of GB of storage taken by other volumes on their Macs. Why does this happen? There are several possible reasons.
- The macOS is wiped or reinstalled incorrectly, leaving the old data volume behind.
- Some system data like cache and temporary files aren't deleted by macOS.
- Snapshots of Time Machine are stored locally when the backup drive is not connected to Mac.
- Large or suspicious apps are installed on your Mac.
Q2: What are the potential risks of deleting Other Volumes in Container on Mac?
"Other Volumes in Container" on Mac is a hidden storage space that contains various system files and data related to macOS and its applications. Deleting "Other Volumes in Container" can have potential risks and consequences:
- System Instability: Deleting "Other Volumes in Container" can cause system instability, crashes, and application malfunctions.
- Data Loss: Deleting "Other Volumes in Container" may result in the loss of important data used by macOS and its applications, leading to missing files, corrupted preferences, or incomplete installations.
- Inability to Update macOS: Deleting "Other Volumes in Container" can interfere with macOS updates, preventing the installation of security patches and new features.
- Application Compatibility Issues: Deleting "Other Volumes in Container" may cause compatibility issues with certain applications, making them unusable or unstable.
Therefore, it is generally not recommended to delete “Other Volumes in Container” unless you have a specific technical reason and understand the potential risks and consequences. If you are experiencing storage space issues, consider alternative methods like optimizing storage, removing unnecessary files, or using third-party software.
Macube Cleaner
Speed up and troubleshoot your Mac super easily with a Macube full-featured free trial!
Start Free Trial